How to add LUTs in Final Cut Pro: a step-by-step guide
Learn how to add LUTs in Final Cut Pro, from importing .CUBE files to adjusting intensity and combining with colour correction for better video grading results.
Envato: Get every type of asset for any type of project, and access to AI tools. Start now
Learn how to turn an idea into a finished video using Envato’s AI-powered tools. From concept visuals to sound and editing, this workflow simplifies every stage of AI video creation.
TL;DR: Use Envato’s AI video workflow to go from concept to publish: GraphicsGen/ImageGen for look development → VideoGen for motion → VoiceGen/MusicGen/SoundGen for audio → Envato templates for finishing.
Video creation has many moving parts. An AI video workflow brings them together early, so you can test style, motion, and sound before a single edit. In this guide, we’ll use Envato’s tools to move from idea to a finished video with fewer apps and less friction.
This is where many projects lose momentum. An idea on its own can feel solid, but without anything visual to test against, it’s difficult to move forward with confidence.
A solid AI video workflow helps to close that gap. By using AI video tools early, creators can explore styles, generate visuals, build footage, and shape sound design before committing to a final edit. In this article, we’ll walk through an end-to-end AI video workflow using Envato’s AI tools, showing how to move from idea to a finished video with fewer friction points along the way.
An AI video workflow is a step-by-step process that utilizes AI tools to plan, generate, and complete videos, encompassing visuals, motion, voice, music, and editing, enabling creatives to move from concept videos to publication faster with fewer apps.
Why Envato is different: Most “AI video workflow” guides stitch together 4–7 tools. Envato unifies ImageGen, VideoGen, VoiceGen/MusicGen/SoundGen → Envato templates with a single license and asset history, ensuring ideas travel intact from prompt to publication.
| Workflow | Tools needed | Visuals | Video | Voice/Music/SFX | Templates/Branding | Licensing | Hand-off |
|---|---|---|---|---|---|---|---|
| Envato (end-to-end) | One ecosystem | ImageGen; GraphicsGen | VideoGen | VoiceGen; MusicGen; SoundGen | Envato templates | Single, simple commercial license | Assets persist across tools |
| Piecemeal stack | 4–7 apps | Separate AI image app | Separate video app | Third-party audio tools | Separate marketplaces | Mixed/unclear | Manual re-exports, re-prompts |
Envato’s AI tools are designed to be used across the whole video process. ImageGen is often used first to explore visual direction or rough scene ideas. VideoGen, powered by the latest AI models and get specific shots with VideoGen presets, can then transform those images into moving footage, while VoiceGen and MusicGen are used later to add narration and sound. Working this way makes it easier to carry ideas forward instead of recreating assets at each step.
The workflow in this article follows a clear sequence, with each stage building on the last:
The concept stage is where ideas are still flexible and open to change. Nothing is set in stone yet, which makes it the perfect moment to explore tone, style, and direction without worrying about polish.

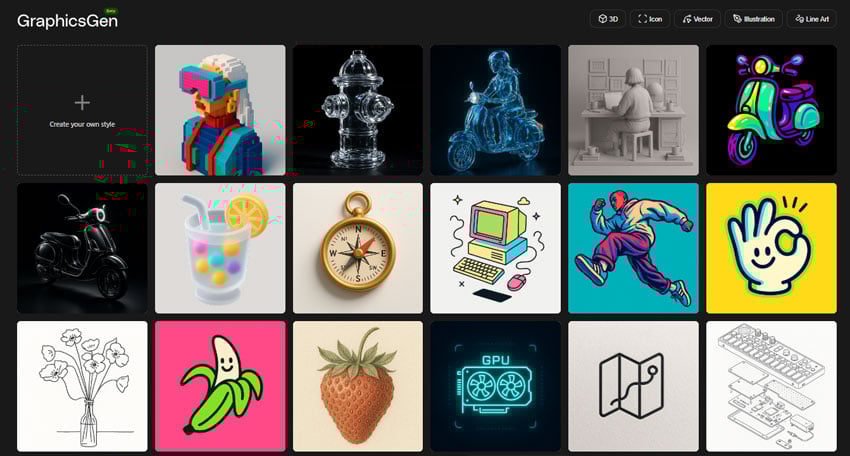
At the idea stage, the aim is often to get a sense of style rather than finished artwork. GraphicsGen fits naturally here by allowing graphic elements such as icons and illustrations to be generated quickly in various visual directions, with the option to choose from a comprehensive list of pre-made styles. Experiment with different illustrations or graphic treatments to establish tone and act as a reference point before any scenes or motion are created.
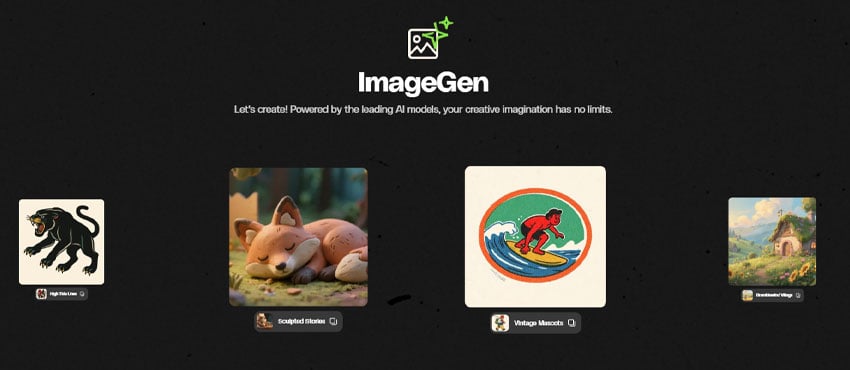
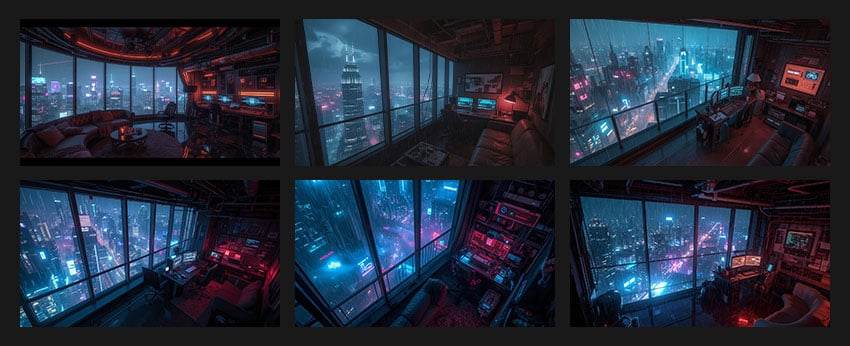
ImageGen is used when the focus shifts from abstract ideas to fuller visual scenes. The Styles feature enables the exploration of various looks, environments, or subjects through generated images, making it easier to test lighting, composition, and overall mood. These images don’t need to be final assets. It’s rarely a single image that clicks straight away. Generating a few variations can help reveal what actually works.
Clear prompts at the concept stage lead to more useful outputs from both GraphicsGen and ImageGen. When it comes to prompting, you can use this simple structure to get started:
[subject] + [action] + [setting] + [lighting] + [mood/genre] + [sound/music]
In this example, we’ve left out the sound/music as we will add it later on using MusicGen or VoiceGen. However, VideoGen can also generate sound if you include it in the prompt. Here’s an example of how it looks when you put it all together:
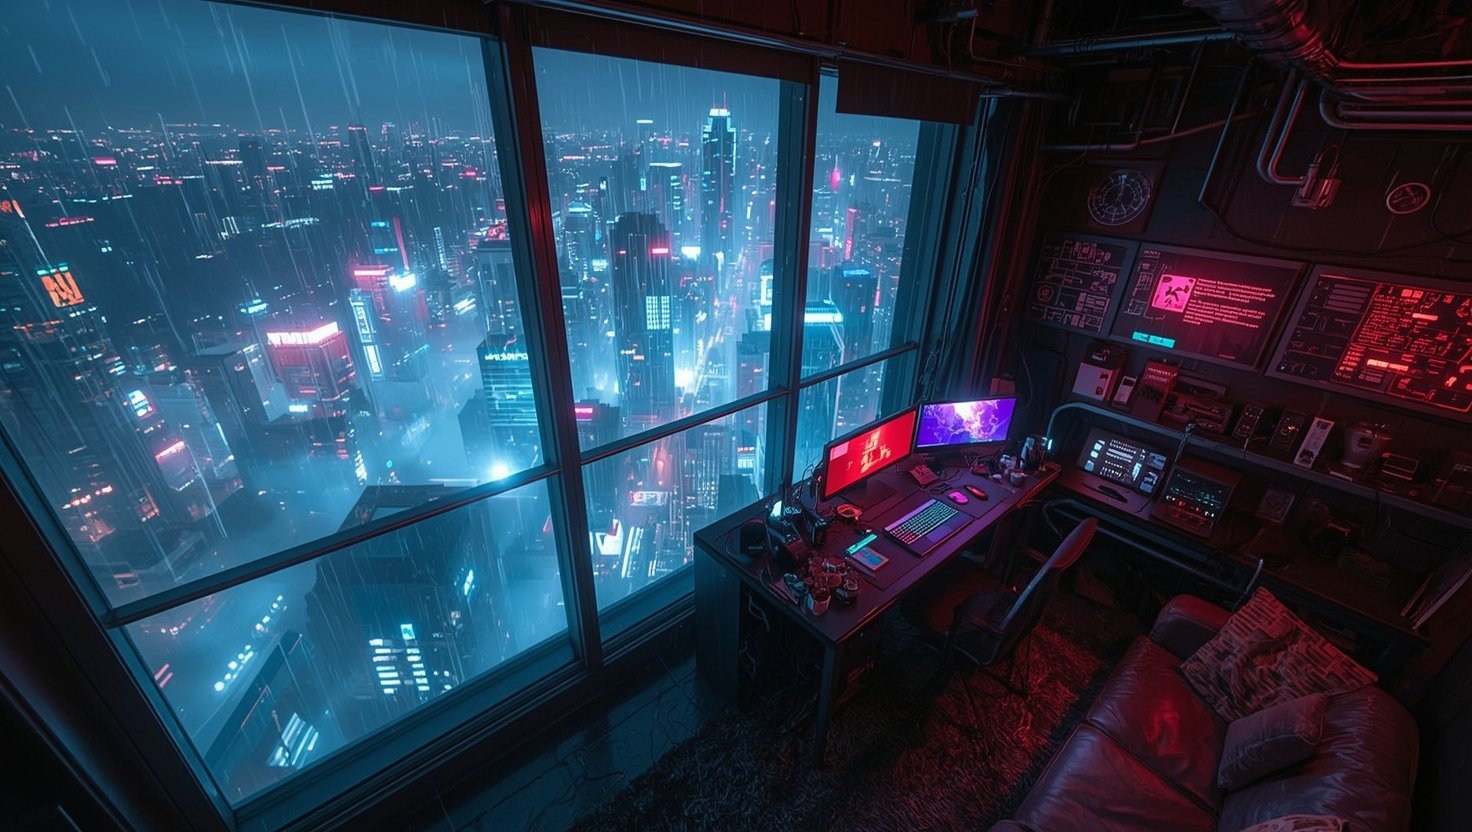
A compact cyberpunk workstation filled with glowing monitors and cables, overlooking a sprawling futuristic city through large windows as rain falls outside, inside a high-rise apartment above neon-lit streets and skyscrapers, illuminated by cool blue city glow mixed with warm red and magenta screen light, moody cinematic cyberpunk atmosphere.
This will usually give you decent results. But if you’re looking for a more in-depth guide to creating prompts for AI artwork, check out the complete guide to AI video prompts for some inspiration.
Before turning still images into motion, it’s worth taking the time to prepare the visuals. Small refinements at this stage help clarify focus, reduce inconsistencies, and make sure the images are ready to hold up once movement and animation are introduced. This step acts as a bridge between concept exploration and video generation. You can generate multiple images at this stage to help narrow down the look you want.
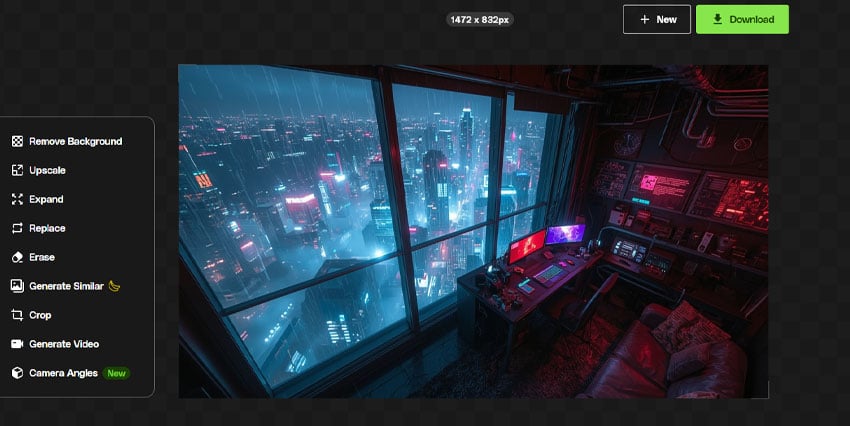
Once a visual direction is established, ImageEdit is useful for refining individual images before incorporating them into a video. This stage involves making focused adjustments rather than large-scale changes. Removing distractions, correcting small inconsistencies, or subtly adjusting color, balance, or camera angle can help images feel more deliberate and easier to animate later. These refinements often take an image from “good enough for planning” to something stable enough to act as a video input.
For a deeper look into ImageEdit, check out our guide to Introducing ImageEdit—AI-powered photo editing now available with Envato.
Nano Banana adds another layer of control when images need more targeted changes. It’s often used for refining specific areas of an image or restyling elements without regenerating the entire frame. For example:
Clear the view outside the window, increasing detail and sharpness in the cityscape. Remove the curtains along the top edge of the window near the ceiling so the glass is fully visible.

This can be helpful when a composition works overall, but certain details need adjusting to better fit the intended look. Used together, ImageEdit and Nano Banana make it easier to prepare visuals that feel consistent and intentional before introducing motion.
For a deeper look into how Nano Banana works inside ImageGen, check out our guide on How to use Nano Banana Pro in ImageGen and ImageEdit.
Once the visuals are ready, it’s time to move on to movement! We’ll use VideoGen to turn our image into a short video (by using it as a starting frame). Describe as much movement as you can. Timing, motion, and overall energy start to take shape here, long before anything reaches a final edit. Here’s a sample prompt we used to turn our static image into a short video:
No camera movement. An atmospheric cyberpunk high-rise room at night overlooking a neon-soaked futuristic city in heavy rain. Outside, animated rain streaks down the glass. Inside the room, computer monitors display looping holographic graphics that glitch subtly. RGB lights reflect softly on the desk and cables. Cinematic lighting, moody ambience, shallow depth of field.
VideoGen Presets provide boundaries for the generation process. Instead of leaving camera movement and framing entirely open-ended, a preset sets a loose direction for how the shot should behave.
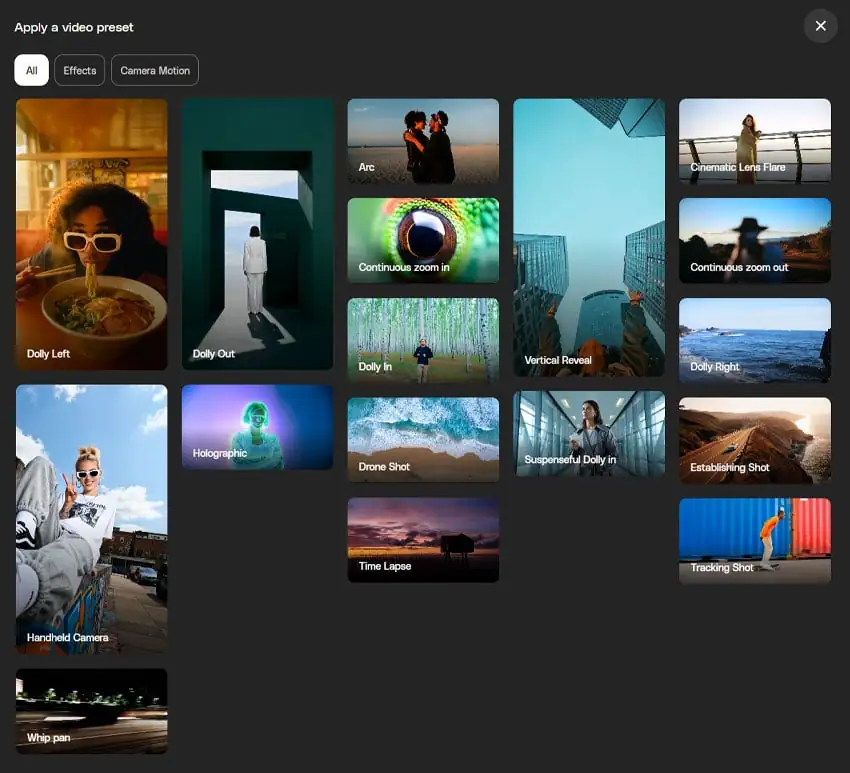
That guidance helps shape the result early on, while still leaving room for the prompt to influence the subject and mood. Here’s a list of the different presets you can use. Learn how to use them in our VideoGen Presets guide.
| Preset | What it does | When to use it |
|---|---|---|
| Dolly Left/Right | The camera moves sideways across the scene | Useful when a shot feels static but you want movement without changing distance. Works best in layered spaces with foreground and background elements. |
| Dolly Out | The camera pulls away from the subject | Often used to close a moment or reveal more context. The movement naturally slows the pace and gives the scene room to breathe. |
| Suspenseful Dolly | Slow, controlled camera movement | Suits darker or quieter scenes where atmosphere matters more than action. The motion is subtle and builds tension over time. |
| Tracking Shot | The camera follows a moving subject | Works well when movement is the focus, such as following a person or object through an environment. Feels grounded and continuous. |
| Arc | The camera curves around the subject | Helps show form, scale, or detail without cutting away. Adds visual interest while keeping attention on a single focal point. |
| Continuous Zoom Out | The frame gradually widens | Best used at the start of a sequence to clearly show the location before moving closer or cutting in. |
| Establishing Shot | A wide, steady view of the environment | Well-suited to landscapes or large environments where scale and space are important. Feels smooth and expansive. |
| Vertical Reveal | The scene is revealed vertically | Designed for mobile-first formats. Works best when height or vertical space is part of the composition. |
| Continuous Zoom In | The camera slowly tightens toward the subject | Helps guide attention or add emphasis in a controlled way without sudden framing changes. |
| Dolly In | The camera physically moves closer | Creates a strong sense of presence. Often used for emotional moments or points of emphasis. |
| Drone Shot | Simulated aerial movement | Well suited to landscapes or large environments where scale and space are important. Feels smooth and expansive. |
| Handheld Camera | Subtle, natural camera movement | Reduces a polished look and adds realism. Works well for observational or grounded scenes. |
| Timelapse | Time is compressed into a short clip | Best for showing change or progression rather than detail. Useful when transformation over time is the focus. |
A good video prompt is less about detail and more about intent. It gives VideoGen a clear sense of what should be on-screen, how the scene should move, and the kind of atmosphere it should convey. Prompts that are too loose can feel unfocused, while overly specific ones may limit motion or variation.
For example, you can start by describing the scene, then add motion cues and camera behaviour, and finish with tone or mood.
If you’re unsure how to phrase something, VideoGen also includes an option next to the Generate button that can expand or refine your prompt automatically, helping clarify intent before the clip is created. Here’s a quick comparison that highlights the impact of these additions:
Before
Neon cyberpunk interior at night.
After
Neon-lit cyberpunk interior, slow camera push-in, subtle screen flicker and rain outside the windows, quiet and atmospheric tone.
Small changes like these often lead to clips that feel more coherent and easier to work with once they reach the edit.
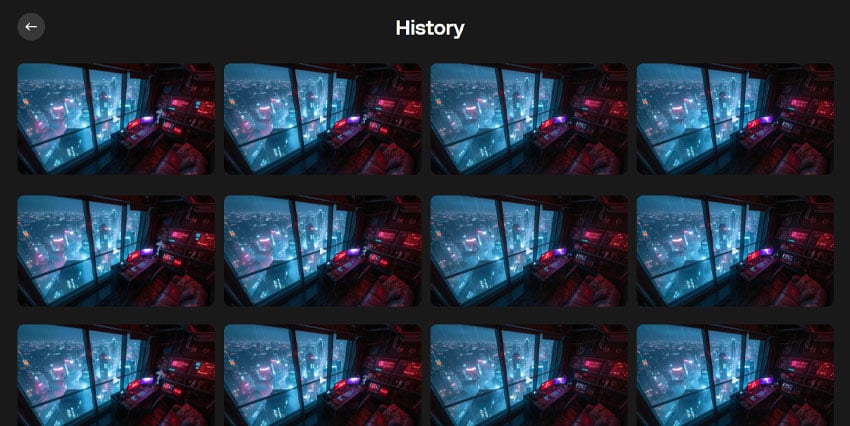
Relying on a single generated clip can be limiting once you reach the edit. Creating a small batch of variations gives more room to work with, especially when pacing or transitions start to take shape. Differences in timing, motion, or framing often become useful later, even if they feel minor at first.
Keeping multiple versions also makes the editing stage more flexible (Envato makes this easy by saving each generation in your own history). Some clips may work better as openers, while others may be more suitable as transitions or background moments. Saving these clips together makes it easier to experiment on the timeline without needing to return to generation every time a change is needed.
Audio often determines how a video is received. Even simple visuals can feel more complete once voice and music are in place. At this stage, AI audio tools are used to support what’s already on screen, not distract from it.
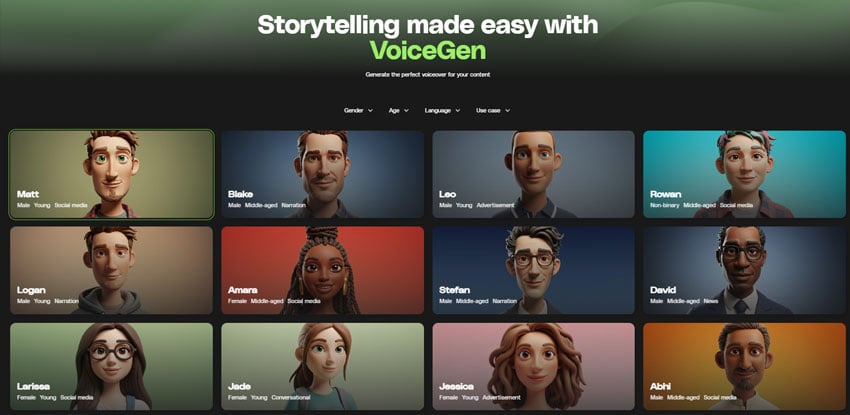
Voiceover is added later in the process. It’s one of the final layers that helps the video feel complete.
With VoiceGen, you can choose from a variety of different-sounding voices:
For a more detailed guide on how to use VoiceGen and all of its features for your projects, check out our guide on Discover VoiceGen: How to use an AI voiceover for video marketing.
MusicGen generates original music that supports the mood and rhythm of a video. Rather than searching through large libraries, creators can explore different musical directions quickly by focusing on feel and intensity. When choosing a prompt for your music, it helps to match intensity to the video type:
If you want to learn more about how to use MusicGen, its features, and how it works, check out our guide, Meet MusicGen, our AI-powered tool that turns your vision into original tracks instantly.
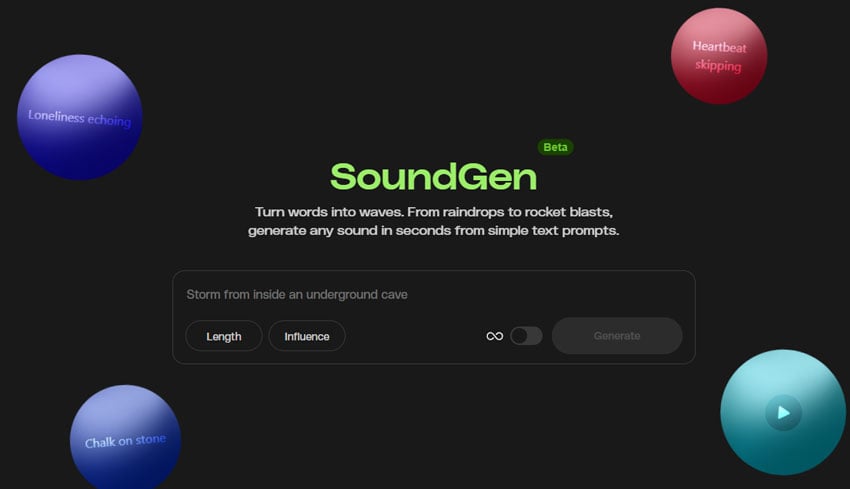
SoundGen creates sound effects from short text descriptions. The generated sounds can be used within a video project alongside music and voice, covering elements such as ambience, movement, or transitions.
In practice, generated sound effects are treated like any other audio asset in the edit. They sit underneath visuals, support motion, or add subtle detail, and are usually kept secondary to voice and music. Used carefully, SoundGen helps fill gaps and add texture without drawing attention away from the video’s main elements.
For more info about SoundGen, check out our guide on What is Envato SoundGen? Complete guide to AI sound effect generation.
This is the point where all of the pieces come together in your editing software, whether that’s Premiere Pro, Final Cut, CapCut, or something similar. VideoGen clips are usually added to the timeline first, followed by the sound and any other assets. This makes it easier to get a sense of the overall project as it comes together.

With the clips laid out on the timeline, the sequence becomes easier to evaluate. Playing it through highlights where moments feel too long, too short, or unnecessary. AI clips can often “settle” in the first moments. Shave off the first few frames until the motion feels clean and more natural.

At this stage, templates and graphic elements from Envato can be brought into the edit to give the video a clearer identity. In this example, we’re using a logo reveal template and a complementary font:
Using templates in this way helps anchor the video’s style without requiring the creation of custom motion graphics from scratch.

At the final stage, attention shifts to small visual refinements. Colour LUTs, overlays, or textures from Envato can be applied to bring shots closer together and give the footage a more unified look. These changes are subtle, but they all help bring everything together, giving a more professional look.

Once the edit is finished, the video can be exported in different formats. Envato templates can help with elements such as fonts, graphics, and branding, ensuring the visuals remain consistent across multiple platforms. Vertical versions are commonly used for platforms like TikTok, Reels, and Shorts, while wider formats are better suited for YouTube and other similar platforms. Aspect ratio and length are usually adjusted at this point.
No. VideoGen operates in the browser, generating clips from written prompts. Basic editing skills are not required to create footage, but they can be useful when clips are combined, arranged, or extended into a larger project.
VideoGen presets can be used in numerous different ways. Here are some examples of how you can use a combination of them for different styles of projects:
Ads: Use Vertical Reveal, Continuous Zoom In, or Arc. These presets guide attention quickly and work well in short runtimes where impact matters. Vertical Reveal is particularly well-suited for mobile-first ads.
Tutorials: Use Tracking Shot, Continuous Zoom In, or Handheld Camera. These keep the focus clear and grounded, helping viewers follow movement, steps, or objects without distraction.
Product videos: Use Arc, Dolly Left, or Continuous Zoom In. These presets showcase form, detail, and scale without cutting away, which works well when clarity and presentation are the top priorities.
Story scenes: Use Dolly In, Dolly Out, Suspenseful Dolly, or Establishing Shot. These presets support mood, pacing, and emotional beats, making them well-suited for narrative or atmospheric content.
Consistency usually comes from visual preparation and repetition. Using similar prompts, lighting descriptions, colour palettes, and presets helps clips feel connected once they’re placed together in the edit. Envato LUTs can also be applied to bring colour and contrast into closer alignment, helping different clips sit together more naturally.
That’s completely fine. AI-generated audio is optional. You can replace it with a recorded voiceover, licensed music, or sound effects during the editing stage.
Yes. AI-generated clips and filmed footage can be placed together in the same edit. They are often used together within a single timeline. In practice, they’re often used to support live video rather than replace it, filling gaps with atmosphere, transitions, or providing support for visuals where needed.
VideoGen clips are created as short segments, typically around 5 seconds long. They are intended to be trimmed, arranged, and combined as part of an edit rather than used as extended standalone shots. For situations where a scene needs to run longer, VideoGen Extend can extend an existing clip, adding more time while maintaining the same scene and visual continuity.
Assets generated and downloaded through Envato are covered by Envato’s license, which allows commercial use when used in line with the terms of the subscription.
Small issues are typically addressed during the editing process. Trimming clips, adjusting colour, adding overlays, or refining visuals before video generation often improves the final output without regenerating everything.
Learn how to add LUTs in Final Cut Pro, from importing .CUBE files to adjusting intensity and combining with colour correction for better video grading results.

Learn how to use LUTs with RAW footage for accurate colour grading. A step-by-step guide to applying LUTs, preserving dynamic range, and achieving cinematic video results.

Every month, we're rounding up our favourite TikTok trends: the sounds, hooks, and concepts that are going viral right now. We'll break down the formats, show you examples, and give you practical ways to adapt them to your niche.

Explore movie typography trends shaping 2026, from bold film fonts to cinematic branding, with inspiring examples and practical tips for creating impactful, screen-ready typography.