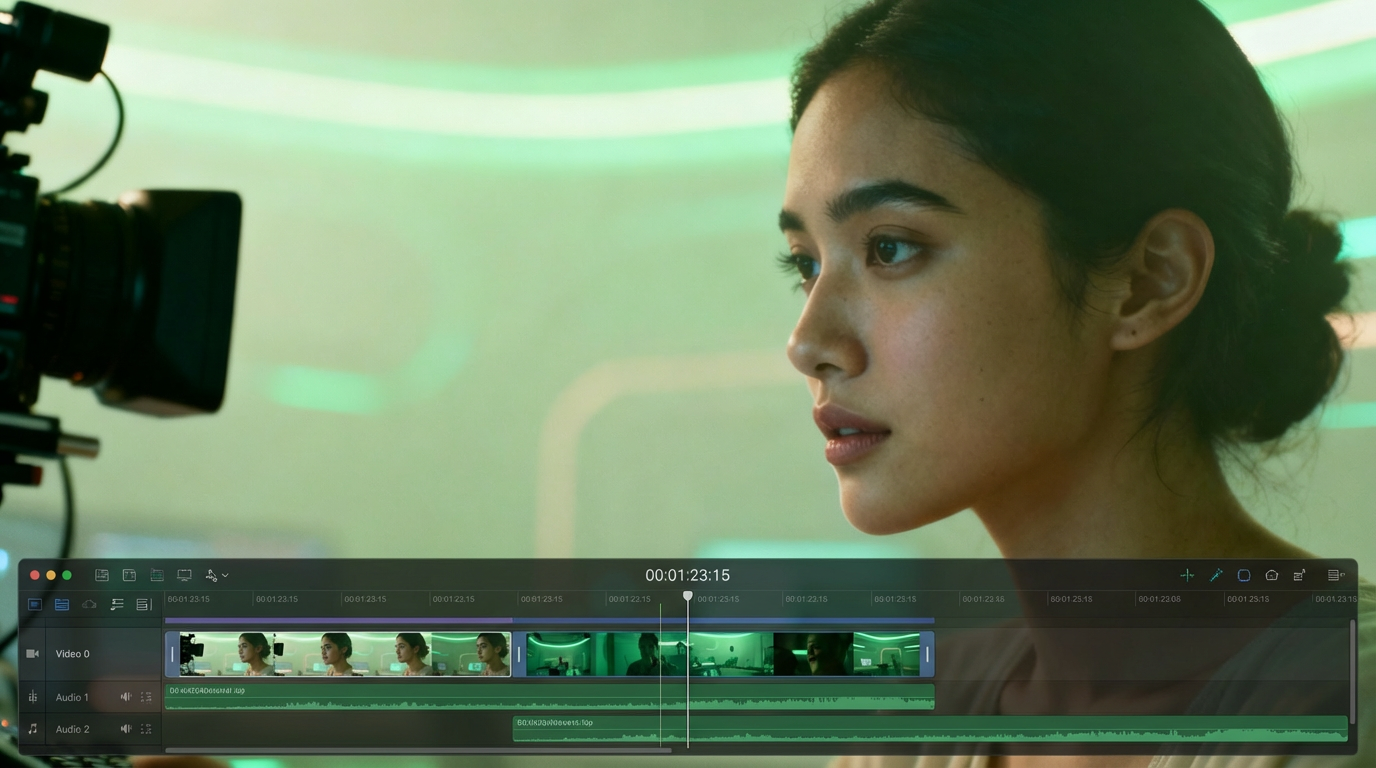
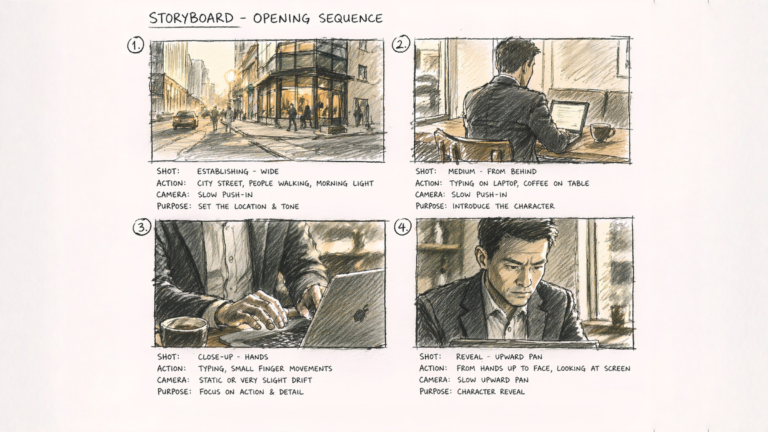
How to combine video clips with AI: A step‑by‑step guide for beginners

A quick guide on how to combine video clips with AI tools and polish your final edit easily.

Jonathan Lam 7min read 13 Feb 2026
how to combine video

Merging a bunch of video clips used to be a slow process. You’d line them up by hand, trim each one, and hope they flowed together. Now, AI video tools can handle a lot of that work for you, taking separate clips and turning them into a smooth sequence very quickly.

If you’re wondering how to combine video clips without spending hours on a manual timeline, AI tools can now handle most of the heavy lifting for you. We’ll run through merging clips with Descript and Vidio.ai, then move into Premiere Pro or DaVinci Resolve to refine everything.

Along the way, we’ll point out where AI can speed things up, when it’s worth going manual, and a couple of ways to dodge those export issues that can wreck a final render.

Why use AI to combine video clips

If you’ve ever tried to combine video clips together manually, you’ll know it’s not the quickest job. You drag them in, shuffle things around, trim a bit here and there… then notice something’s still slightly out of sync. It’s the sort of task that eats time without you realizing.

AI tools significantly alleviate that pain. They can arrange the clips in the correct order, close any gaps, and even smooth the joins for you. You hit a button, grab a drink, and most of the grunt work is done.

The big gain? Time. You can transform a messy folder of files into something watchable in minutes. That means you get to play with different orders, test new flows, and still have energy left for the fun stuff like pacing, color, and sound.

Choosing the right AI tool to combine video clips

Every AI video editor has its own quirks. Some are lightning fast but bare-bones. Others let you fiddle with every join and transition. It’s not really about which is “best”, it’s about which one fits the way you work.

For example, Descript is great if you’ve got a lot of talking in your clips. You can move scenes around by using AI video editing to manipulate the text transcript, rather than searching through a timeline. On the flip side, Vidio.ai keeps things simple. You can join video clips online by simply uploading, arranging, merging, and exporting them. Done!

FeatureDescriptVidio.ai
Best forDialogue-heavy content, interviews, tutorialsQuick edits, simple merges, social clips
Main workflowRearrange clips by editing the text transcriptUpload clips, drag into order, export
SpeedModerate (depends on transcription)Very fast
Control over editsHigh: Fine-tune timing, cuts, and audioLow: Mostly clip order and transitions
Export quality optionsMultiple formats, good for post-productionLimited formats, geared for quick delivery
Runs onCloud basedCloud based

How to combine clips in Descript

Descript is a strong option if you’re learning how to combine video clips that include dialogue or interviews.
Here’s the flow most people use:

Step 1: Create a new project

First, navigate to the Descript website and log in. Then click on New Project > Video Project.

Create a new project in Descript

Step 2: Import your clips

Drag all video files into the project (or Upload file). Then wait for uploads to finish.

Import video clips in Descript

Step 3: Transcribe

When prompted, start transcription for each clip (this should happen automatically if speech is detected). Let Descript generate the script so you can edit it by text.

Transcribing each clip in Descript

Step 4: Check the text

You should see your text next to the video. Just go through it and check if it is correct, and make any changes if needed. 

Checking the text

Step 5: Upload more clips

Upload more clips by clicking and dragging them into the timeline. Or click the Add New Scene button. From there, you can start editing your clips by cutting them or re-ordering them on the timeline.

Uploading clips in Descript

Step 6: Add transitions

Place the cursor in between each scene, and a new Edit Transition button appears. Click on it and choose the transition you want to use.

Transitions in Descript

Step 7: Export a single master file

Select File > Export > Video, and then you can have a look at the following options before hitting the Export button. 

Note: If you want to remove the watermark, you may need to upgrade from the free version of Descript.

How to combine clips in Vidio.ai

Vidio.ai is ideal if you want to combine video clips online with minimal setup. Everything is done on the website, so you can join video clips online. Here’s a basic workflow to follow:

Step 1: Log in and select the Tool

Go to Vidio.ai and sign in. From the menu on the left, select Tool > Editing and Summarization > OneEditor > Create a New Project, which will then allow you to start editing.

Log in to Vidio.ai

Step 2: Choose a template

You’ll automatically be assigned a template to work with. If you want to use something else, look to the left menu and select the template you would like to use.

Vidio.ai templates

Step 3: Upload your videos

Select “Load” and click the “Upload” button to upload the video clips you would like to use for the project. You can upload your music tracks here as well.

Uploading videos to Vidio.ai

Step 4: Add clips to the timeline

Now simply click your uploaded video, and click on the Add to Timeline button.

Step 5: Edit your clip and add transitions

From there you can start editing your clips by cutting them or re-ordering them on the timeline. To add a transition, just click on your clip and choose the transition you want to use from the menu on the left.

Editing videos with Vidio.ai

Step 6: Save and export your video

Once you’re done, save your project and simply hit the Export button. This will download your project as an MP4 file.

Exporting videos in Vidio.ai

How to polish combined video clips in Premiere Pro or DaVinci Resolve

Once you’ve got your merged file from Descript or Vidio.ai, here’s how to finish it in a traditional editor:

Step 1: Import the merged video

Open Premiere Pro or DaVinci Resolve. Create a new project and bring your merged file into the media pool.

Importing video in DaVinci Resolve

Step 2: Add it to the timeline

Drag the video onto a new sequence (Premiere) or timeline (Resolve). Make sure your sequence settings match your video resolution and frame rate.

Adding video in DaVinci Resolve

Step 3: Refine the joins

Zoom into any cuts that feel abrupt. Use crossfades, J-cuts, or L-cuts to smooth them out.

Refining video in DaVinci Resolve

Step 4: Tweak the color

Apply basic color correction so all clips feel consistent. Add a LUT or grading style if you want a particular look.

Tweaking color in DaVinci Resolve

Step 5: Check the audio

Balance volume levels so nothing jumps out or drops suddenly. Use noise reduction if any clips have background hum or hiss.

Checking audio in DaVinci Resolve

Step 6: Save your project

Name and save your project before proceeding to the final export, so you can return to it later if needed.

From separate clips to a finished video

Learning how to combine video clips doesn’t have to be slow or frustrating anymore. AI tools like Descript and Vidio.ai take care of the repetitive work, so you can focus on pacing, color, and sound.

Sometimes you’ll only need a fast AI merge. At other times, combining clips is just the first step before refining everything in Premiere Pro or DaVinci Resolve. Try both workflows and stick with the one that helps you move faster without sacrificing quality.

The best tool is the one that fits your editing style and helps you combine video clips efficiently every time.

Tip: If you know you’ll be doing more polishing later in Premiere or Resolve, export in the highest quality format you can. It keeps the footage looking clean and prevents detail loss when you re-export later.

Frequently Asked Questions: How to combine video clips

Related Posts