
Envato LUTs category: preview LUTs on your own footage before you download
Explore the Envato LUTs category and discover 66,000+ searchable LUTs with previews, frame testing, commercial licensing, and compatibility across major editing software.
Envato: Get every type of asset for any type of project, and access to AI tools. Start now
This article shows how to upscale 1080p video to 4K in Premiere Pro and After Effects, preserving detail and improving export quality.
4K video resolution is now the standard for high-production projects. However, when it comes to editing, you might not always have 4K footage available. Learn how to upscale 1080p video to 4K using Premiere Pro and After Effects for sharper detail, cleaner edges, and a more professional final export.
To upscale video to 4K without softening your footage, use After Effects’ Detail-Preserving Upscale instead of standard scaling. This workflow helps 1080p clips retain edge clarity and texture, so they integrate naturally into a 3840 × 2160 (UHD) timeline.
Check out the difference below. The left image shows a simple stretch with no upscaling applied. On the right, edge definition and surface texture are noticeably clearer, especially in the rock and background areas, where standard scaling would normally introduce softness.

The example on the right side shows the version with detail preserved, which includes sharper details in the rock area.
To achieve that result on your 1080p footage, let’s upsample from standard HD (1920 × 1080) to 4K UHD (3840 × 2160) while preserving as much detail as possible.
Before we start, here’s why we’re using After Effects for this process. Adobe Premiere Pro doesn’t include a true, native method for upscaling footage. Sure, you can take a 1920×1080 clip and stretch it to a 4K canvas, but you’ll lose detail and won’t get the best results.
Our method uses Detail-Preserving Upscale in After Effects to intelligently increase the image size. This interpolation technique analyzes surrounding pixels to preserve fine detail far better than simply stretching them.
Note for 2025 to 2026 users:
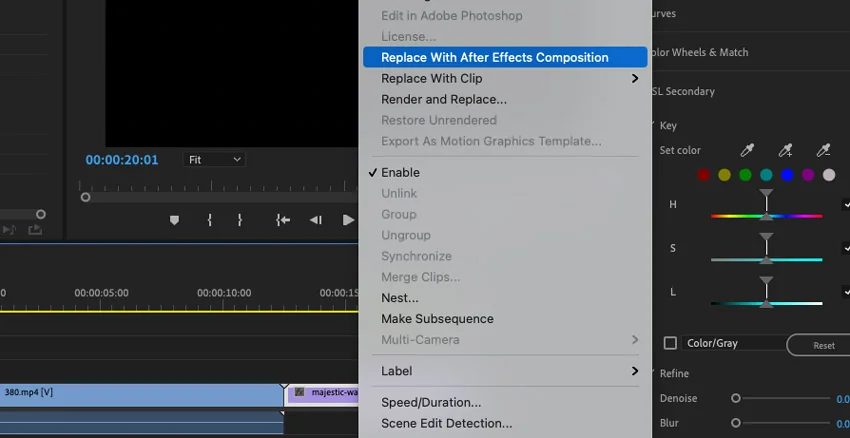
Earlier versions of this tutorial relied on the one-click “Replace with After Effects Composition” (Dynamic Link) feature. In recent versions of Premiere Pro and After Effects, this feature may not function consistently. The updated method below works independently of Dynamic Link, so you can follow it regardless of your software version.
Tip before you start:
Make sure your Premiere Pro edit is completely finalized before starting this process, including cuts, effects, music, and subtitles. After Effects should be the final step in your workflow. If you return to Premiere Pro to make changes after upscaling, you’ll need to repeat the entire After Effects process.
Here’s the stock video template we’ll use for this tutorial. You can explore several similar options on Envato to create your own complete, polished videos.

Start by importing your clips and arranging them on the timeline in your preferred order.

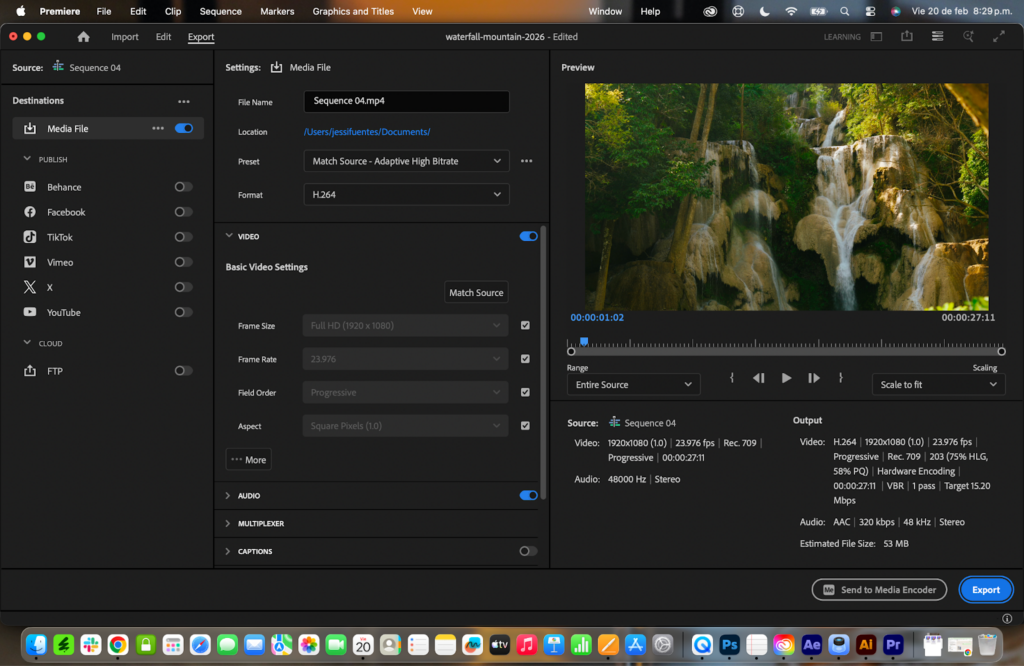
Once your edit is completely finished, export the final sequence in its original 1080p resolution.
Go to File > Export > Media and use these settings:
Click Export.
Open After Effects and import the 1080p file you just exported from Premiere Pro.
Go to File > Import > File and select your video.
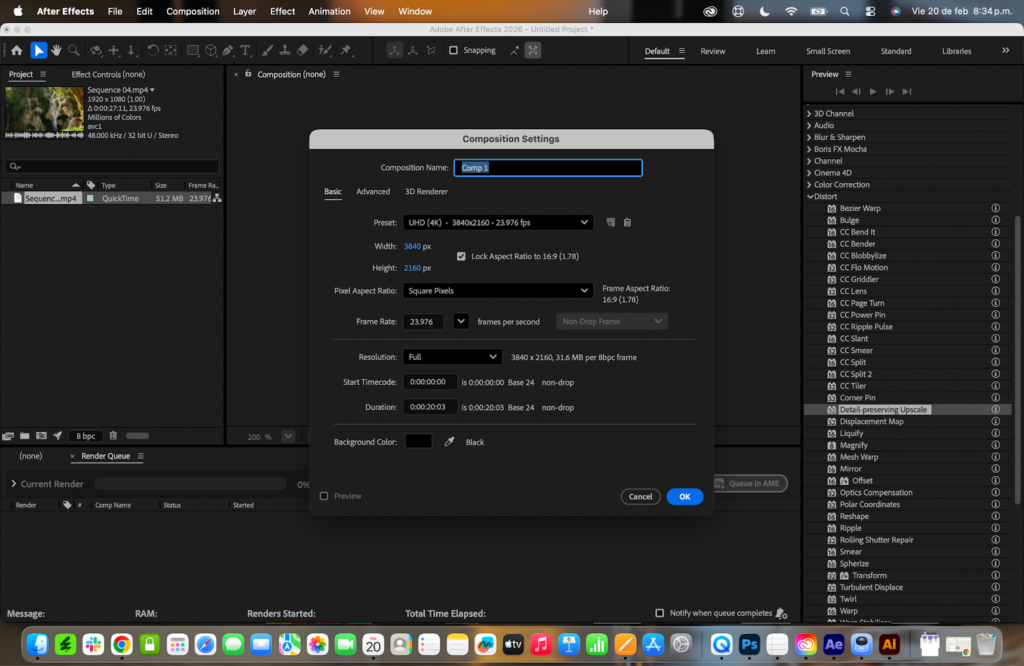
Next, create a new composition by selecting Composition > New Composition.
Set the following settings:
Click OK.
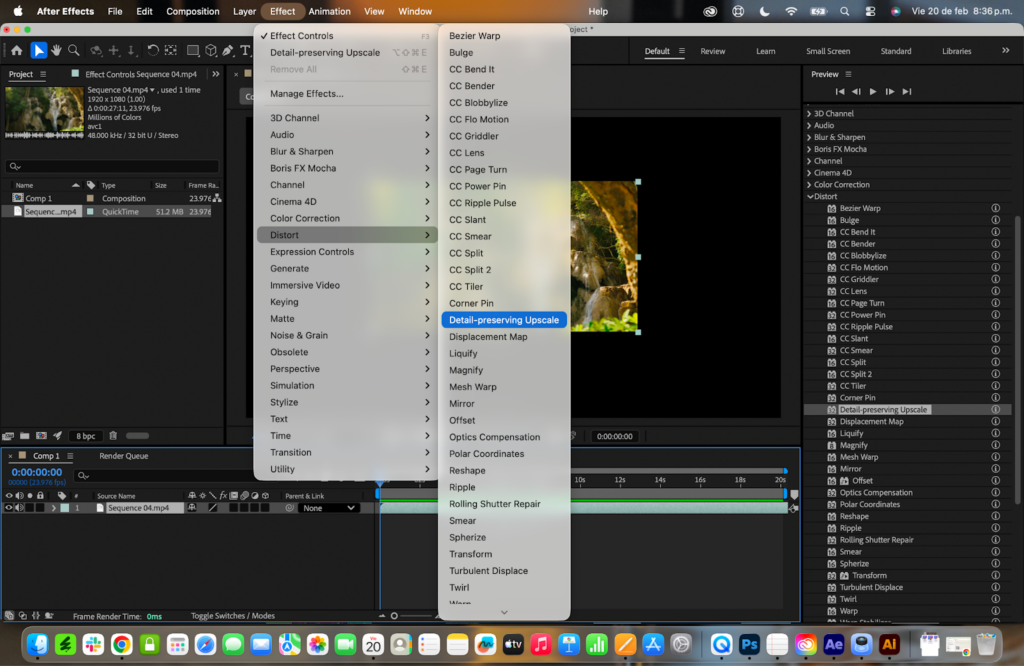
With your clip selected in the timeline, go to Effect > Distort > Detail-preserving Upscale to apply the effect.
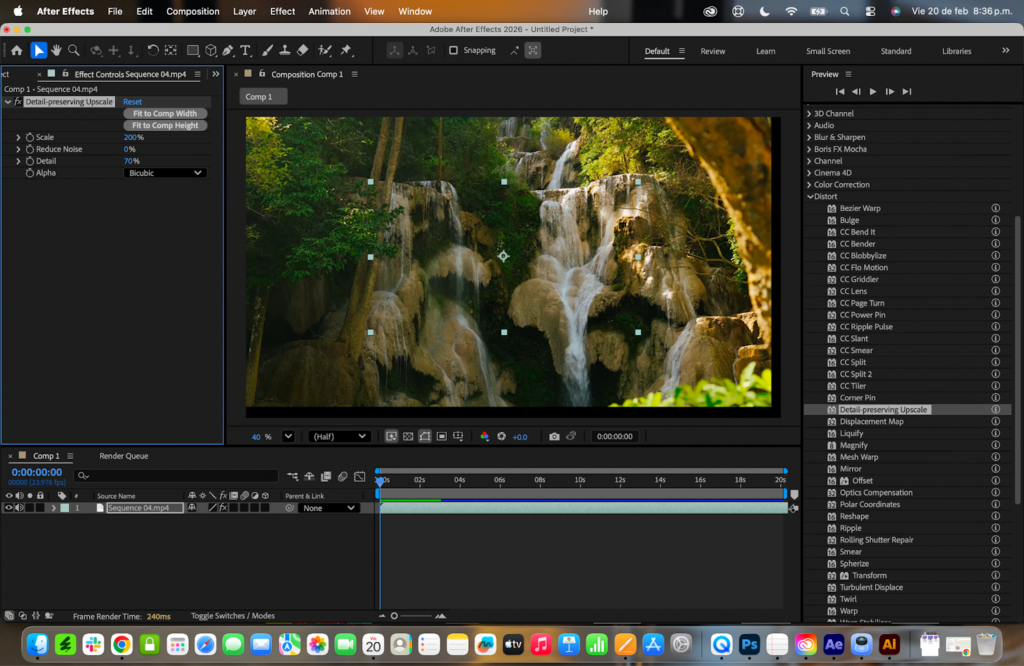
In the Effects Control panel, you’ll see several key settings:
Search for Detail-preserving Upscale and double-click to add it to your active clip.
There’s no single perfect setting here. Upscaling is partly technical and partly a visual judgment. Adjust the Detail slider gradually and preview the results until the footage looks natural and sharp, not over-processed.
Before moving on, save your After Effects project by going to File > Save. It’s a small step, but it protects your work if anything crashes (and yes, it happens).
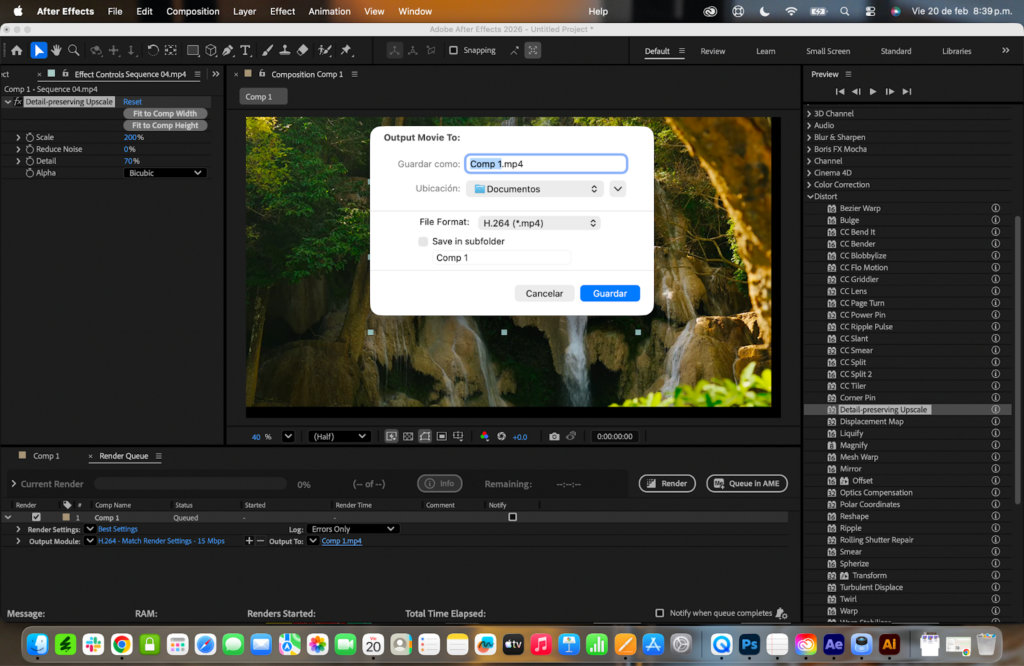
Go to File > Export > Add to Render Queue.

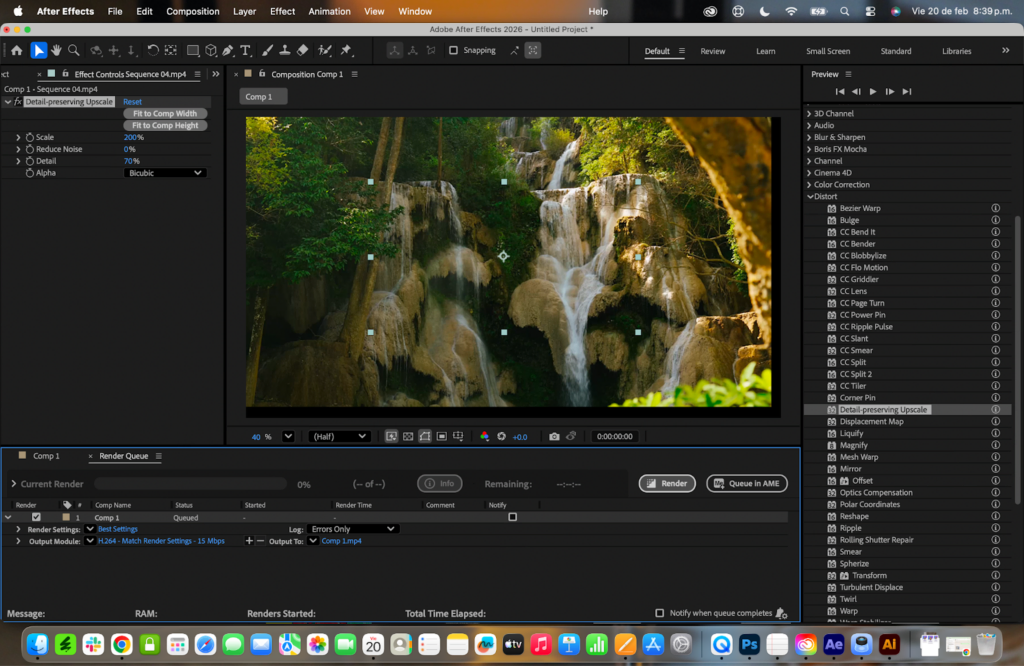
In the Render Queue panel:

Once everything looks correct, click Render to begin exporting. After Effects will now process the upscale and generate your final 4K file.
Note:
Rendering can use a significant amount of your computer’s CPU and GPU resources, so the interface may appear slow or less responsive during export. This is normal. Let the render complete fully before opening or moving the file.
Once the progress bar reaches 100%, your 4K video will be saved automatically to the folder you selected.

Several third-party tools offer AI-powered upscaling, often promising sharper results or better edge reconstruction than native workflows.
Check out these other tools as options for upscaling to 4K:
If your footage doesn’t hold up after upscaling, the best solution isn’t always to push the resolution further; it may be to start with native 4K clips. While many creative platforms offer 4K video, having access to a large, curated library makes the process more efficient.
Envato includes hundreds of thousands of 4K stock videos – alongside stock music, video templates, and motion graphics – covering cinematic landscapes, business scenes, lifestyle footage, and motion graphics. With a single subscription, you can download assets as needed while it’s active, making it a practical solution for ongoing creative work.
Today’s editors rely on more than just footage. From transitions and motion graphics to sound design and AI-powered tools, having a complete creative toolkit helps streamline production and maintain consistent quality across projects.
That’s where staying current matters. The resources below reflect what many Premiere Pro users are incorporating into their projects in 2026.
AI is now embedded in modern video editing workflows. In 2026, editors use it to automate repetitive tasks, generate supporting visuals and audio, and explore ideas more efficiently.
Instead of spending hours sourcing individual elements, you can combine high-quality stock footage, music, voiceovers, graphics, and templates to build polished edits faster. When paired with ready-to-use assets, AI-enhanced tools help streamline production without compromising creative control.
Transitions are more than visual effects; they control pacing and storytelling. In 2026, editors are moving beyond simple crossfades and experimenting with stylized wipes, glitch effects, light leaks, and cinematic camera transitions that reinforce brand identity.
Using pre-built transition packs can save time while maintaining consistency across projects. Whether you’re cutting a YouTube short or a commercial edit, having flexible transitions in your toolkit makes your timeline cleaner and your edit more cohesive.
Motion graphics separate a functional video from a memorable one. Animated titles, lower thirds, and branded overlays help guide attention and reinforce key messages.
Instead of building every animation from scratch, customizable templates let you adapt professional motion design to your own style. This means you spend more time shaping the story and less time adjusting keyframes.
Vertical video isn’t a trend anymore, it’s the format. With TikTok, Instagram Reels, and YouTube Shorts shaping how audiences consume content, editors need templates that are optimized for fast, mobile-first viewing.
Social-ready templates make it easier to:
Publishing faster doesn’t mean lowering quality. It means having the right starting point.
Upscaling won’t magically replace native high-resolution footage, but learning how to upscale video to 4K properly can dramatically improve how HD clips hold up in modern projects. By combining Premiere Pro for editing and After Effects for precision scaling, you create a workflow that balances flexibility with professional-level output.
As 4K delivery becomes standard across streaming platforms, client projects, and social content, knowing when and how to upscale video to 4K gives you more control over your final result and more confidence in your edit.
Upscaling won’t create new image data, but it can significantly improve the performance of HD footage in a 4K project. When done properly, it helps reduce softness and visible pixel stretching compared to standard scaling.
Not always, but it’s increasingly common. Many platforms support 4K playback, and delivering in 4K can improve perceived sharpness and compression quality, even if your original footage was HD.
Yes. Exporting at 3840 × 2160 increases resolution, which usually results in larger file sizes depending on your bitrate and compression settings.
Some AI-based tools use different reconstruction methods and can produce impressive results, especially with heavily compressed footage. However, they often require longer processing times and separate workflows.
No. Upscaling cannot recreate the full image data captured in native 4K footage. It can improve how 1080p clips integrate into a 4K timeline, but recording in native 4K will always deliver the highest overall quality.
Premiere Pro allows you to scale footage inside a 4K sequence, but this only enlarges existing pixels. It does not include a dedicated AI-based upscaling effect, which is why After Effects is used in this workflow.
Upscaling and rendering can use significant CPU and GPU resources, so your system may feel less responsive during export. This is normal — allow the process to complete before moving or opening the file.
No. Upscaling can improve how footage scales to higher resolutions, but it cannot correct focus issues or motion blur captured in the original clip.
Explore the Envato LUTs category and discover 66,000+ searchable LUTs with previews, frame testing, commercial licensing, and compatibility across major editing software.

Every month, we're rounding up our favourite TikTok trends: the sounds, hooks, and concepts that are going viral right now. We'll break down the formats, show you examples, and give you practical ways to adapt them to your niche.

Found a template that's almost perfect? This guide walks you through editing Envato video templates in any software, with a repeatable process for swapping media, text, colors, and music, then exporting a finished video.

Download a video template and you get the design system, not the finished video. Here's what to expect — and what to source separately.