Movie typography in 2026: why does it suddenly look so good?
Explore movie typography trends shaping 2026, from bold film fonts to cinematic branding, with inspiring examples and practical tips for creating impactful, screen-ready typography.
Envato: Get every type of asset for any type of project, and access to AI tools. Start now
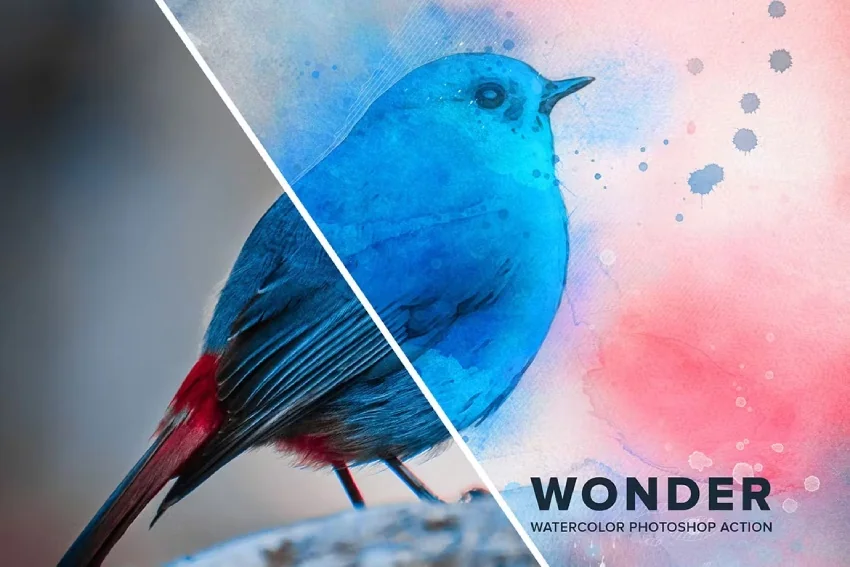
In this tutorial, you'll learn how to make a watercolor painting effect in Photoshop. Even if you're opening Photoshop for the first time, you'll be able to make a Photoshop watercolor effect easily.

If you prefer to watch a video to learn how to make watercolors in Photoshop, follow along with us over on our Envato Tuts+ YouTube channel:
If you would like to create even more advanced Photoshop watercolor effects quickly and easily, then check out the TechnicalArt 2 Photoshop Action on Envato Elements.
To recreate the Photoshop watercolor effect above, you will need the following resources:
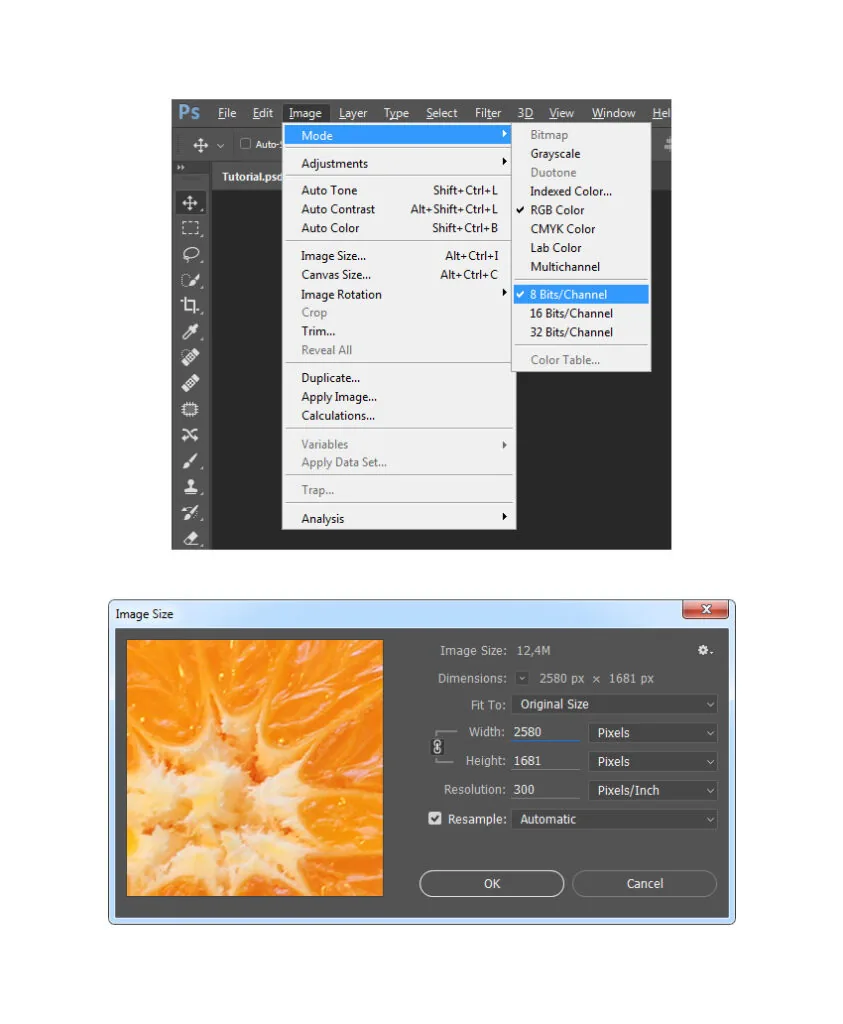
First, open the photo that you want to work with. To open your photo, go to File > Open, choose your photo, and click Open. Now, before we get started, just check a couple of things:
In this section, we are going to create the five watercolor brushes we’ll need. You can either download the textures from the attachment and follow the process, or you can go to Ivan’s tutorial to learn how to create your own watercolor textures.
If you’ve followed the first option and downloaded the textures, then open the first texture scan in Photoshop. Go to Edit > Define Brush to define this texture as a brush, and name it Temp_Brush_1.

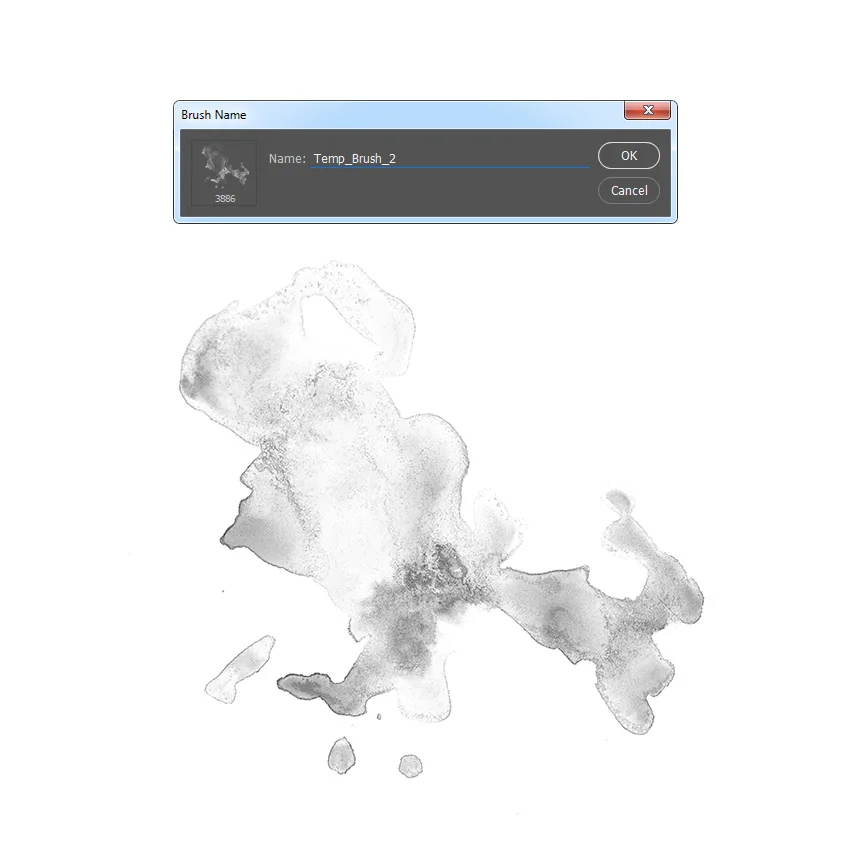
Open the second texture scan, go to Edit > Define Brush to define this texture as a brush, and name it Temp_Brush_2.
Now open the third texture scan, go to Edit > Define Brush to define this texture as a brush, and name it Temp_Brush_3.

Now open the fourth texture scan, go to Edit > Define Brush to define this texture as a brush, and name it Temp_Brush_4.

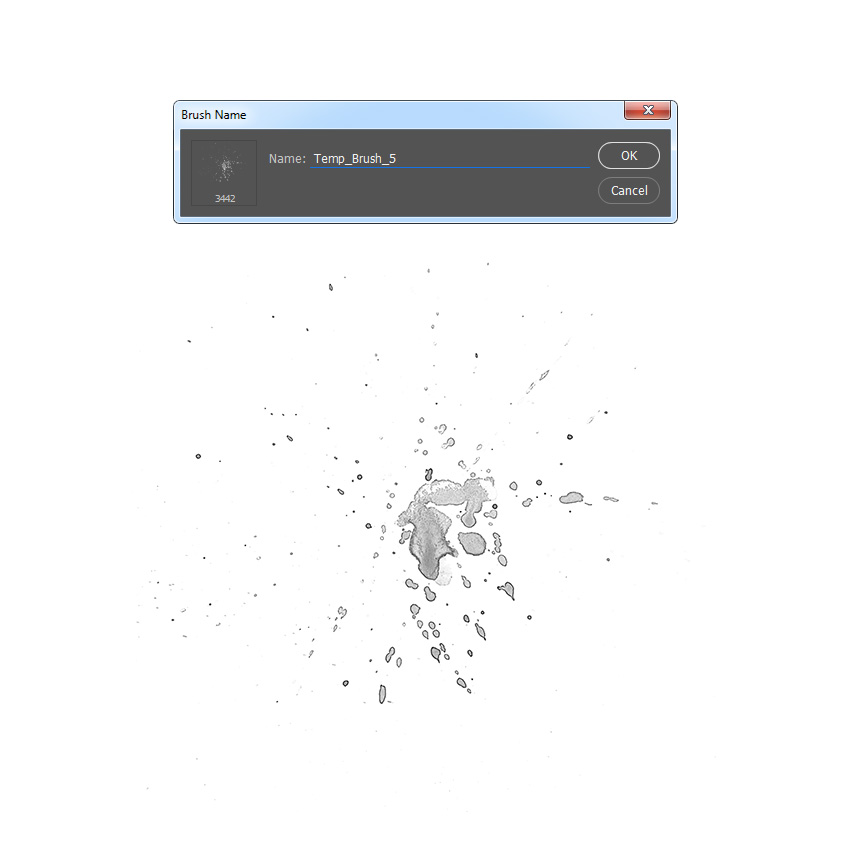
Now open the last texture scan, go to Edit > Define Brush to define this texture as a brush, and name it Temp_Brush_5.
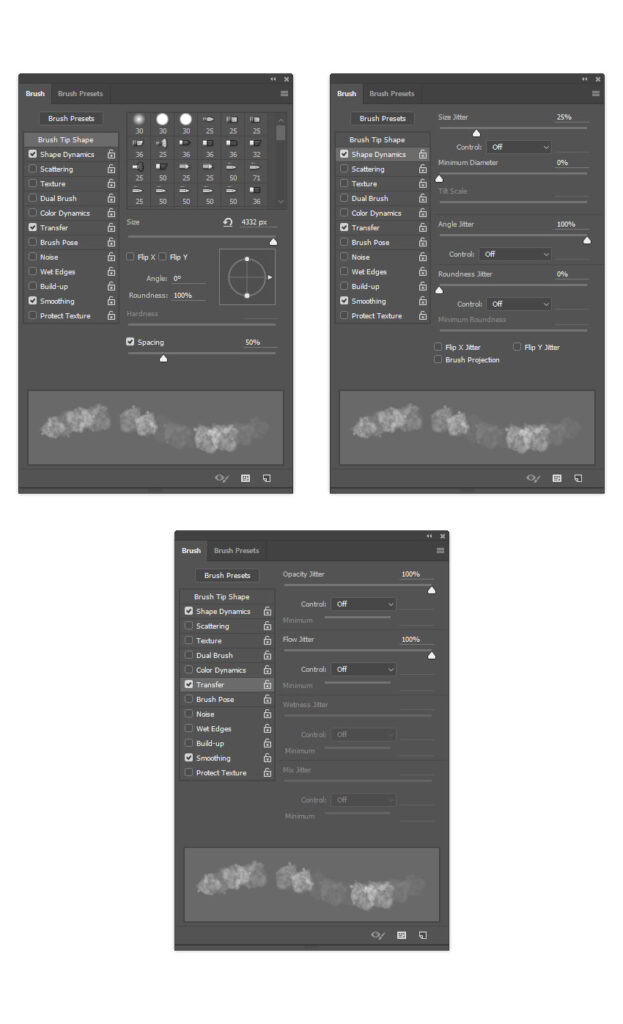
Now that we have defined our brushes, we need to adjust their settings and then define them again as new brushes. Press B on your keyboard, Right-click anywhere inside the canvas, select the Temp_Brush_1 brush, and hit Enter. Then go to Window > Brush and, in the Brush window, use the settings below:
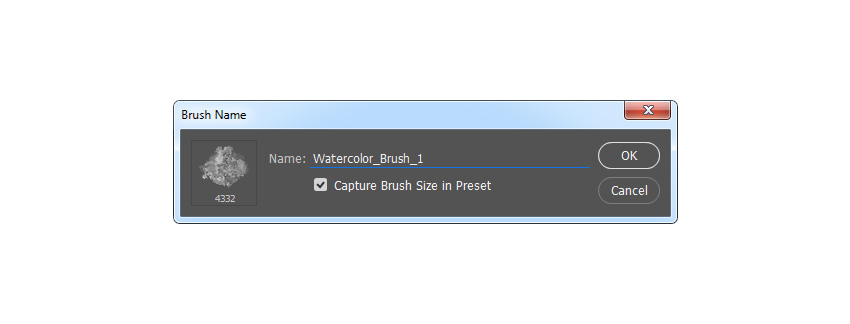
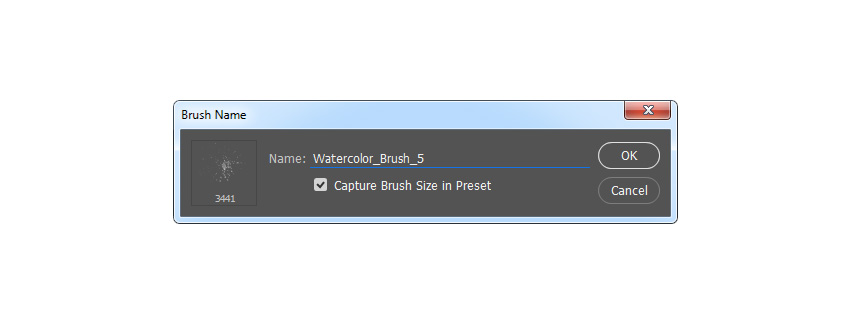
To define this brush with new settings as a new brush, click on the top right icon in the bottom right corner of the Brush panel, and name it Watercolor_Brush_1.
Now press B on your keyboard, Right-click anywhere inside the canvas, select the Temp_Brush 2 brush, and hit Enter. Then go to Window > Brush and in the Brush window use the settings below:

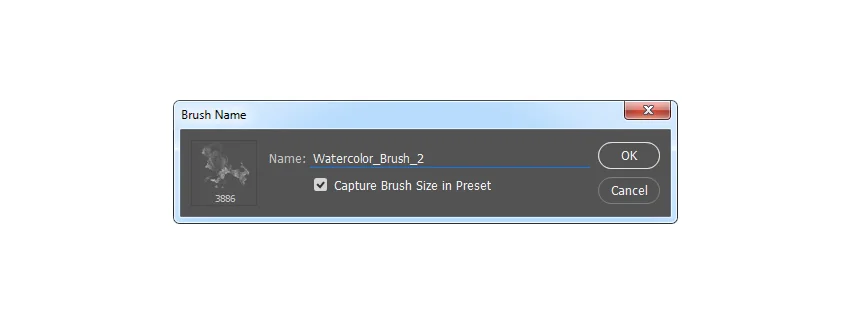
To define this brush with new settings as a new brush, click on the top right icon in the bottom right corner of the Brush panel, and name it Watercolor_Brush_2.
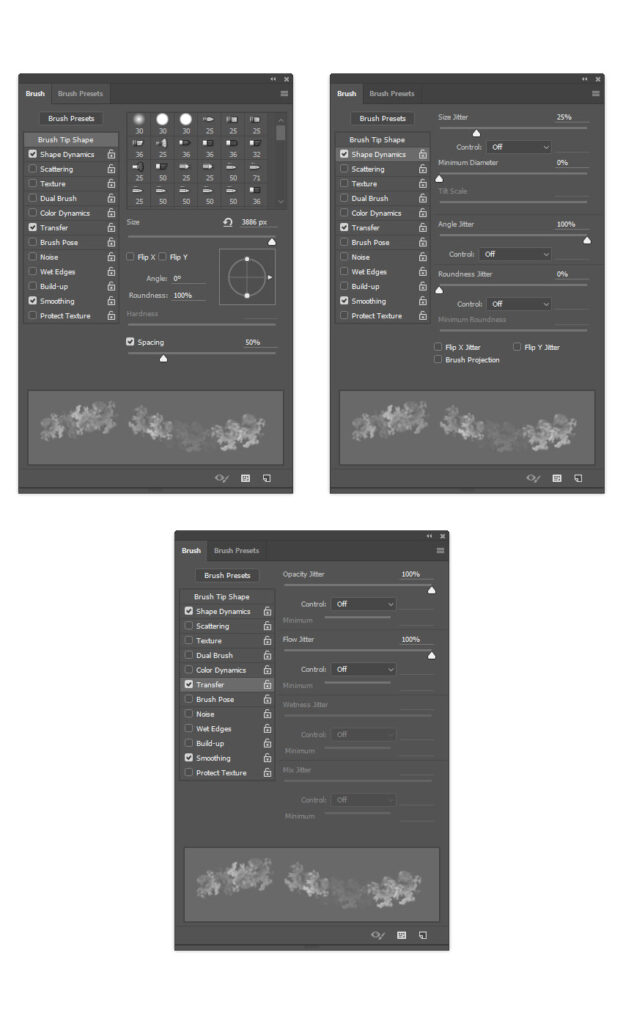
Now press B on your keyboard, Right-click anywhere inside the canvas, select the Temp_Brush_3 brush, and hit Enter. Then go to Window > Brush and in the Brush window use the settings below:
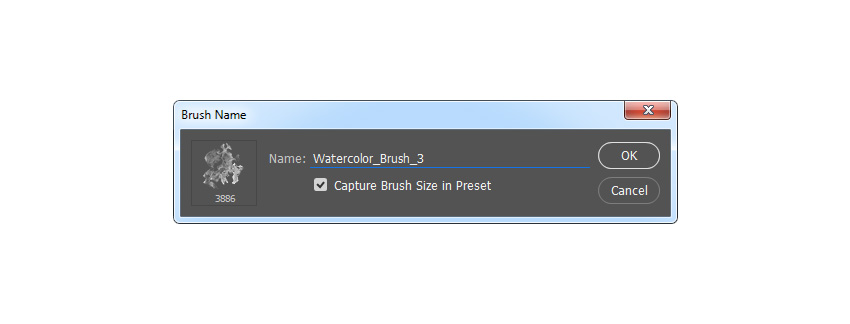
To define this brush with new settings as a new brush, click on the top right icon in the bottom right corner of the Brush panel, and name it Watercolor_Brush_3.
Now press B on your keyboard, Right-click anywhere inside the canvas, select the Temp_Brush_4 brush, and hit Enter. Then go to Window > Brush and in the Brush window use the settings below:

To define this brush with new settings as a new brush, click on the top right icon in the bottom right corner of the Brush panel, and name it Watercolor_Brush_4.

Now press B on your keyboard, Right-click anywhere inside the canvas, select the Temp_Brush_5 brush, and hit Enter. Then go to Window > Brush and in the Brush window use the settings below:
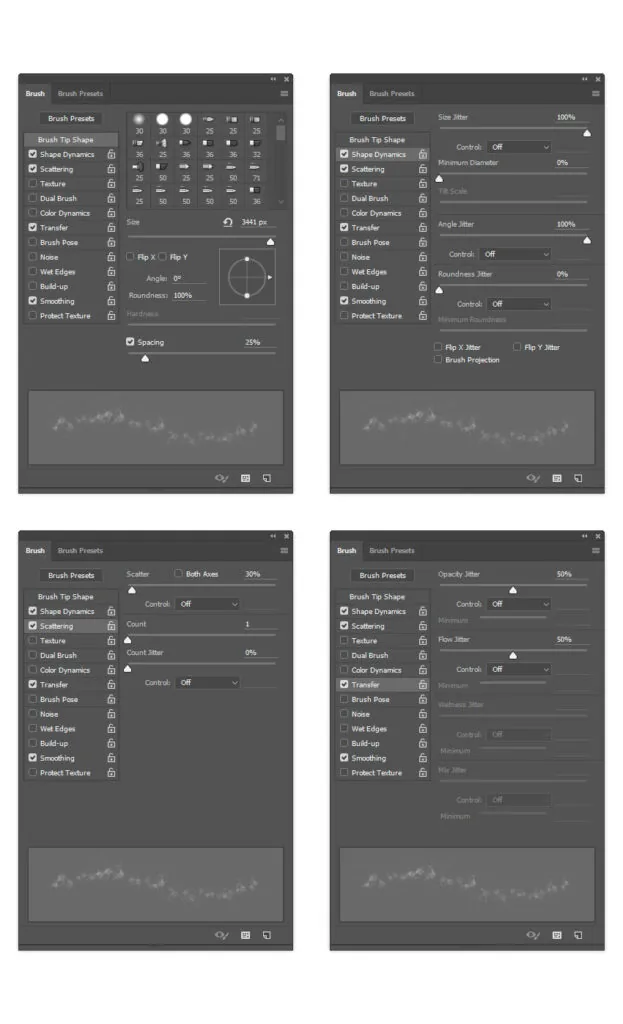
To define this brush with new settings as a new brush, click on the top right icon in the bottom right corner of the Brush panel, and name it Watercolor_Brush_5.
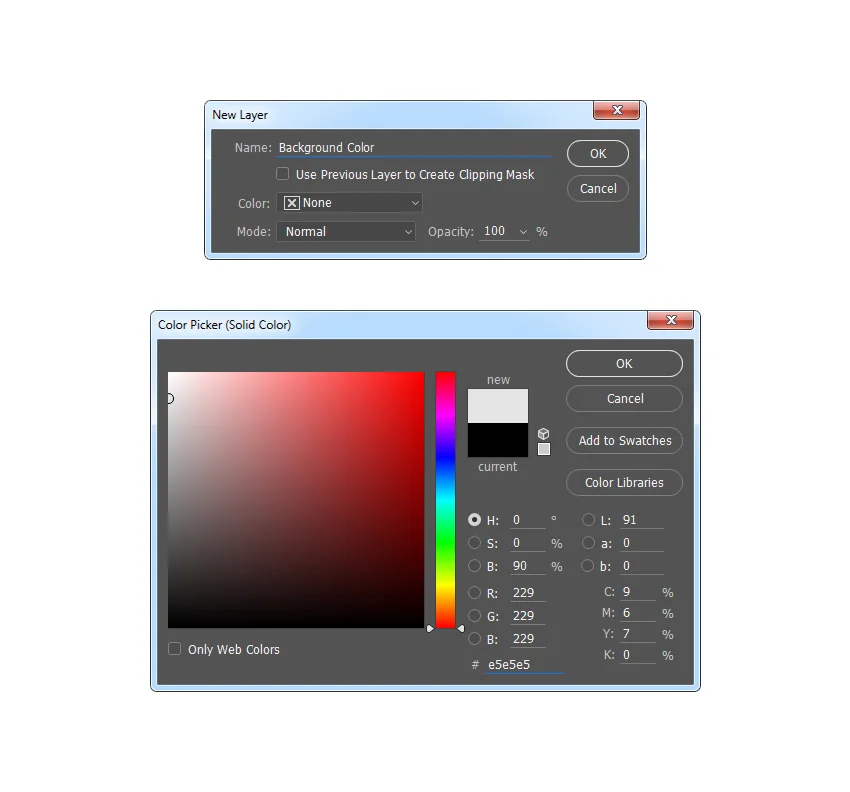
In this section, we are going to create the background. Go to Layer > New Fill Layer > Solid Color to create a new solid color fill layer, name it Background color, and choose the color #e5e5e5.
Now Right-click on this layer, choose Blending Options, check Gradient Overlay, and use the settings below:

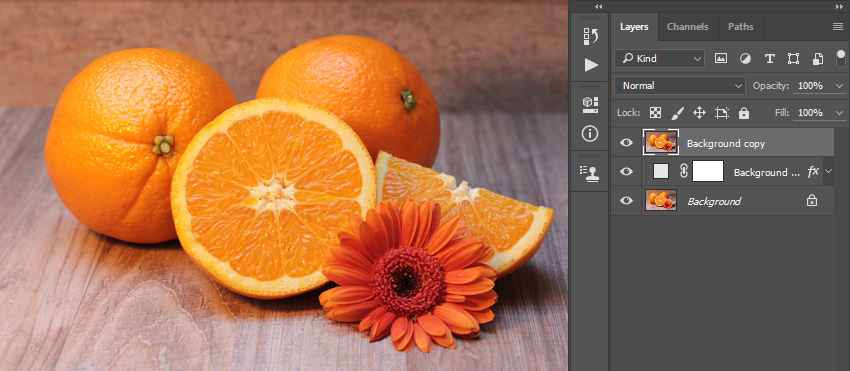
In this step we are going to create the sketch. Select the Background layer and press Control-J on your keyboard to duplicate it. Then, drag this layer to the top of the layers in the Layers panel.
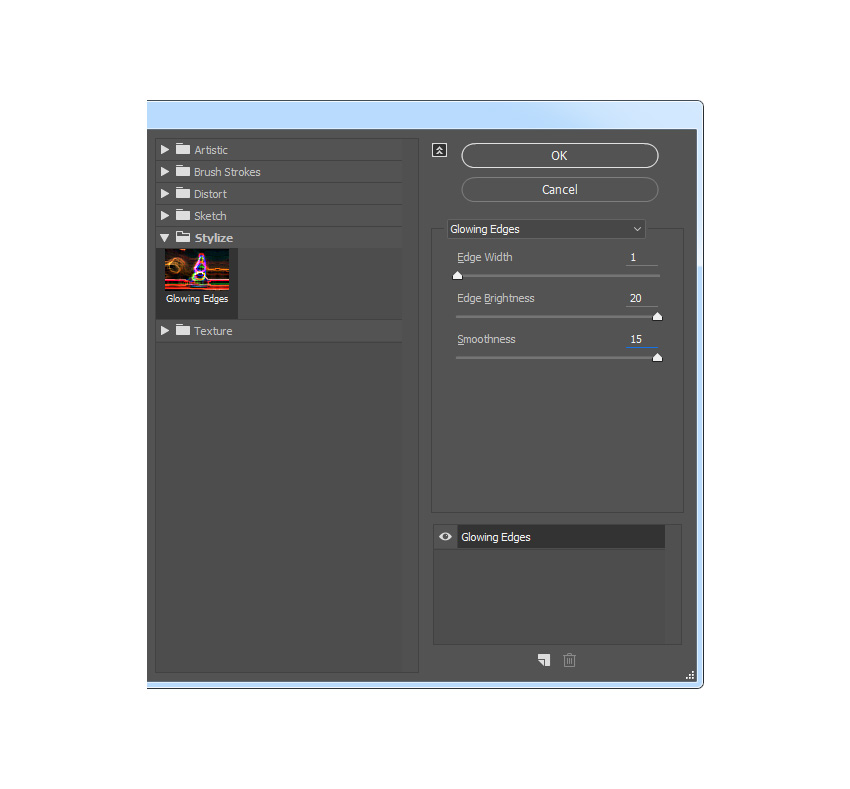
Now press Control-Shift-U on your keyboard to desaturate this layer. Then, go to Filter > Filter Gallery > Stylize > Glowing Edges and set the Edge Width to 1, Edge Brightness to 20, and Smoothness to 15.
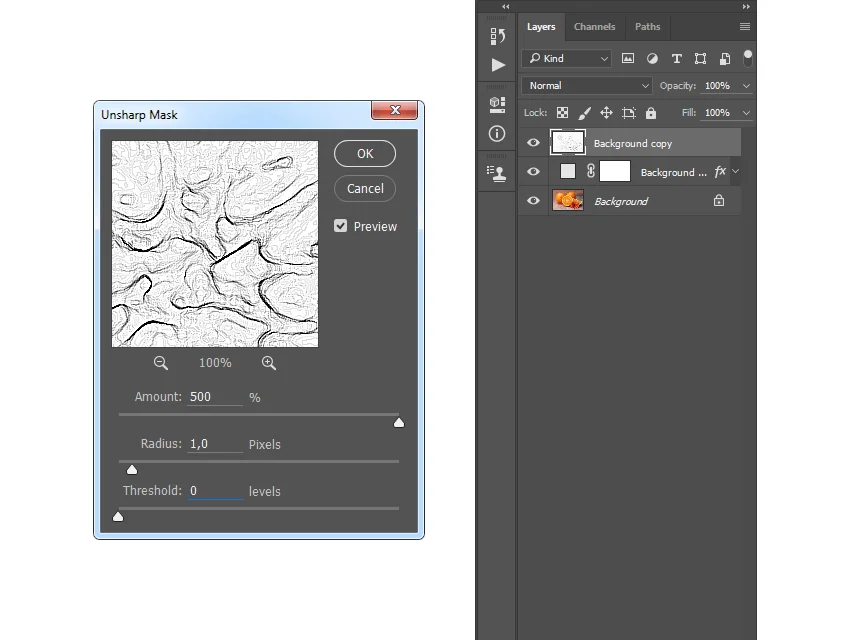
Press Control-I on your keyboard to invert this layer. Then, go to Filter > Sharpen > Unsharp Mask and set the Amount to 500%, Radius to 1 px, and Threshold to 0 levels.
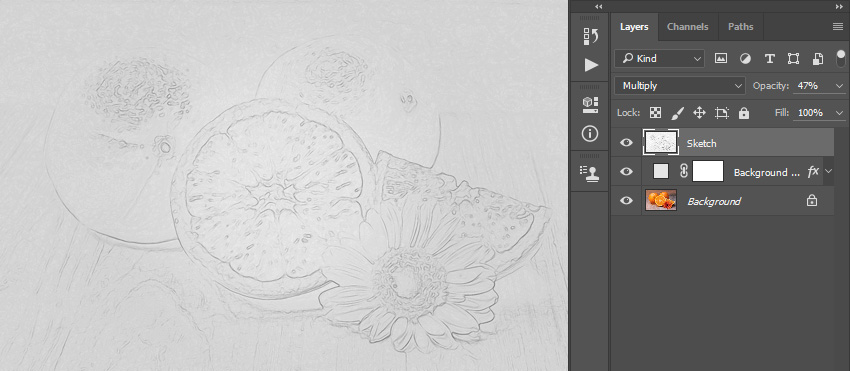
Change the Blending Mode of this layer to Multiply and set the Opacity to 47%. Then, name this layer Sketch.
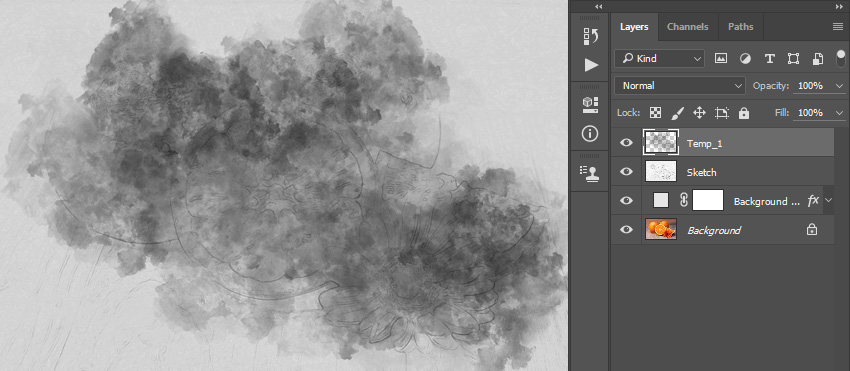
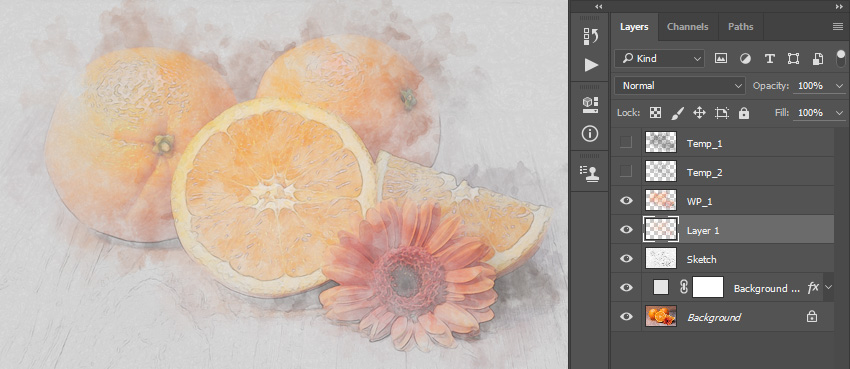
In this section we are going to create the watercolor painting. Go to Layer > New > Layer to create a new layer and name it Temp_1.

Now set the foreground color to #000000, choose the Brush Tool (B), and pick the Watercolor_Brush_1 brush. Then, adjust the Diameter of the brush as you like, and brush as shown below:
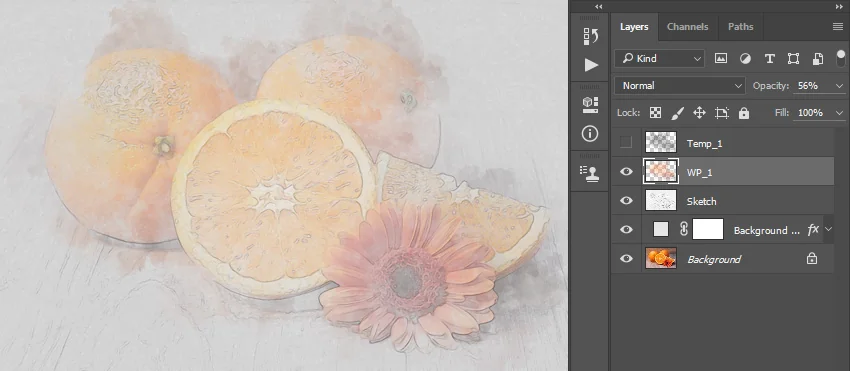
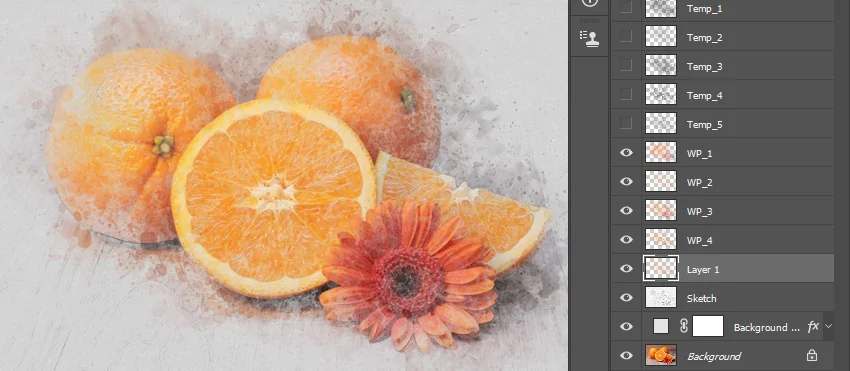
Control-click on this layer thumbnail to make a selection of this layer. Then, hide this layer, select the Background layer, and press Control-J on your keyboard to create a new layer using the selection. After that, drag this new layer just below the Temp_1 layer in the Layers panel.
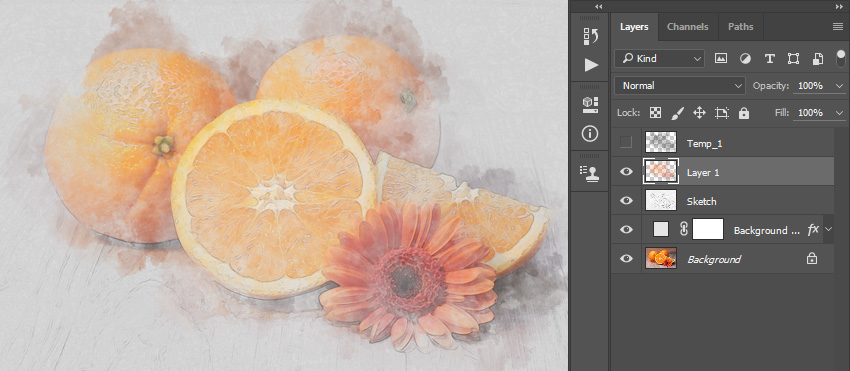
Now change the Opacity of this layer to 56% and name it WP_1.
Go to Layer > New > Layer to create a new layer and name it Temp_2.
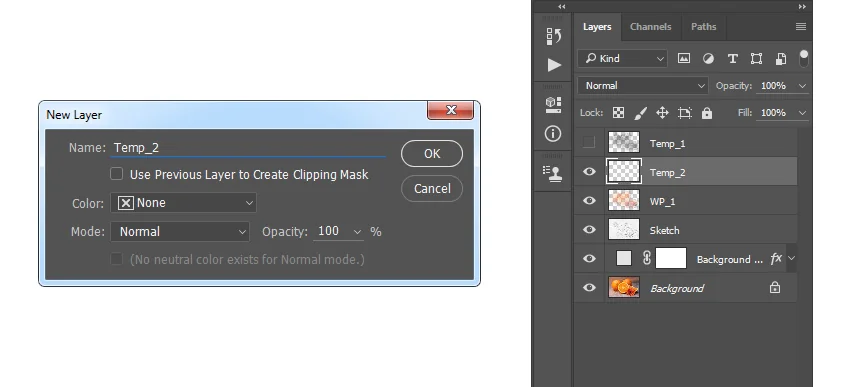
Now set the foreground color to #000000, choose the Brush Tool (B), and pick the Watercolor_Brush_2 brush. Then, adjust the Diameter of the brush as you like, and brush as shown below:
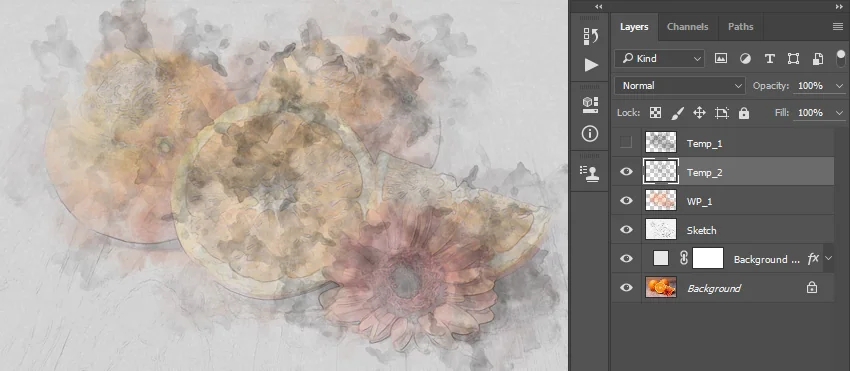
Control-click on this layer thumbnail to make a selection of this layer. Then, hide this layer, select the Background layer, and press Control-J on your keyboard to create a new layer using the selection. After that, drag this new layer just below the WP_1 layer in the Layers panel.
Now change the Opacity of this layer to 40% and name it WP_2.

Select the WP_1 layer, go to Layer > New > Layer to create a new layer, and name it Temp_3.
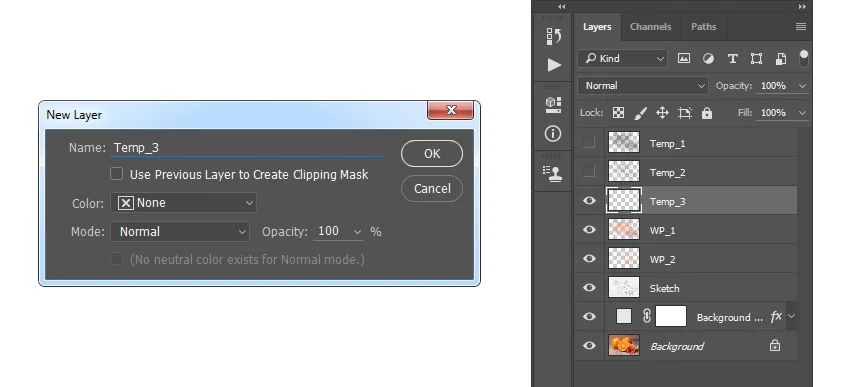
Now set the foreground color to #000000, choose the Brush Tool (B), and pick the Watercolor_Brush_3 brush. Then, adjust the Diameter of the brush as you like, and brush as shown below:
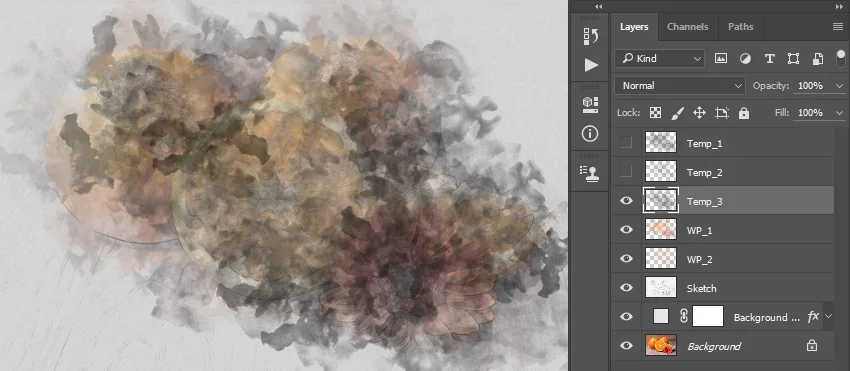
Control-click on this layer thumbnail to make a selection of this layer. Then, hide this layer, select the Background layer, and press Control-J on your keyboard to create a new layer using the selection. After that, drag this new layer just below the WP_2 layer in the Layers panel.
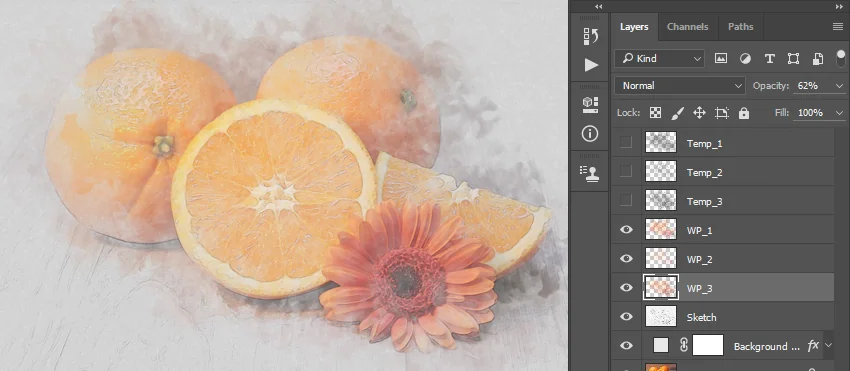
Now change the Opacity of this layer to 62% and name it WP_3.
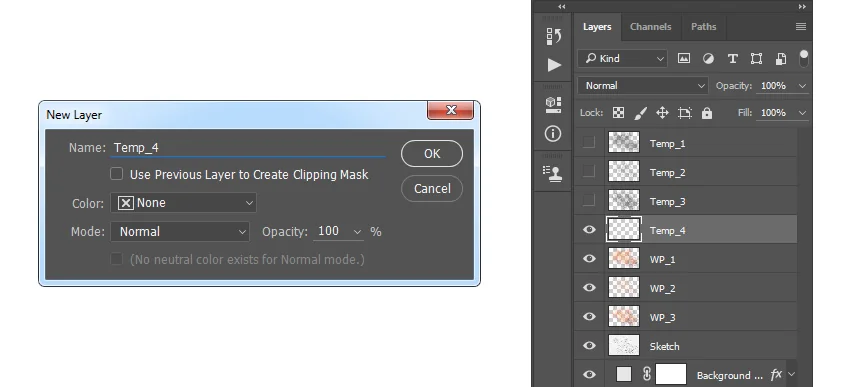
Select the WP_1 layer, go to Layer > New > Layer to create a new layer, and name it Temp_4.
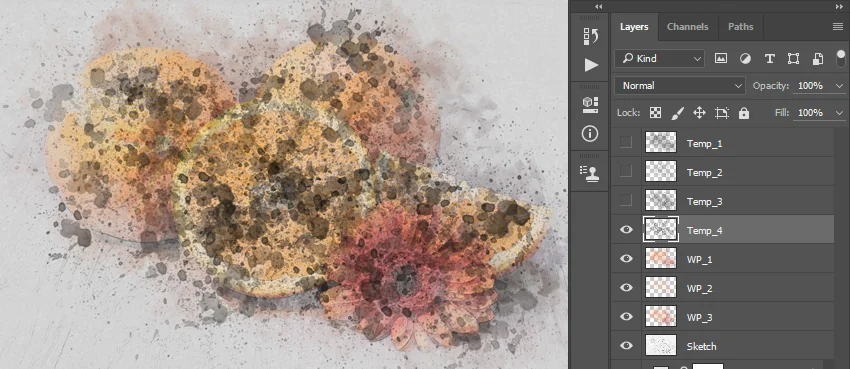
Now set the foreground color to #000000, choose the Brush Tool (B), and pick the Watercolor_Brush_4 brush. Then, adjust the Diameter of the brush as you like, and brush as shown below:
Control-click on this layer thumbnail to make a selection of this layer. Then, hide this layer, select the Background layer, and press Control-J on your keyboard to create a new layer using the selection. After that, drag this new layer just below the WP_3 layer in the Layers panel.

Now name this layer WP_4.

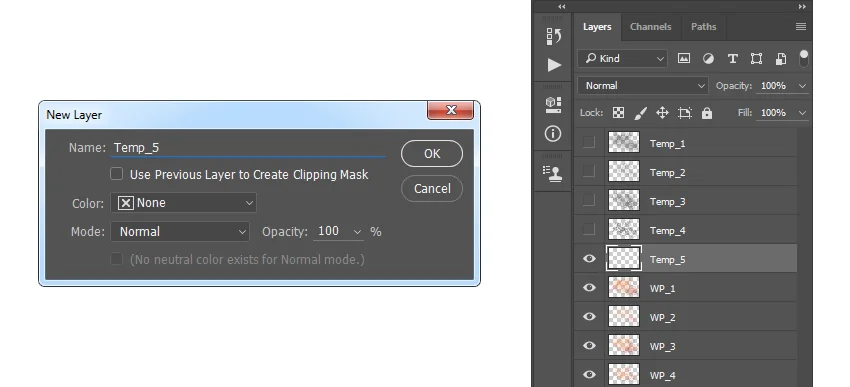
Select the WP_1 layer, go to Layer > New > Layer to create a new layer, and name it Temp_5.
Now set the foreground color to #000000, choose the Brush Tool (B), and pick the Watercolor_Brush_5 brush. Then, adjust the Diameter of the brush as you like, and brush as shown below:
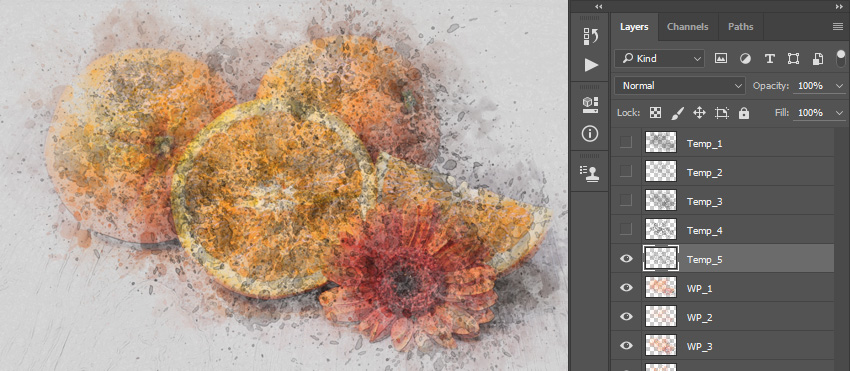
Control-click on this layer thumbnail to make a selection of this layer. Then, hide this layer, select the Background layer, and press Control-J on your keyboard to create a new layer using the selection. After that, drag this new layer just below the WP_4 layer in the Layers panel.
Now name this layer WP_5.

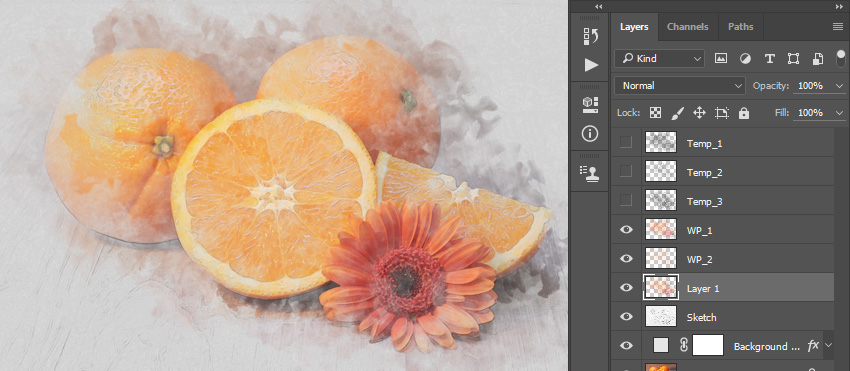
Select the Temp_1 layer and Shift-click on the Temp_5 layer to select all layers between. Then, Right-click on any of the selected layers and choose Delete Layers.
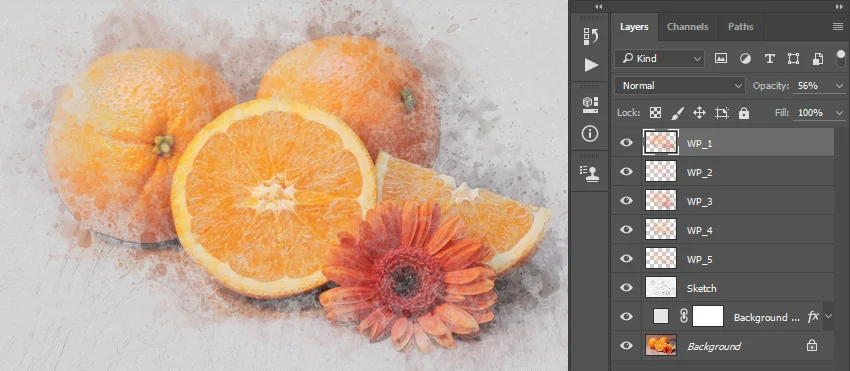
Now select the WP_1 layer, go to Filter > Filter Gallery > Artistic > Watercolor, and set the Brush Detail to 14, Shadow Intensity to 0, and Texture to 1.

Now repeat the previous step to apply the same filter to the remaining watercolor layers.

Select the WP_1 layer and Shift-click on the WP_5 layer to select all layers between. Then, go to Layer > New > Group from Layers to create a new group from the selected layers and name it Watercolor Painting.

In this step we are going to create the texture. Go to Layer > New > Layer to create a new layer and name it Texture.
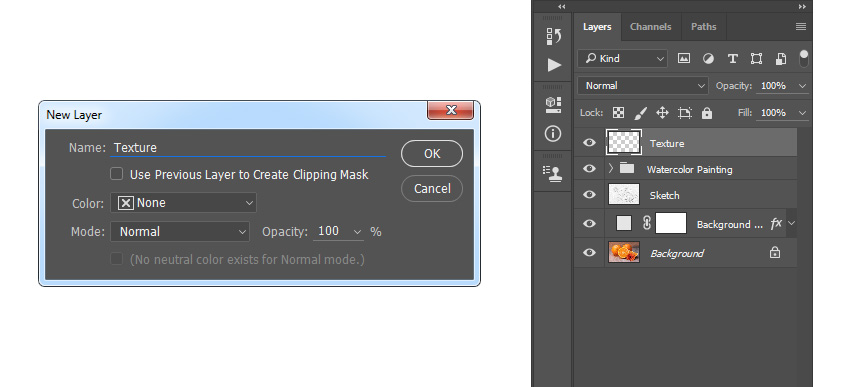
Now go to Edit > Fill and set Contents to 50% Gray, Mode to Normal, and Opacity to 100%.

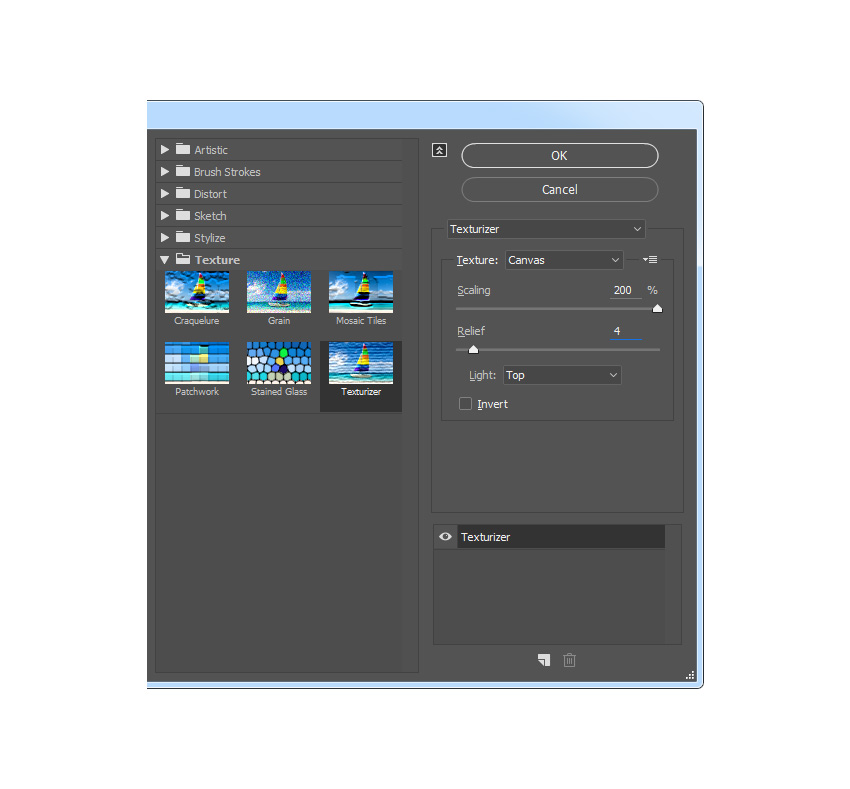
Go to Filter > Filter Gallery > Texture > Texturizer and set the Texture to Canvas, Scaling to 200%, Relief to 4, and Light to Top as shown below:
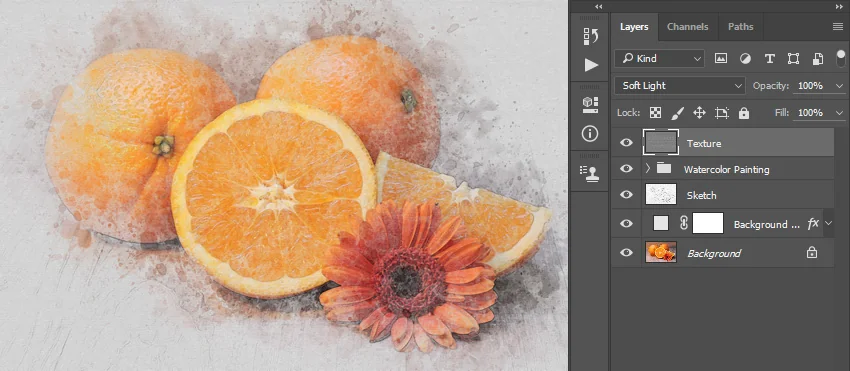
Now change the Blending Mode of this layer to Soft Light.
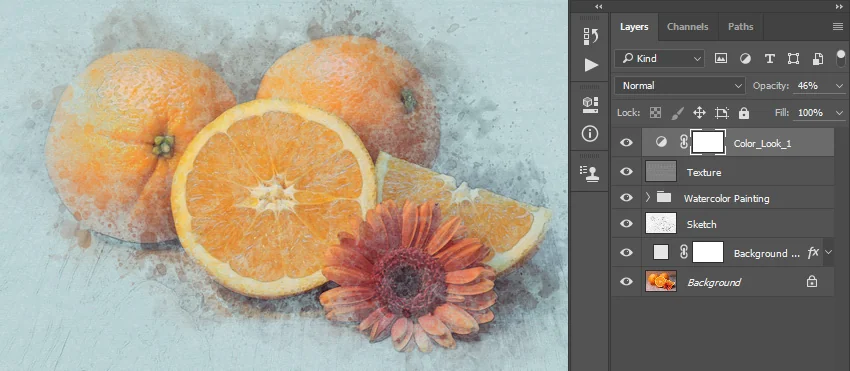
In this section, we are going to make final adjustments to the design. Go to Layer > New Adjustment Layer > Curves to create a new curves adjustment layer and name it Color_Look_1.
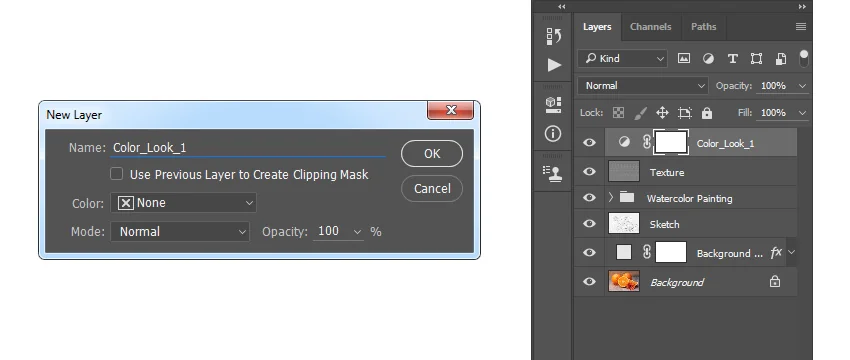
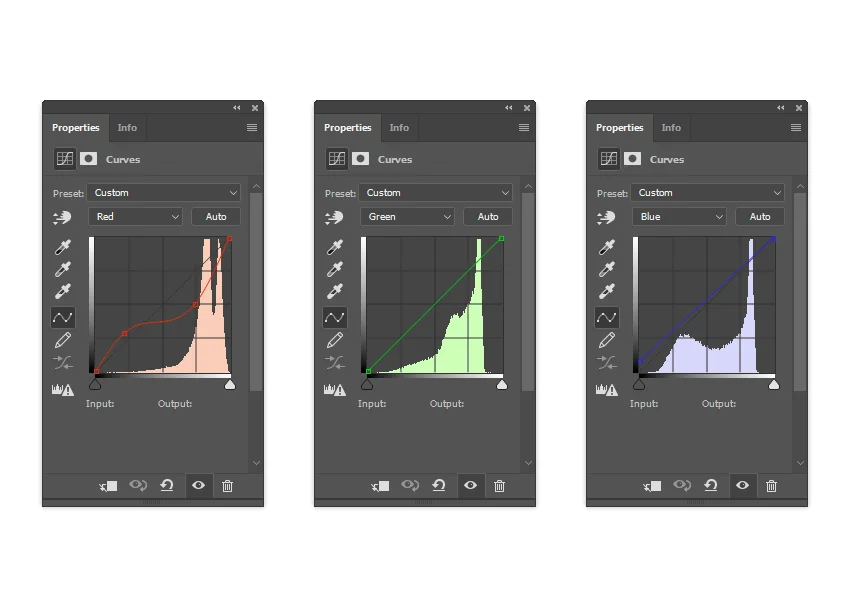
Now Double-click on this layer thumbnail and in the Properties panel enter the settings below:
Change the Opacity of this layer to 46%.
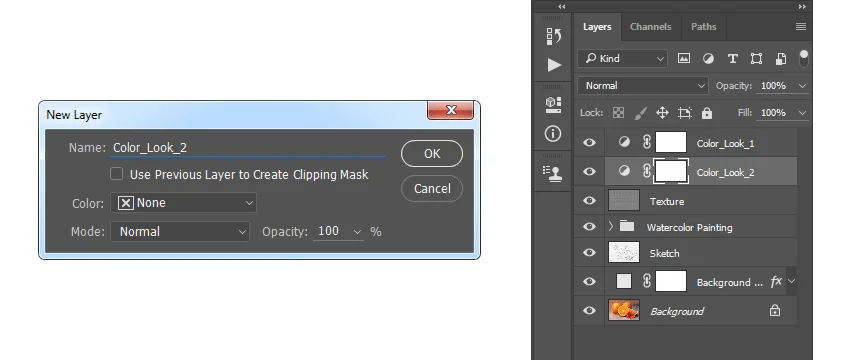
Now select the Texture layer, go to Layer > New Adjustment Layer > Gradient Map to create a new gradient map adjustment layer, and name it Color_Look_2.
Double-click on this layer thumbnail, and then in the Properties panel, click on the gradient to open up the Gradient Editor panel and enter the settings below:
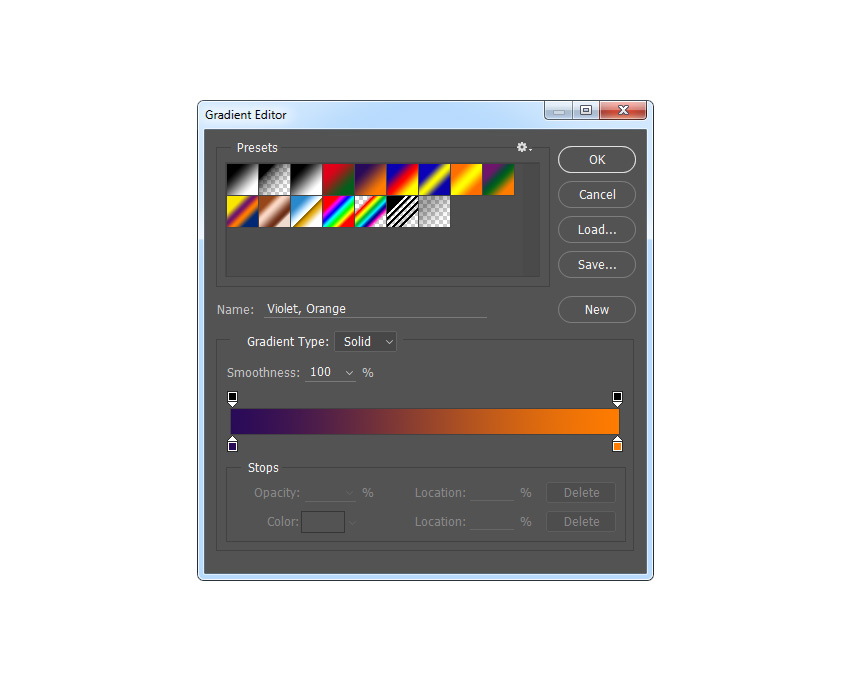
The left color stop has color 290a59, and the right color stop has color ff7c00.
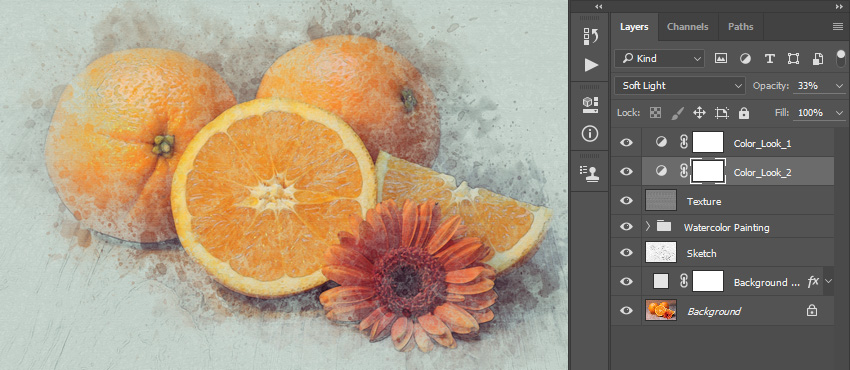
Now change the Blending Mode of this layer to Soft Light and set the Opacity to 33%.
Select the Color_Look_1 layer and press D on your keyboard to reset the swatches. Then, go to Layer > New Adjustment Layer > Gradient Map to create a new gradient map adjustment layer and name it Overall Contrast.
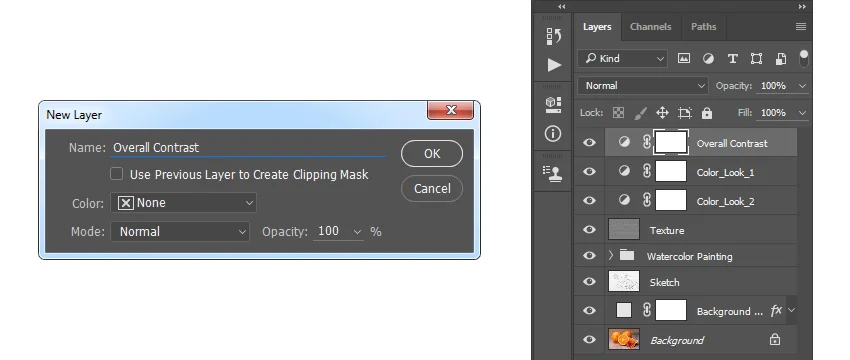
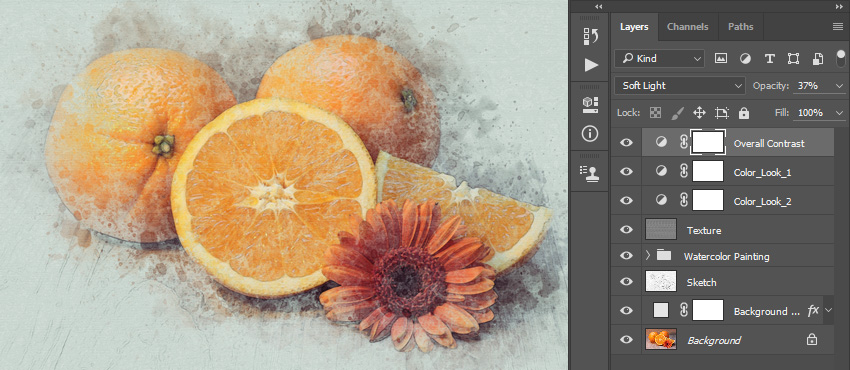
Now change the Blending Mode of this layer to Soft Light and set the Opacity to 37%.
Go to Layer > New Adjustment Layer > Vibrance to create a new vibrance adjustment layer and name it Overall Vibrance/Saturation.
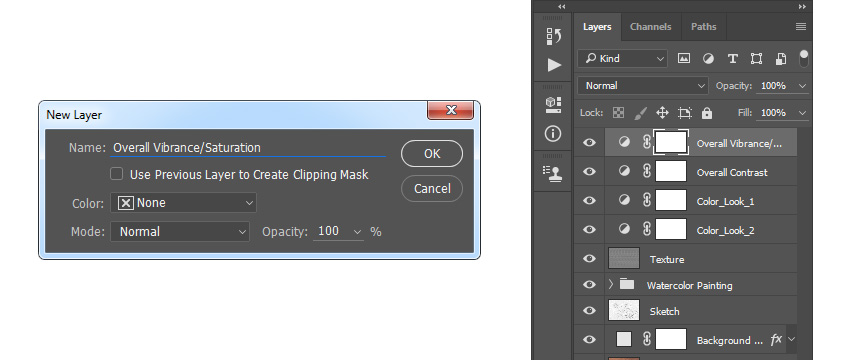
Now Double-click on this layer thumbnail and in the Properties panel set the Vibrance to +33 and Saturation to +19.

Now press Control-Alt-Shift-E on your keyboard to make a screenshot, and then press Control-Shift-U to desaturate this layer. Then, go to Filter > Other > High Pass and set the Radius to 2 px.

Change the Blending Mode of this layer to Hard Light and name it Overall Sharpening.

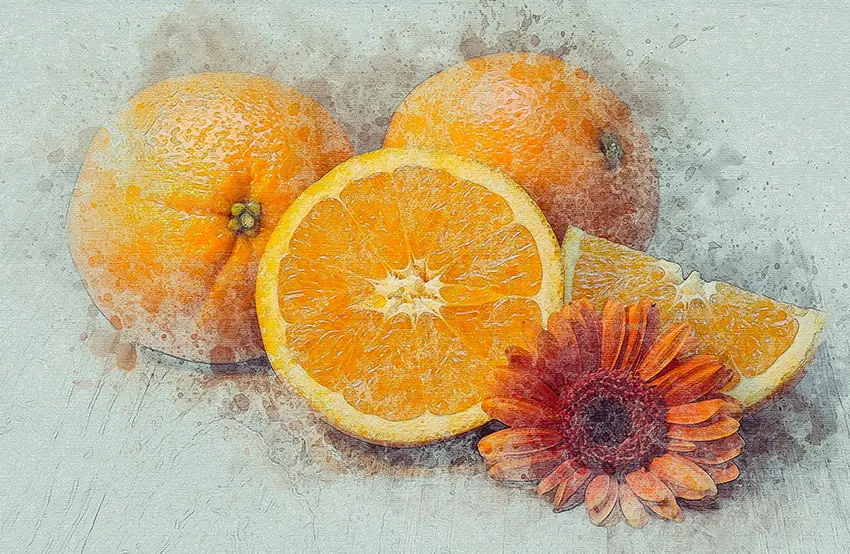
Congratulations, you have succeeded! You’ve learned how to make a watercolor effect in Photoshop. Here is our final result:
If you would like to create the even more advanced watercolor effects shown below, using just a single click and in only a few minutes, then check out this TechnicalArt 2 Photoshop Action.
After learning how to make a watercolor action in Photoshop, you may still want to do it even more quickly and easily.
If that’s the case, check out a few of the premium Photoshop watercolor effects from Envato Elements. You can get access to all of these (and plenty of other premium digital assets) for a low monthly fee!

Let’s begin this list with a beautiful watercolor effect Photoshop action. It takes any image you have and adds a layer of watercolor that transforms it into an impressionist painting.
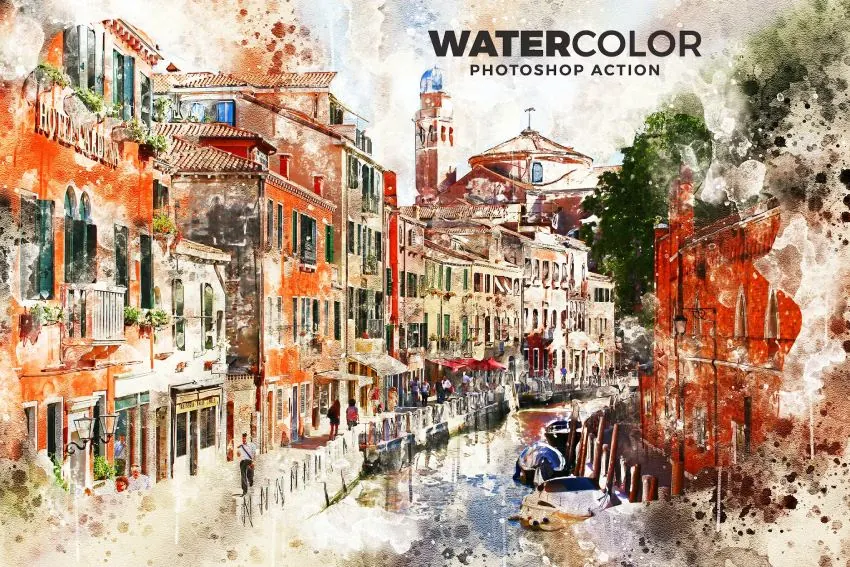
For a more traditional watercolor effect in Photoshop, there’s this option. It has well-defined lines but with an added watercolor texture in Photoshop.
This Photoshop watercolor effect is the middle ground between the first two actions mentioned above. It’s not quite impressionist, not quite defined. It’s just a layer of watercolor for your photos.
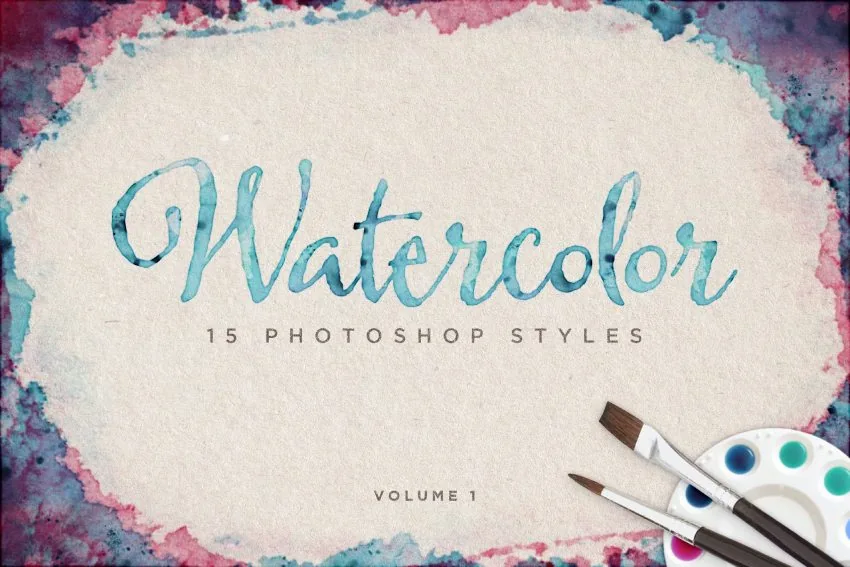
Here’s another great option for a watercolor effect in Photoshop. You can easily add this watercolor texture in Photoshop and give your projects a distinctive, quirky style.
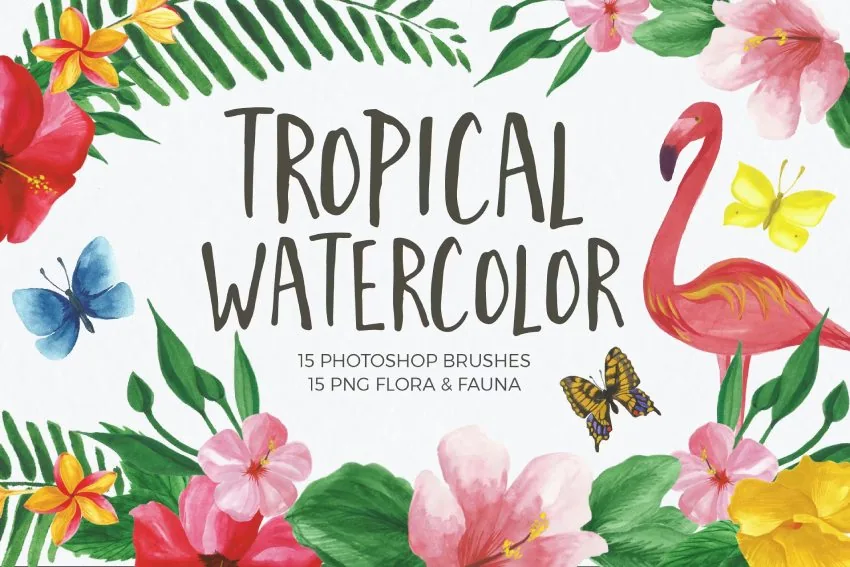
Last but not least, grab this watercolor effect Photoshop action. You can go over your images with a layer of watercolor to make them pop.
Explore movie typography trends shaping 2026, from bold film fonts to cinematic branding, with inspiring examples and practical tips for creating impactful, screen-ready typography.

Explore the bold botanical design trend shaping 2026, from lush patterns and floral design to branding, interiors, and nature-inspired creative projects rooted in biophilic aesthetics.

Learn what font Disney uses, why it’s not downloadable, and discover Disney-style font alternatives to recreate that iconic, playful branding style in your own designs.

Explore PowerPoint templates with professionally designed layouts to create polished, modern, and visually cohesive presentations.