Movie typography in 2026: why does it suddenly look so good?
Explore movie typography trends shaping 2026, from bold film fonts to cinematic branding, with inspiring examples and practical tips for creating impactful, screen-ready typography.
Envato: Get every type of asset for any type of project, and access to AI tools. Start now
Today I'm going to show you how to cut out an image in Photoshop using a few simple techniques and standard Photoshop tools. Then I'll teach you how to add a simple retro effect to the image that you cut. Let's get started!

If you want to learn how to cut out an image in Photoshop via video, check out our lesson on the Envato Tuts+ YouTube channel:
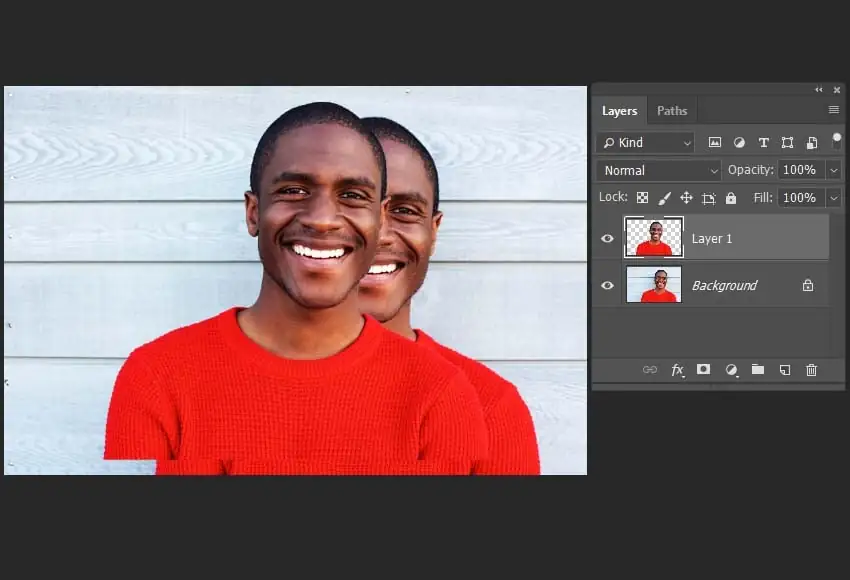
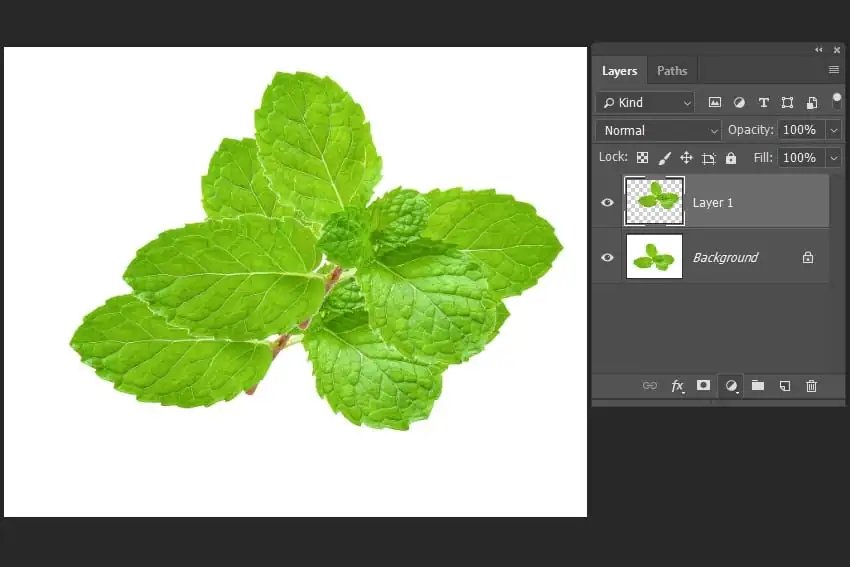
Before learning how to cut out an image in Photoshop, I want to show you which assets were used during the production of the tutorial:
One of the basic steps in learning how to Photoshop pictures is discovering how to cut out images. Let’s try one of the easiest and most effective methods to cut out a Photoshop image. Open your image in Photoshop and go to Select > Subject, and then wait a few moments.
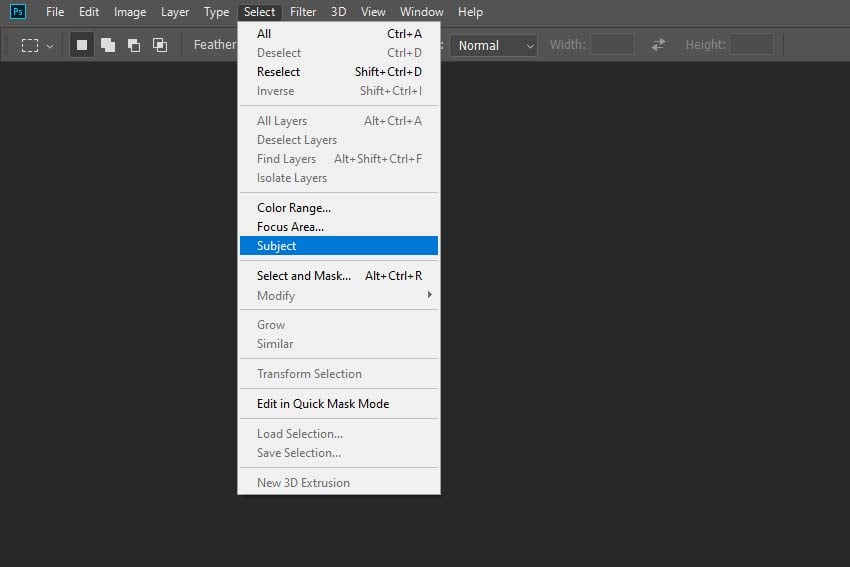
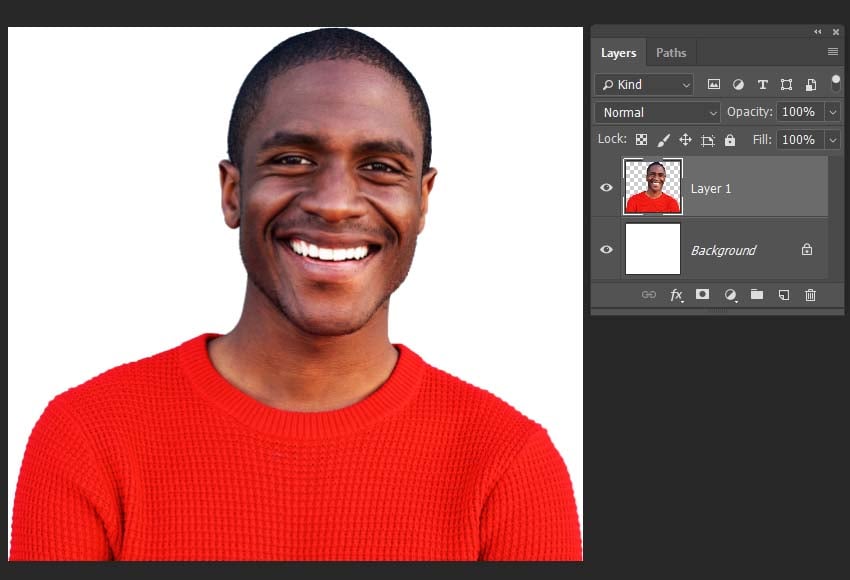
As you can see, our image cutout selection is almost ready now, and we can easily cut out the photo in Photoshop:

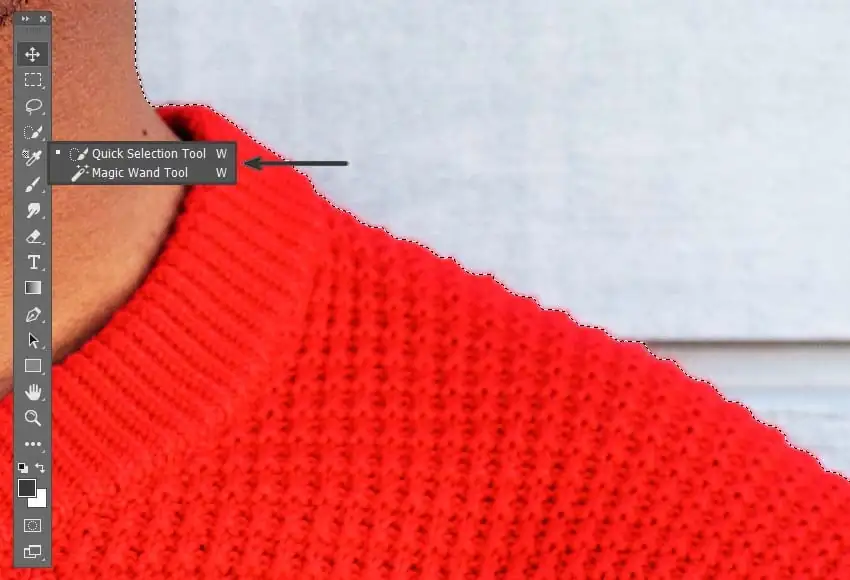
To make your image cutout selection more precise, we can use the Lasso Tool or the Quick Selection Tool. Choose one of these tools, and then add or remove part of the cutout image selection as you need using the Shift and Alt keys.

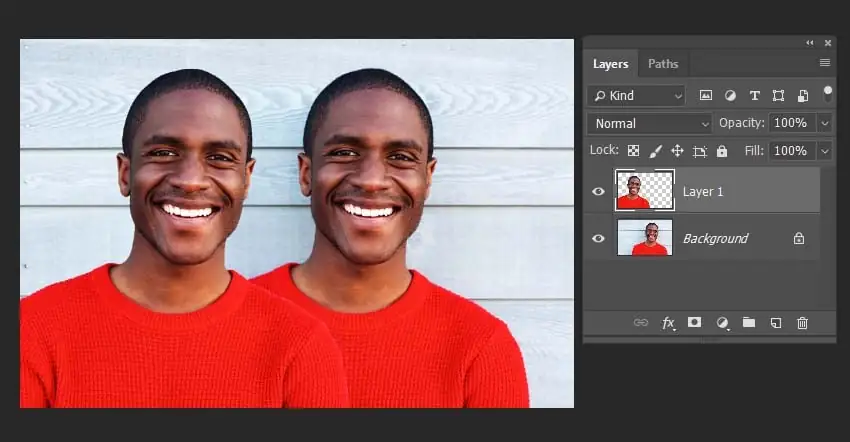
Once you’ve finished with the selection, we are ready to cut this image out. You can do it the following way: press Control-C (or Control-X), and then create a new document and paste your image (Control-V).
Another cut tool Photoshop provides is the Rectangular Marquee Tool—or you could also use the Elliptical Marquee Tool. This selection method is rough, but sometimes it can be useful for some design purposes. Select one of these tools in the Tools panel.

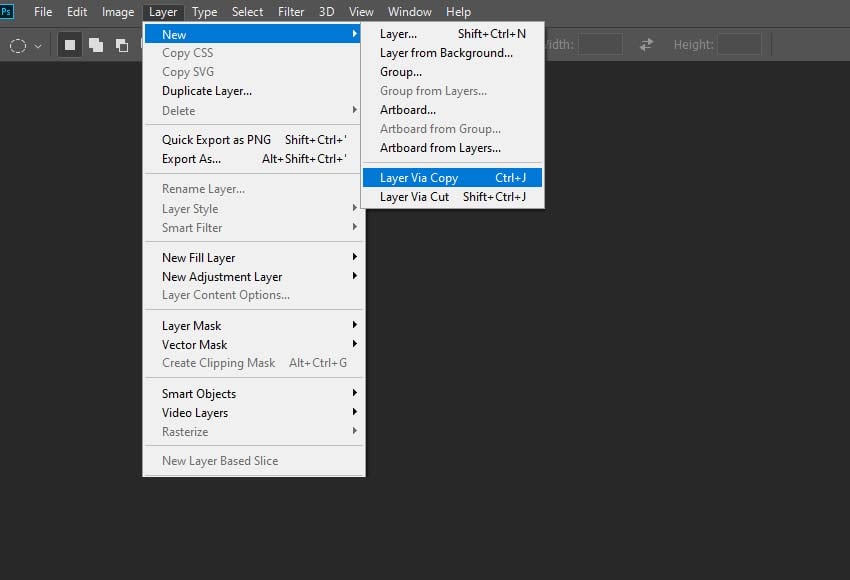
Select the part of the photo cutout you want, and then go to Layer > New Layer > Layer via Cut/Copy, and voila!
As you can see, this photo cutout tool in Photoshop can be useful for creating avatars for social media or, after compressing the image, for use on websites.

Another way to make a precise cut-out picture in Photoshop is with the Lasso Tool. You can find it in the same Tools menu.
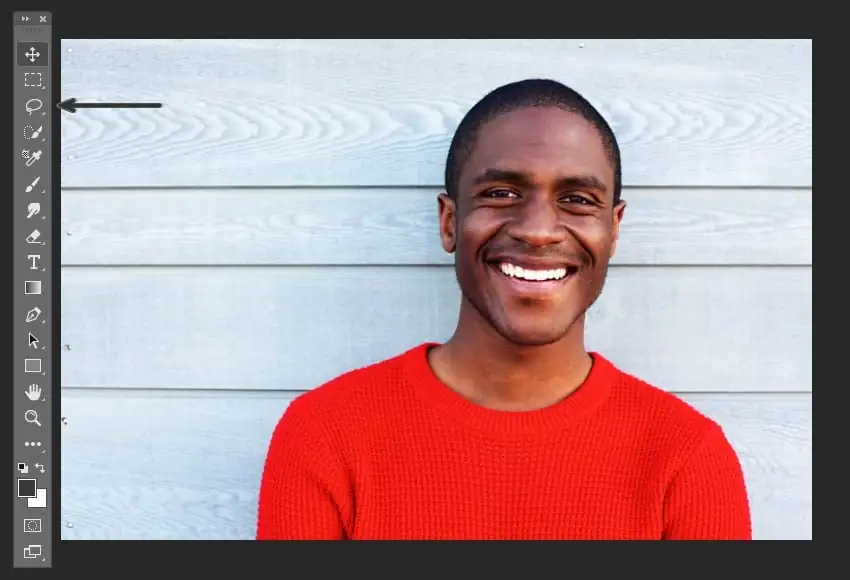
It can be also a great tool to remove or add some parts of the selection. You can add a selection using the Shift key or remove it using Alt to make a more precise selection to cut it out.

Once you’ve finished with the photo cut-out selection, press Control-J to cut out and paste the selection.
You can also use the Quick Selection Tool and the Magic Wand Tool for selecting and cutting the image out. The Quick Selection Tool works pretty similarly to the Lasso Tool, but it creates areas of selection as if you were painting with a brush. The Magic Wand Tool creates selections based on the color, contrast, and hue settings of the cut-out image.
Once you’ve made the selection of your picture in Photoshop, just use one of the previous methods to create a new image based on your selection.
For the next method, I’ll use another image with a solid white background. Let’s go to Select > Color Range, select the color of the background with the Eyedropper Tool, and adjust the selection using the Fuzziness setting.
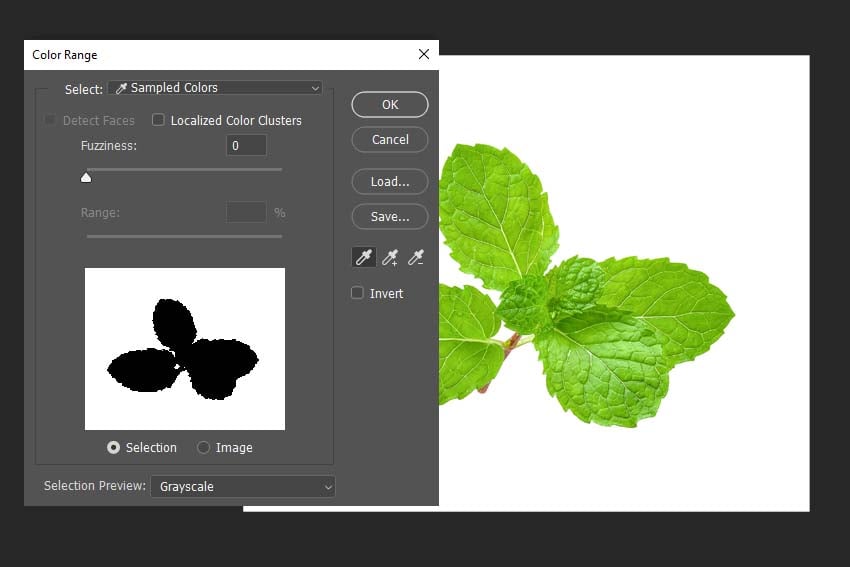
After that, go to Select > Inverse and then just cut the image out using Control-C and Control-V.
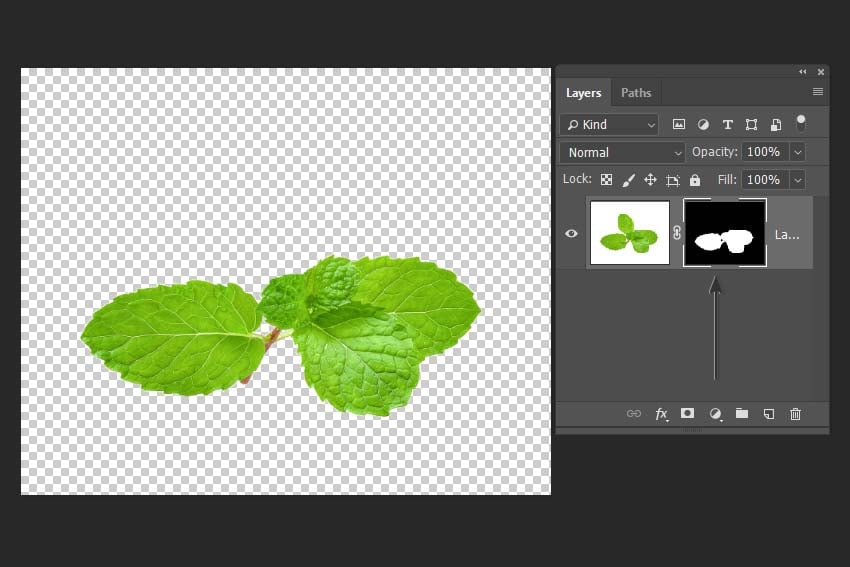
One more cut tool Photoshop method is creating a mask. Let’s create a selection using any of the previous techniques, and then just hit the Add Layer Mask icon in the Layers panel.
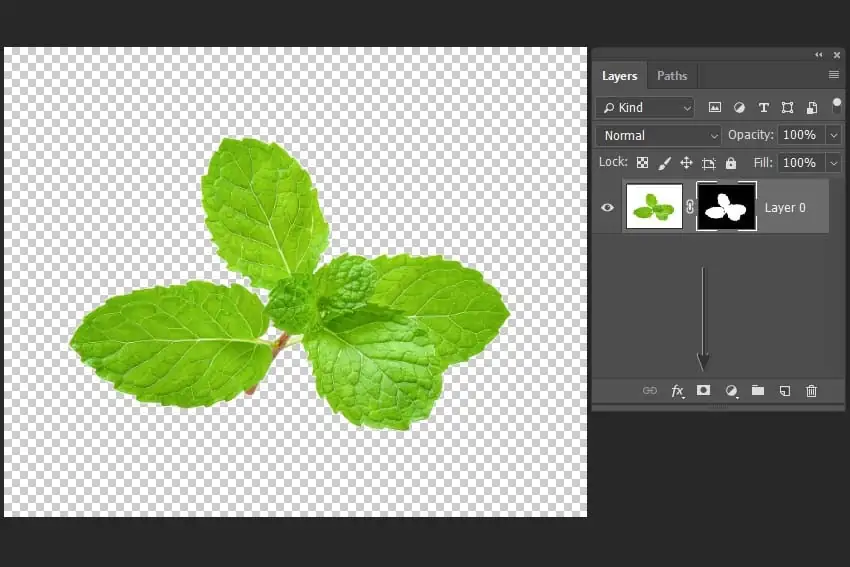
You can adjust your cutout using a standard brush with white and black colors. Just select the Mask in the Layers panel and paint with black where you want to remove a part of the cutout (or white if you want to reveal a part of the image).
Now I would like to show you how you can add a simple retro-looking effect to your cutout image. Create a new document by pressing Control-N, and paste your image. After that, create three copies of the image by pressing Control-J.
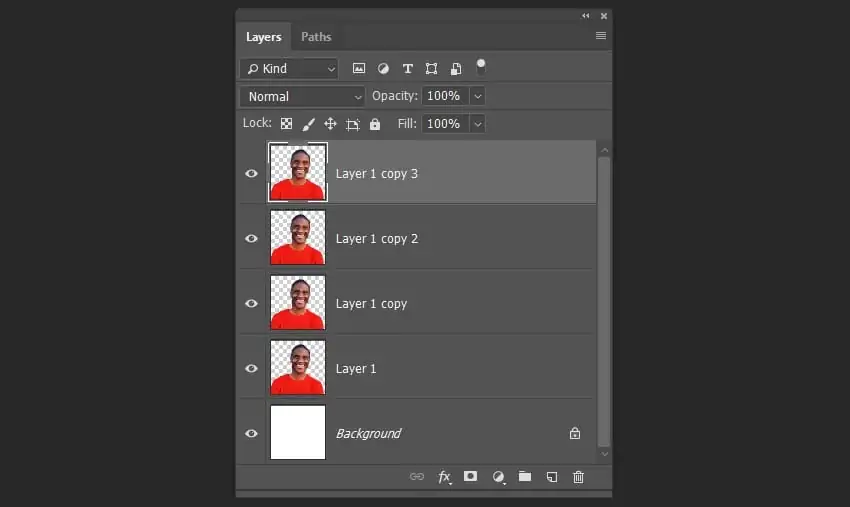
Select the top layer and then press Shift-Control-U to desaturate the image. Then Move all the copies 60 pixels to the left of each other.
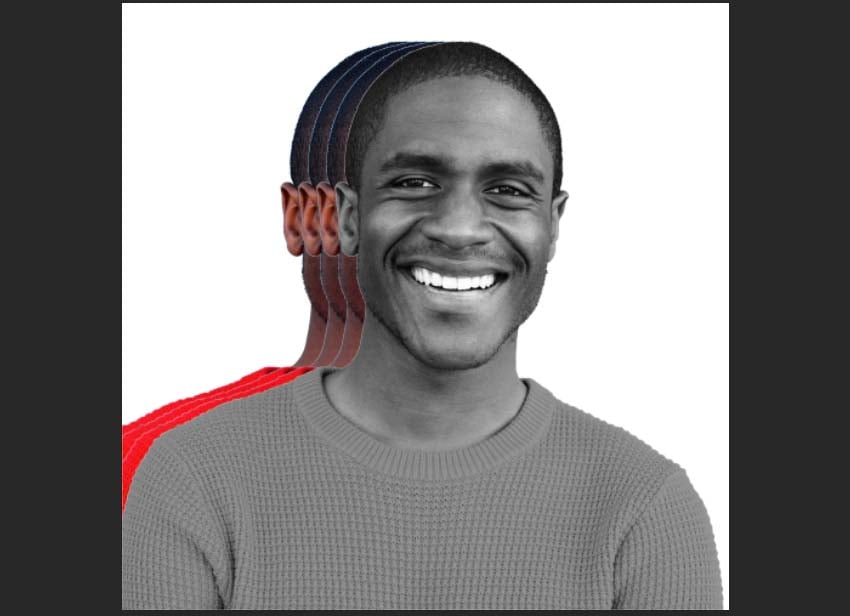
Double-Click on the duplicate and add a color overlay with 100% of the Opacity and any color you like. After that, add the same effect with a different color on each copy of the layer. You can also fill the background layer with any color you like using Shift-F5.
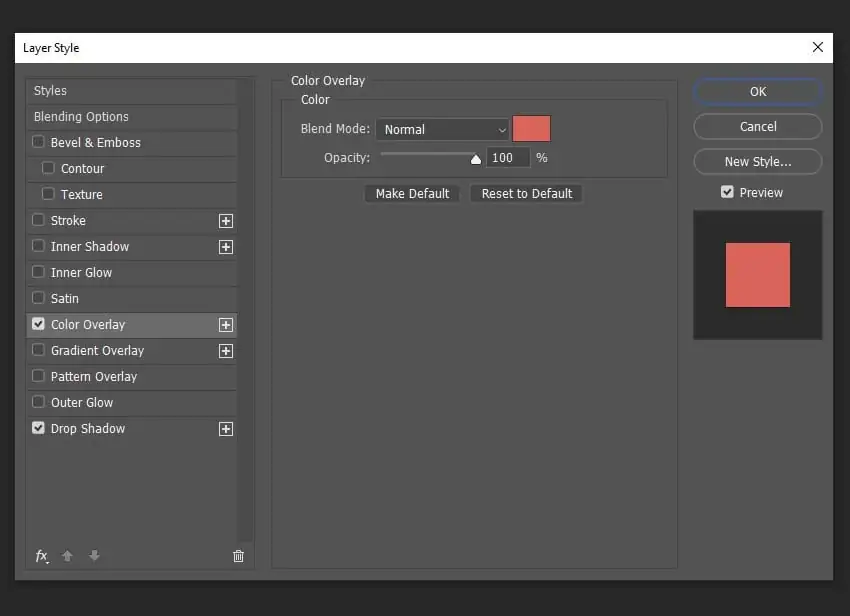
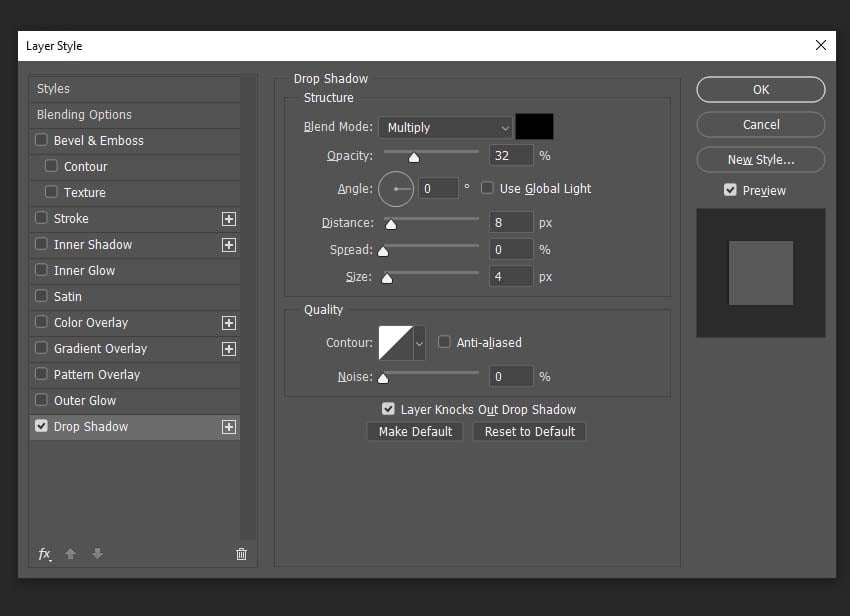
After that, add a Drop Shadow layer style effect to each layer with the settings you can see below:
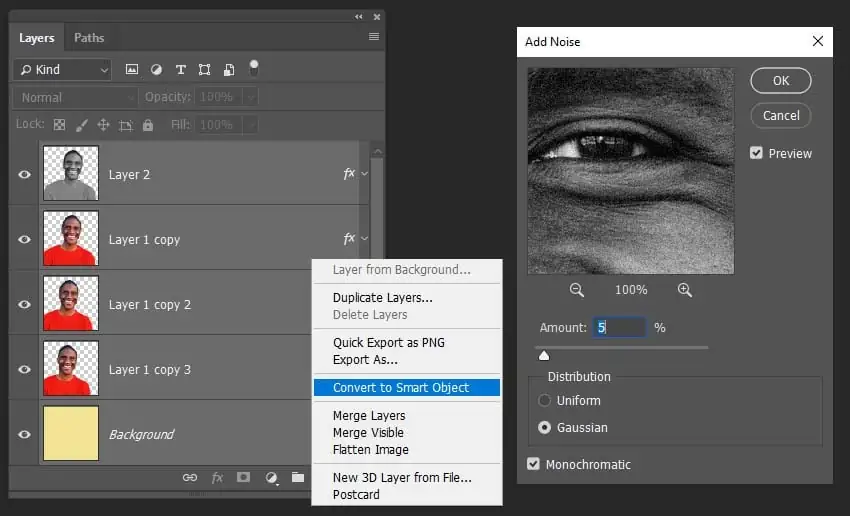
And finally, to add a bit of retro feel to our image, let’s select all the layers while holding Shift and then Right-Click > Convert to Smart Object. After that, go to Filter > Noise > Add Noise and set the Amount to 5% and Distribution to Gaussian.
Congratulations! Now you know how to cut something out in Photoshop in a few different ways and how simply you can apply retro-looking effects to images that you cut.

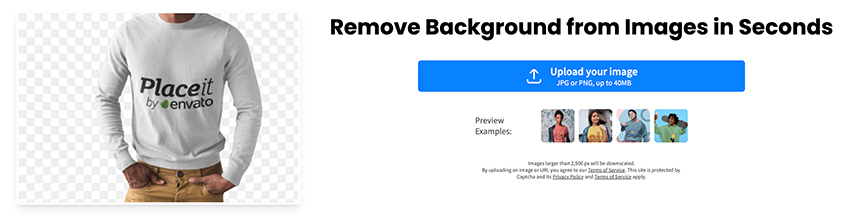
What happens if you need to remove a background but you don’t have Photoshop? If you want to easily remove a background in a few clicks, and using only your browser, Placeit is a great resource. You don’t need to leave your browser—just create an account and start using this cool tool to remove backgrounds.
Use the image background remover tool here:
Explore movie typography trends shaping 2026, from bold film fonts to cinematic branding, with inspiring examples and practical tips for creating impactful, screen-ready typography.

Explore the bold botanical design trend shaping 2026, from lush patterns and floral design to branding, interiors, and nature-inspired creative projects rooted in biophilic aesthetics.
Learn what font Disney uses, why it’s not downloadable, and discover Disney-style font alternatives to recreate that iconic, playful branding style in your own designs.
Explore PowerPoint templates with professionally designed layouts to create polished, modern, and visually cohesive presentations.