Movie typography in 2026: why does it suddenly look so good?
Explore movie typography trends shaping 2026, from bold film fonts to cinematic branding, with inspiring examples and practical tips for creating impactful, screen-ready typography.
Envato: Get every type of asset for any type of project, and access to AI tools. Start now
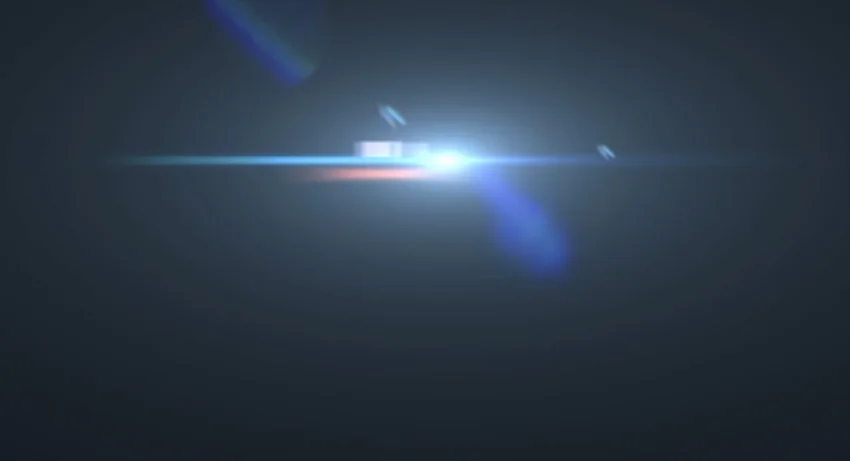
In this tutorial, you'll learn how to add lens flares in Adobe After Effects using an example animation project. Lens flares are just the right thing when you need to add a little bit of flash and pizzazz to your project.


In this tutorial, you’ll learn how to add lens flares in Adobe After Effects using an example animation project. Lens flares are just the right thing when you need to add a little bit of flash and pizzazz to your project.
Our example animation project has an almost retro-futuristic vibe going on, which is perfect for adding lens flares. By adding lens flare effects, we can really make the animation stand out!

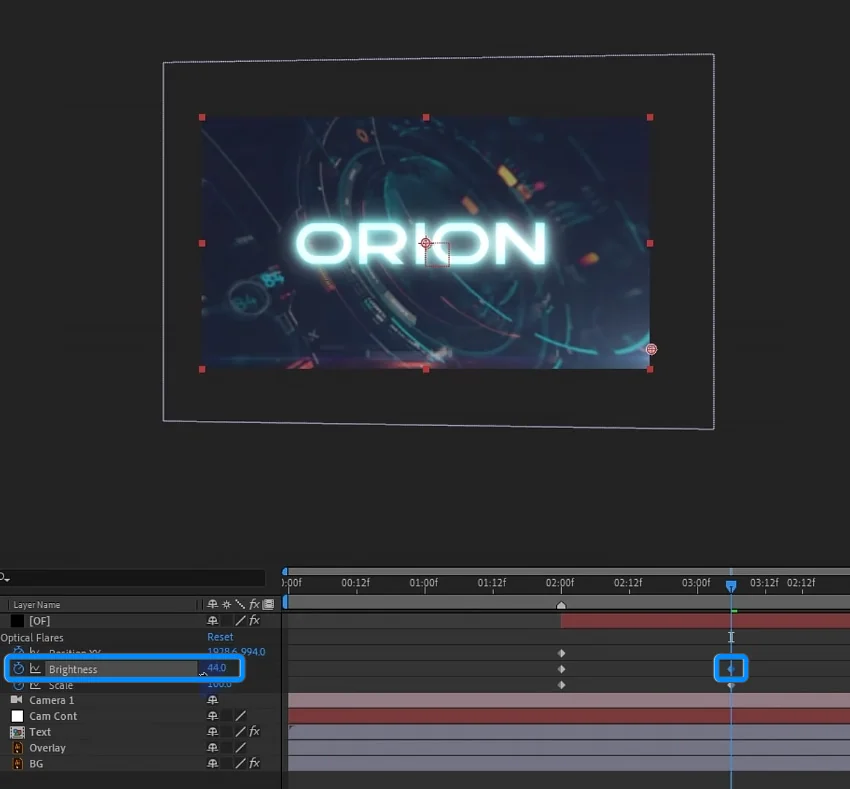
In this example, we want to add some flares just when the text brightens up (when we animate from just the stroke and the light fill comes in). So let’s drop a marker here with the asterisk, so we know when to add the lens flares.

I want to have this whole thing light up nice and bright, and adding some lens flares will make the text appear much brighter than it actually is.
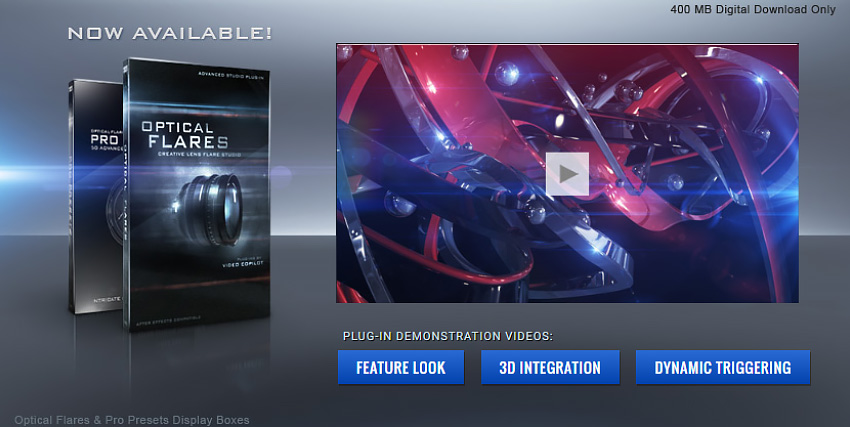
So to accomplish this, I’m going to use a third-party effect called Optical Flares. This is by Video Copilot, and it’s probably one of the best lens flare plugins out there.
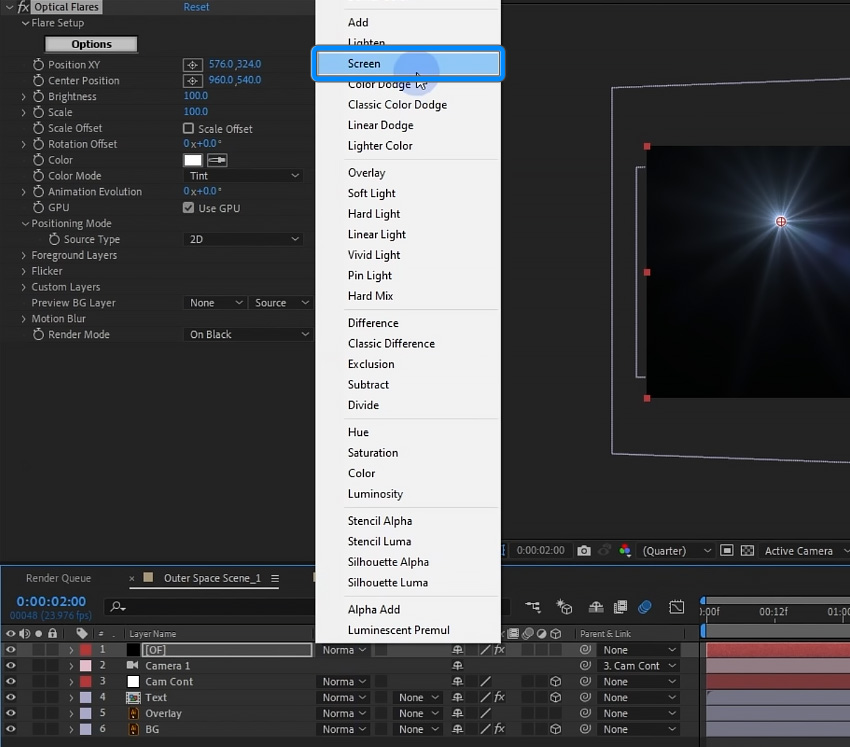
So to apply optical flares, I’m going to create a solid by going to Layer > New > Solid. Name this ‘OF’ for optical flares.

Then go to the Effects & Presets tab, type in “Optical Flares”, and then add it to the solid by double-clicking or clicking and dragging the effect to the solid.

Set the solid to Screen.
Then, in the Effect Controls panel, jump into the options by double-clicking the Options button. This will open up a new window where you can customize your flare.
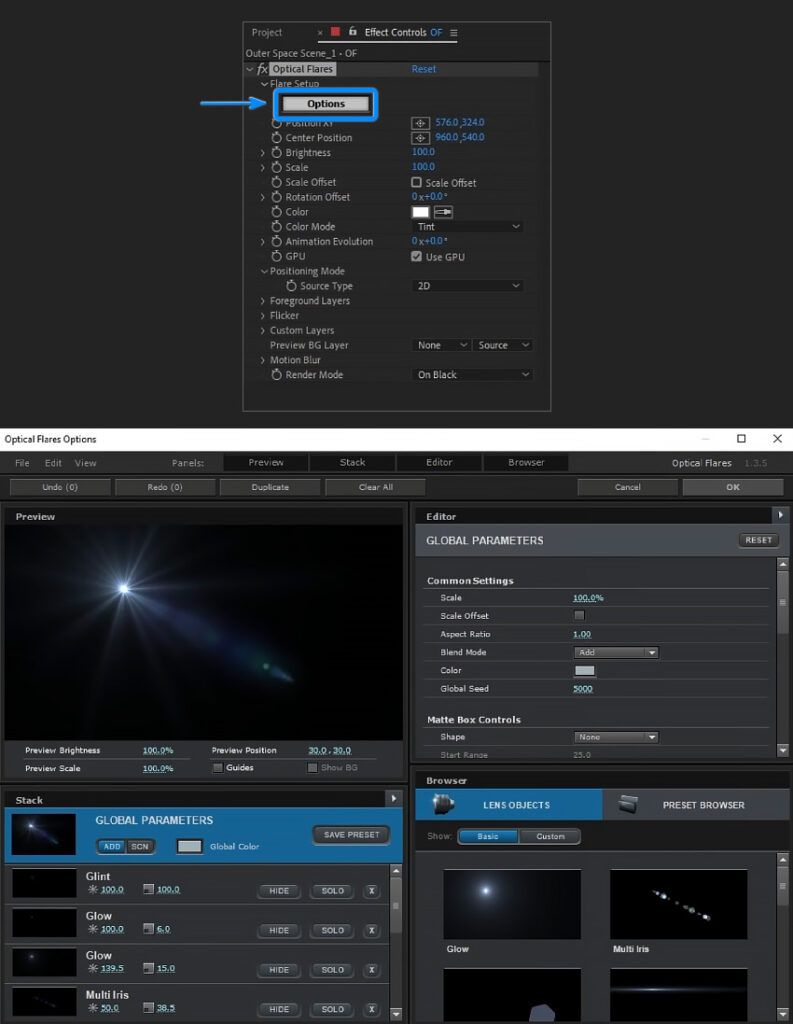
Now, the Optical Flares plugin comes with some default flares, and then there are some pro presets that you can choose from. It also comes with a bunch of different preset packages. So choose the one that you like the look of. For this example, I’ll choose the preset called Sub Zero from the preset browser.

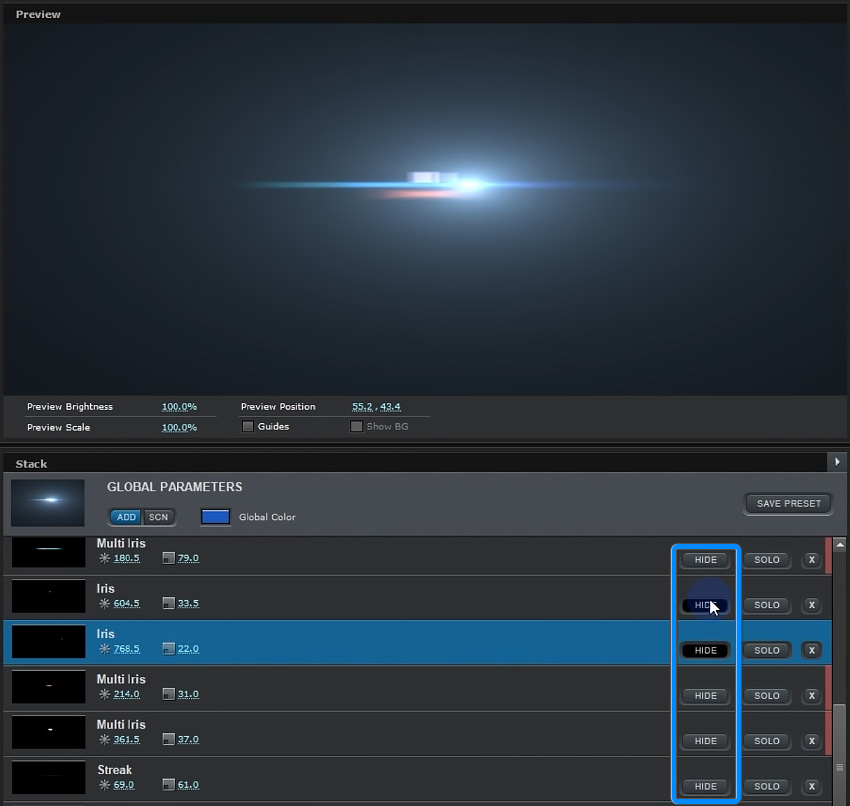
There are some parts of the lens flare that I would like to remove. Thankfully, I can remove parts of the flare by clicking on the Hide button (located below the preview window). So just find the layer that you want to remove and then hide it.
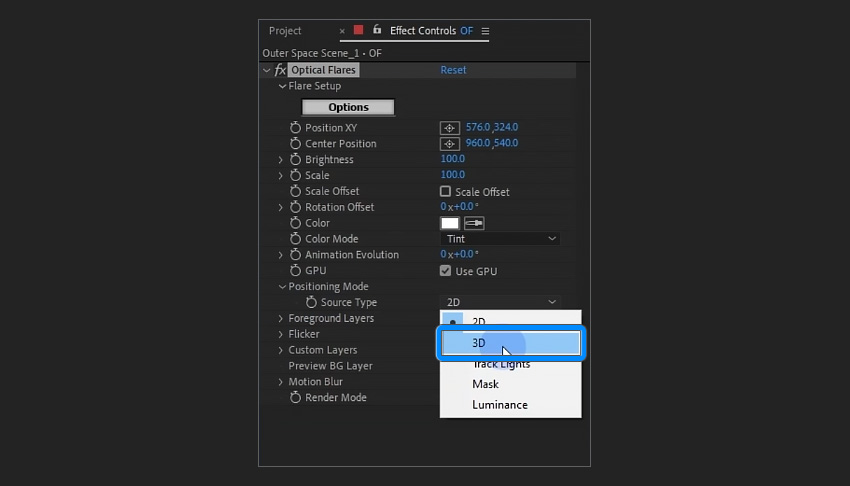
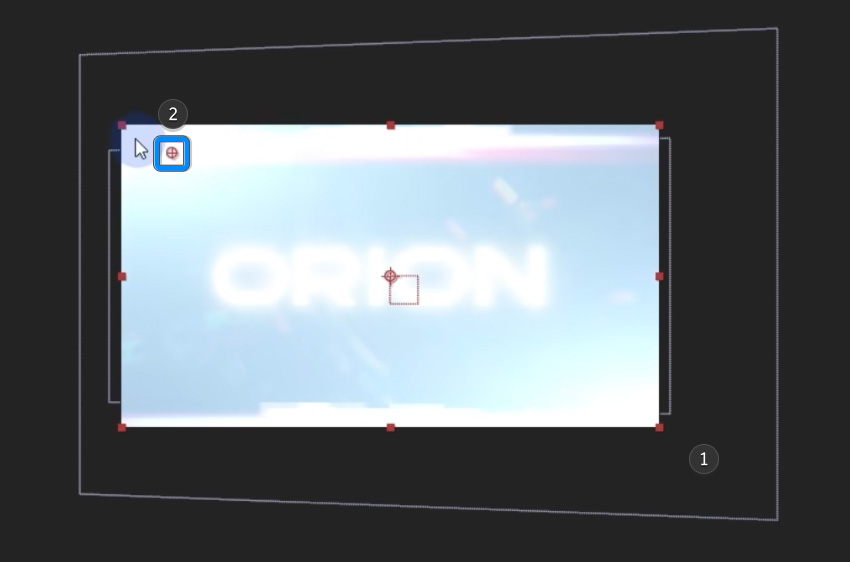
Back in the Effect Controls panel, I’m also going to change the Positioning Mode to 3D, which will help it track a little better with the camera.
And then I’m going to position it just on the edge of the frame when it reaches the marker that we created on the timeline.
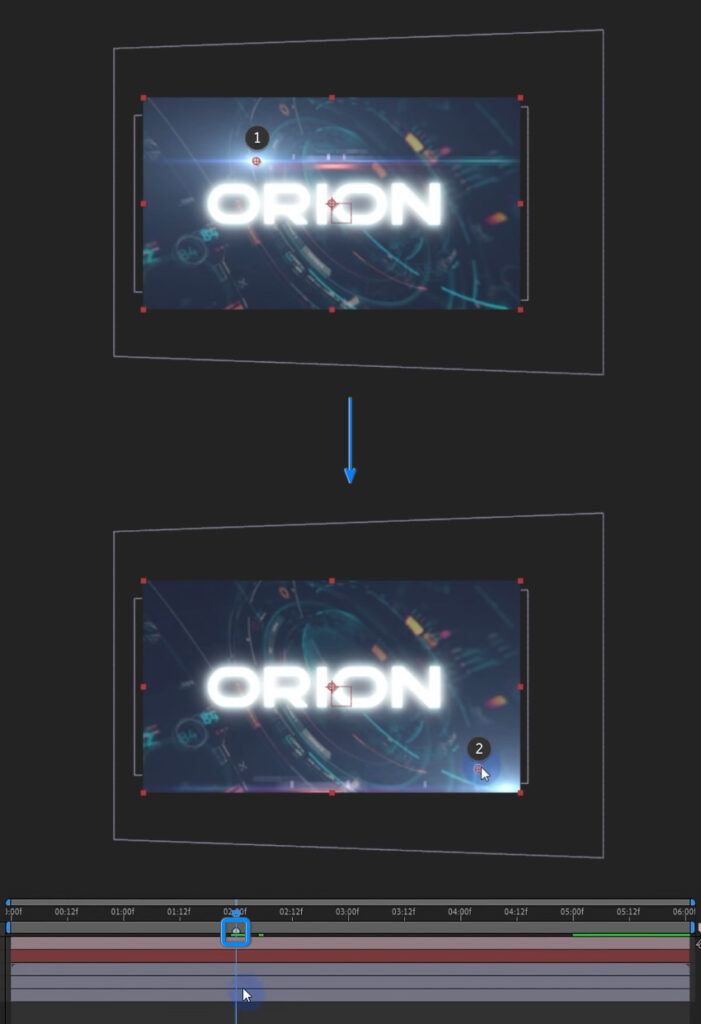
I will also trim up the beginning of the layer with the begin bracket key [ so that the lens flares start right here, and I’m going to animate the position by adding a position keyframe.
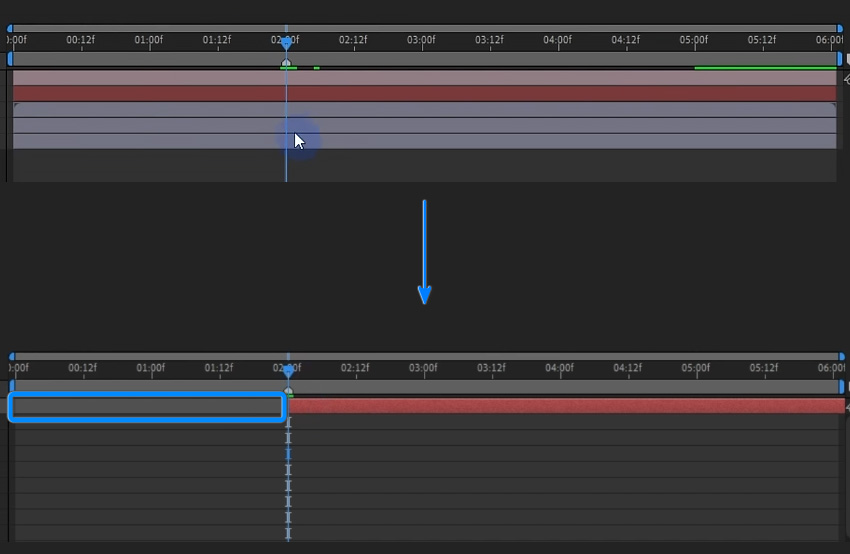
Then I’ll move forward in the timeline and adjust the position in the Effect Controls panel so that it moves further down.

Let’s go back to the marker and animate the scale and the brightness. You can increase both to your liking.
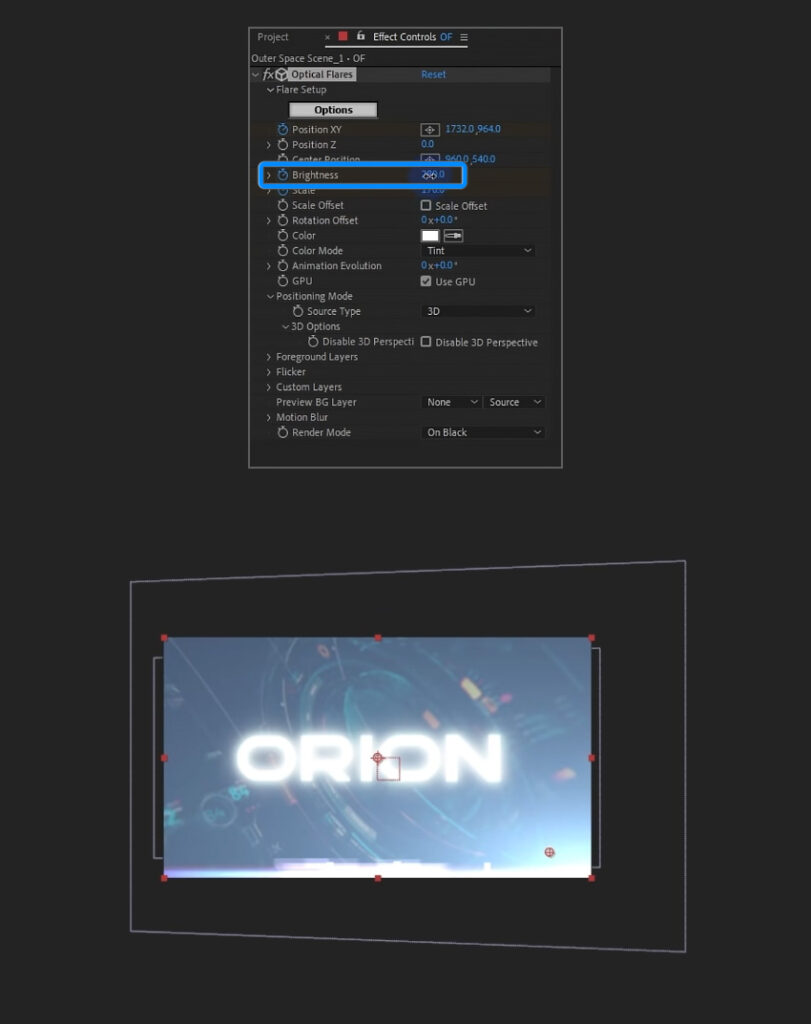
Move forward in the timeline again, and then reset both the brightness and scale or turn them down to your liking.
Select all the keyframes and ease them.
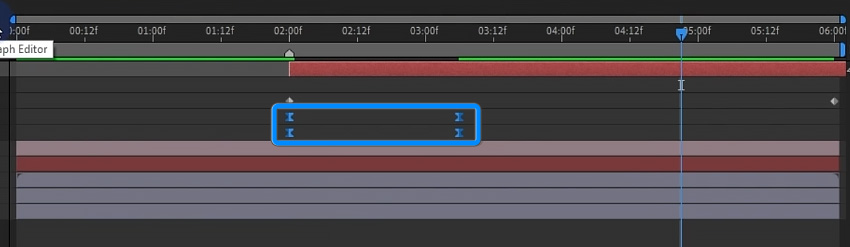
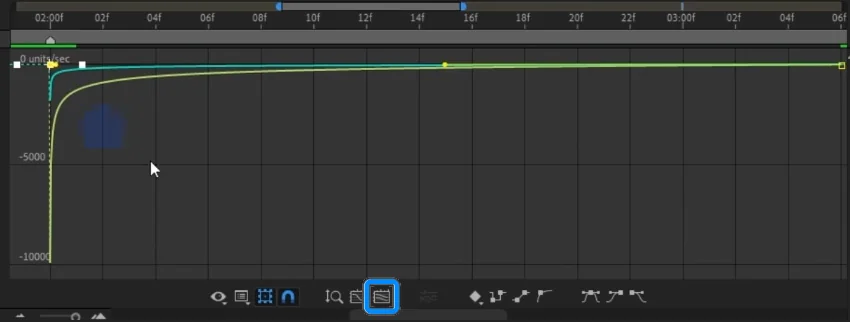
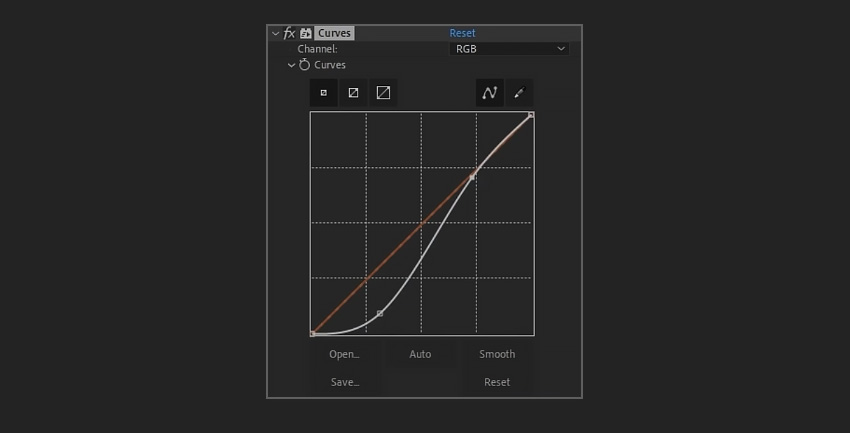
Go into the Graph Editor and select Speed Graph. Click on the Fit All Graphs to View button. Then give it a curve that looks similar to the one below. This will make the flare look like a flash if the curve is that exponential shape.
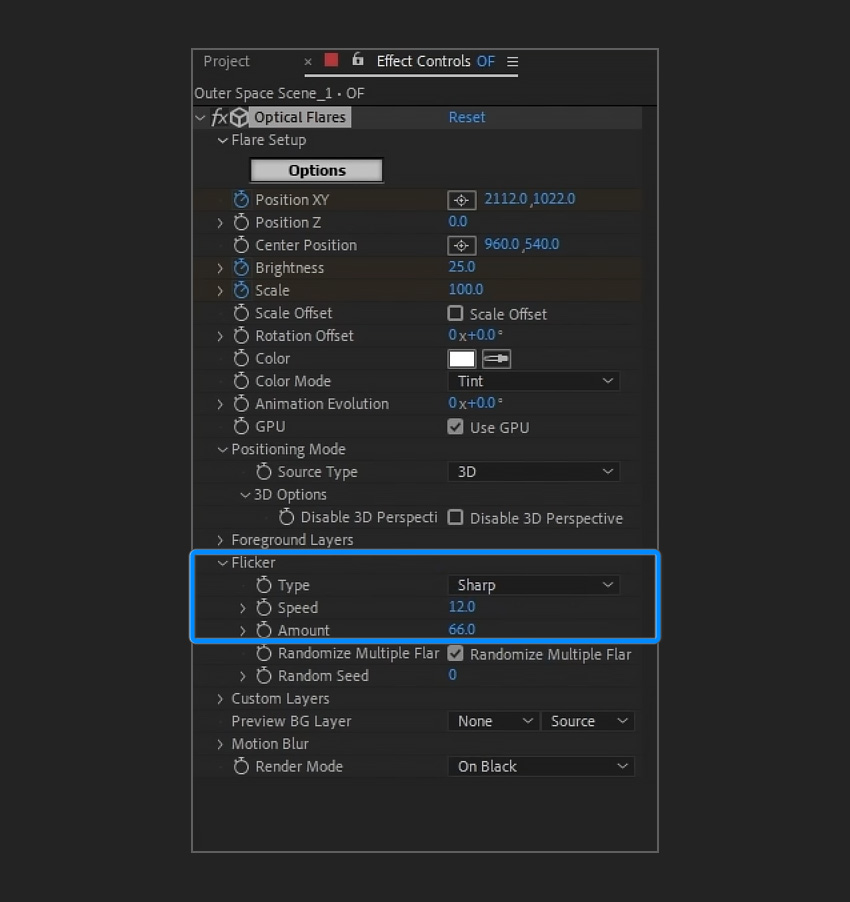
The Optical Flares plugin also has a Flicker section where you can further adjust the look of your flare. Change the Type to Sharp. Turn up the speed and amount to your liking.
The only thing that I would do in addition to this is give the background a bit of an RGB split.
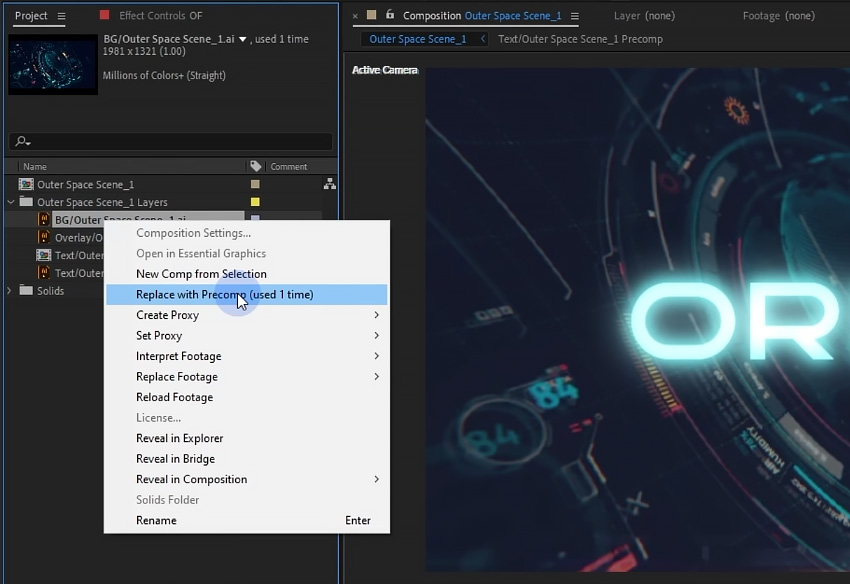
Select the background layer in the Project panel, right-click on it, and select Replace with Precomp. And that’s going to precomp my background layer.
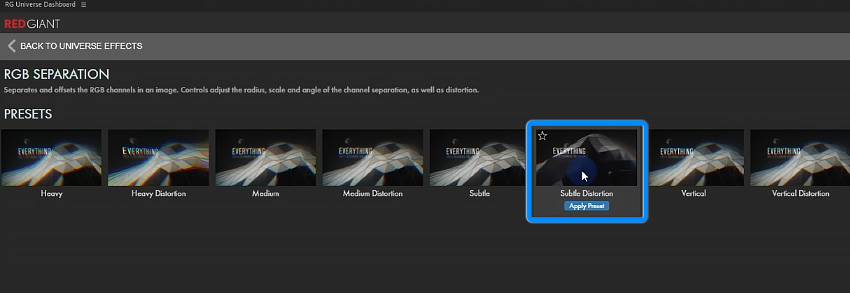
I’m going to double-click and go onto my background layer. And here we will apply another third-party effect. This one is from Red Giant Universe, and it’s called RGB Separation.
Universe is a collection of all kinds of very useful effects for After Effects and Premiere. And one of them that I’m very fond of is this RGB split. It separates the red, blue, and green channels in space, and it has this really cool-looking effect that I just love.

You can also use the preset browser, where you can choose a bunch of different looks. For this example, we will apply the Subtle Distortion preset.
You can also duplicate the Optical Flares layer and use the position XY to move it around the screen to where you want it (you will also need to change the end position keyframe).
You could also add a Curves effect to the Optical Flares layer to further adjust the look of your animation.
Congratulations! And that’s how you can add optical lens flares in Adobe After Effects. Now that you’ve learned the basics, check out some of the other tutorials we have on Adobe After Effects below.
Explore movie typography trends shaping 2026, from bold film fonts to cinematic branding, with inspiring examples and practical tips for creating impactful, screen-ready typography.
Seedance 2.0 — ByteDance's AI video model known for its physical realism and scene complexity — is now part of the model lineup behind Envato's AI video generator. Here's what changes.

Discover bold music video fonts for 2026, with top picks and bonus styles that help creators match sound, genre, and mood with striking visual identity.

Learn how to build an AI character design workflow, from generating concepts with AI to refining and transforming them into clean, stylised 3D characters in Blender.