Movie typography in 2026: why does it suddenly look so good?
Explore movie typography trends shaping 2026, from bold film fonts to cinematic branding, with inspiring examples and practical tips for creating impactful, screen-ready typography.
Envato: Get every type of asset for any type of project, and access to AI tools. Start now
A diagram is worth a thousand words, especially if you’re trying to explain a process. And if you know how to make a flowchart in Word, you don’t need a different diagram-creation tool.

You can make a flowchart right inside Microsoft Word, no programming or design skills required. Keep reading to learn what you need to know about how to create a flowchart diagram in Word.
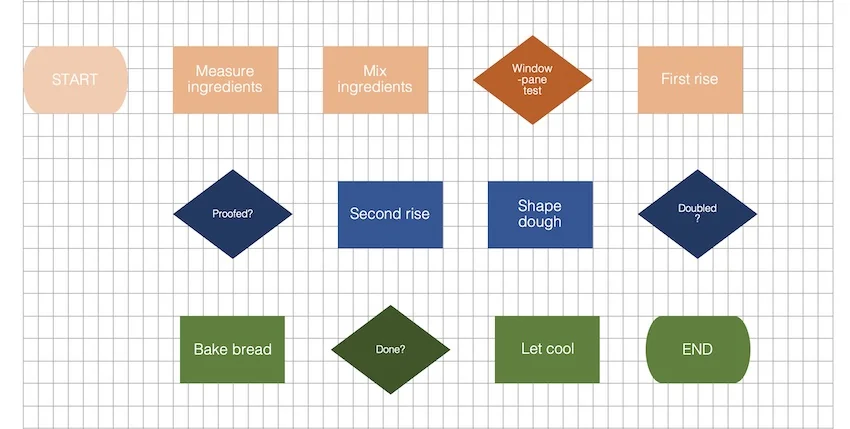
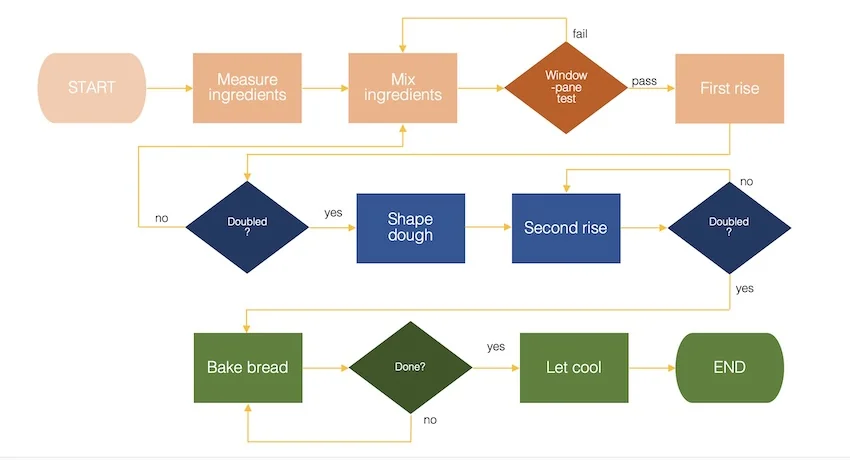
A flowchart is a graphical representation of a series of steps or actions. It’s most effective for depicting a process, data flow, workflow, or decision steps. In a flowchart, each shape holds a meaning. The most basic ones are:
Other shapes are used in flowcharts for very specific applications, like data flow diagrams, but these basic flowchart symbols should be enough for the most common charts. Whether you need just the basics or specialized shapes, you can find them in Word.
In this tutorial, I’ll walk you step by step through how to make flow charts in Microsoft Word using basic shapes. Word offers two ways to create a flowchart. Use the method that lets you make the flowchart you envision.
Note: For this tutorial, I used Microsoft Word for Mac version 16. If you’re using a different version of the application, the interface and steps may be different.
The first way to create a flowchart in Word is by inserting shapes in your document. Here’s what to do:
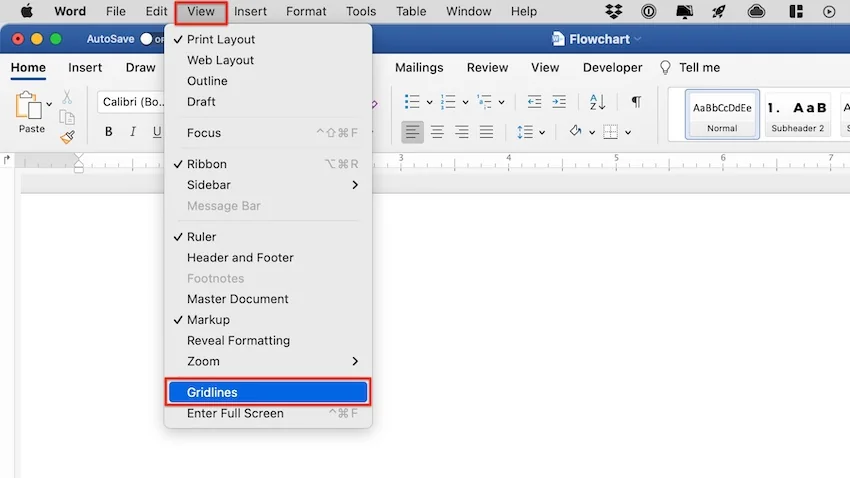
Before getting started, make sure to switch on gridlines. This will make it much easier for you to create a nice-looking flowchart. When gridlines are on, shapes and lines snap to regular spaces, making it easy to align elements.
To switch on the gridlines, go to View > Gridlines.
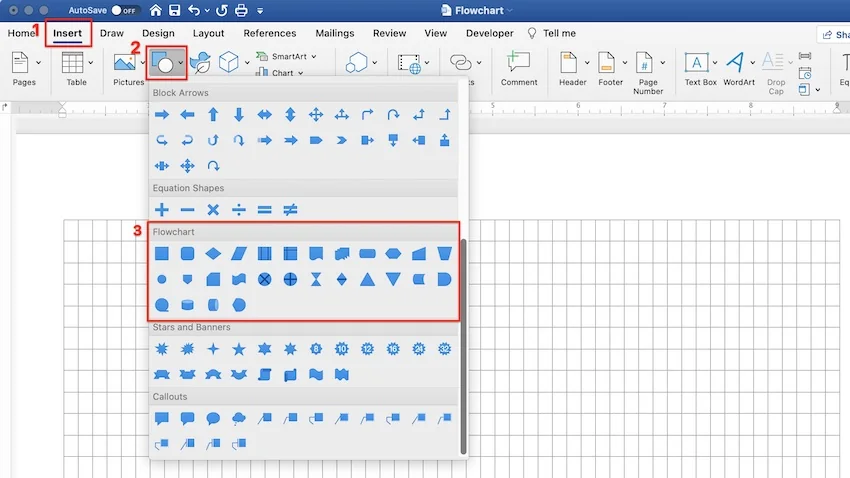
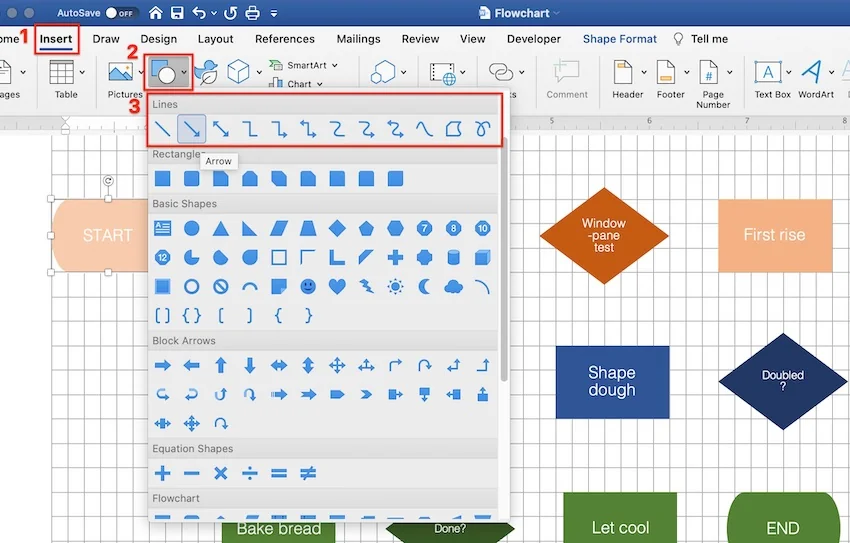
Now you’re ready to start inserting shapes. Go to Insert > Shapes. The shape menu appears. Scroll down to the Flowchart shapes. If you hover over any shape, a tooltip appears, letting you know what the shape means. Click on the shape you wish to use.
The cursor turns into a crosshair. Click and drag the crosshair to create the shape to the size you want.

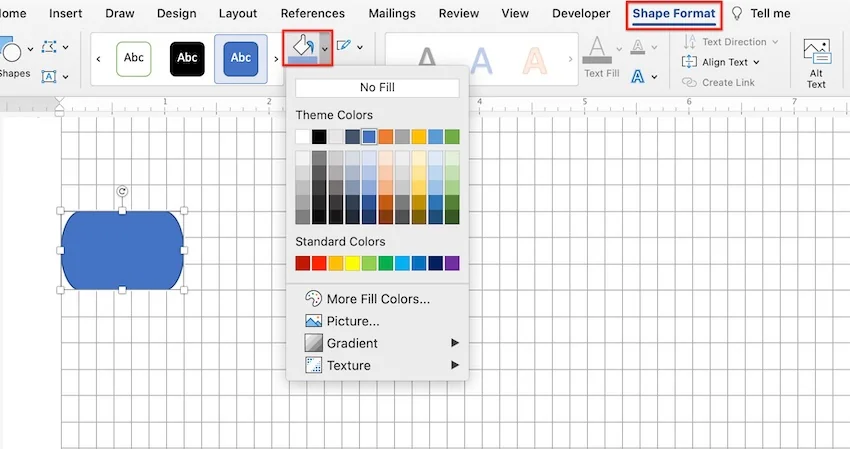
Use the options on the Shape Format ribbon to format the shape’s fill color, border, and other attributes.
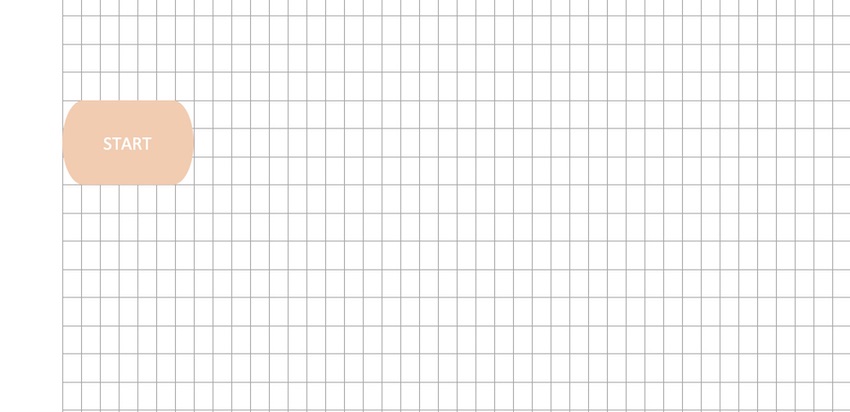
To add text inside a flowchart shape, first select the shape. Then, start typing. The text will appear inside the selected shape.
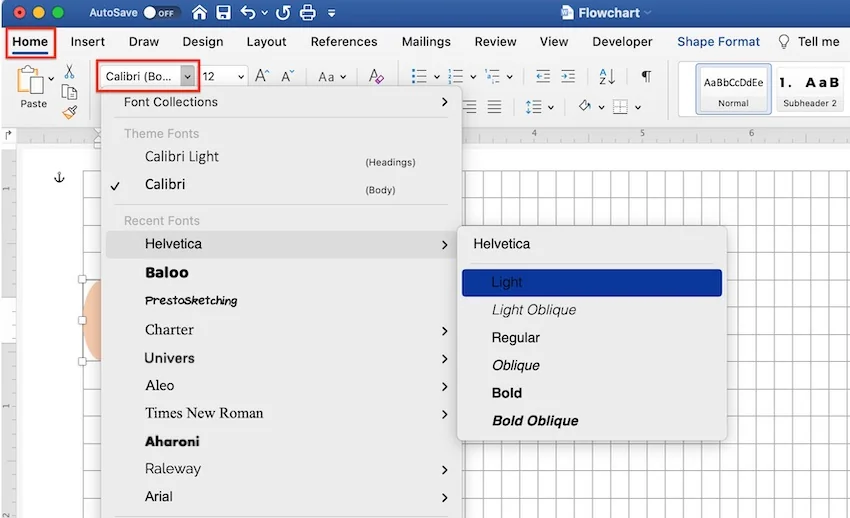
If you wish to format the text inside a shape, select the shape. Under the Home tab, use the formatting options to select the font, font size, and other attributes. To ensure the security and originality of your document, it’s also important to know how to add a watermark in Word.
Repeat the previous steps to create all the shapes you need for your flowchart. Use the gridlines to arrange them on your document.
Next, you’re going to want to connect the shapes with lines or arrows.
To insert an arrow, go to Insert > Shapes > Lines. The line menu opens. Click on the line you wish to use.
Under the Shape Format tab, use the options to format the connector.
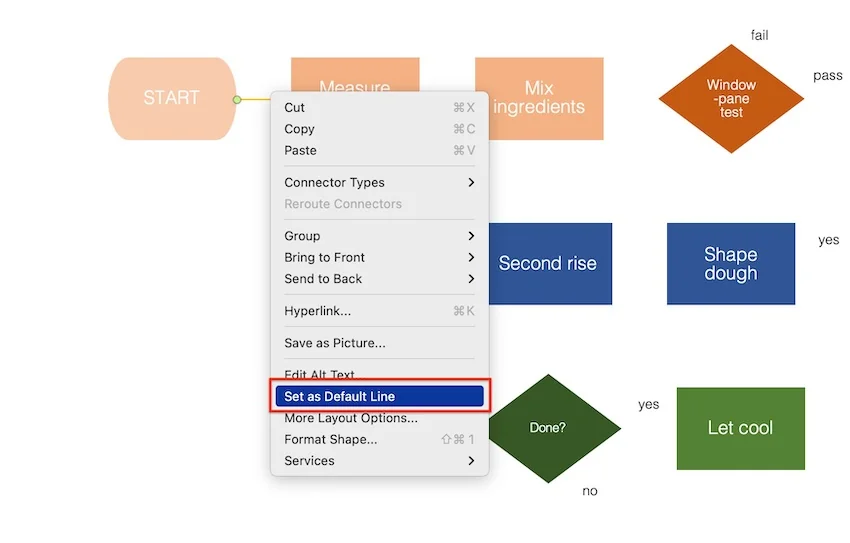
When the line is formatted as you like, set it as a default line. That way, Word will use the same formatting settings for the next lines you create, and you won’t have to keep formatting each one.
To set a line as the default line, right-click on it, and then select Set as Default Line.
Repeat the process until you’ve inserted, formatted, and arranged all the connectors you need.
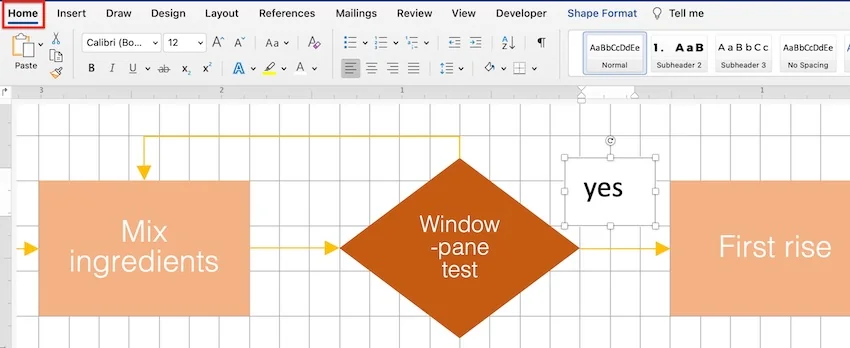
You may find that you need text outside of the shapes in your flowchart.
To add text, go to Insert > Text Box. Click and drag the cursor where you want to place the text box. Type the text inside the box.

Next, format the text. With the text box selected, click on the Home tab. Use the formatting options on the ribbon to format the text.
When your flowchart is complete, switch off the Gridlines, and enjoy your creation!
Another way to create flowcharts in MS Word is by using SmartArt. It’s a pre-designed visual template in Word that lets you quickly make charts and diagrams. You can format SmartArt—up to a certain extent—and personalize it with your own information.
To create a Microsoft SmartArt flowchart, follow these steps:
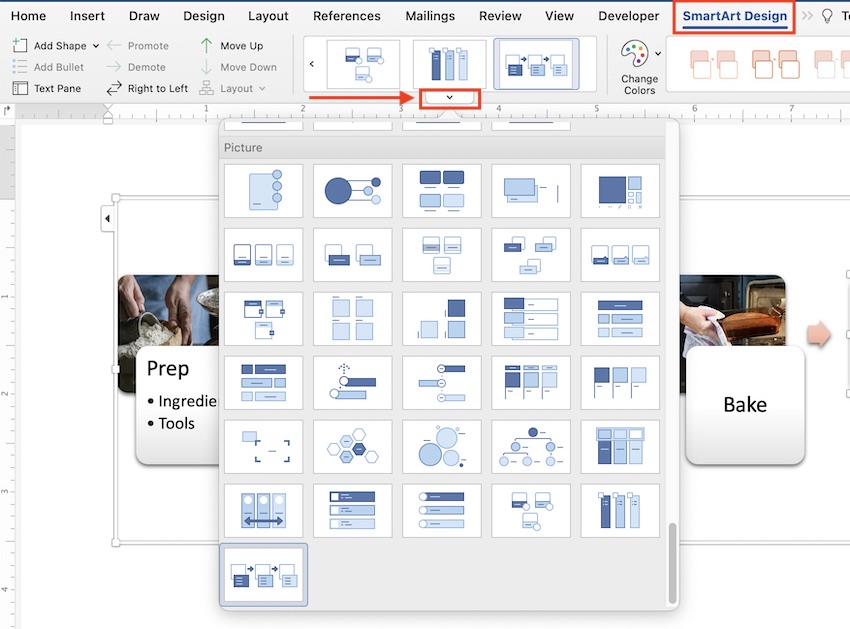
Go to Insert > SmartArt > Process. Click the down arrow. The Process menu pops up with all the process graphic options.
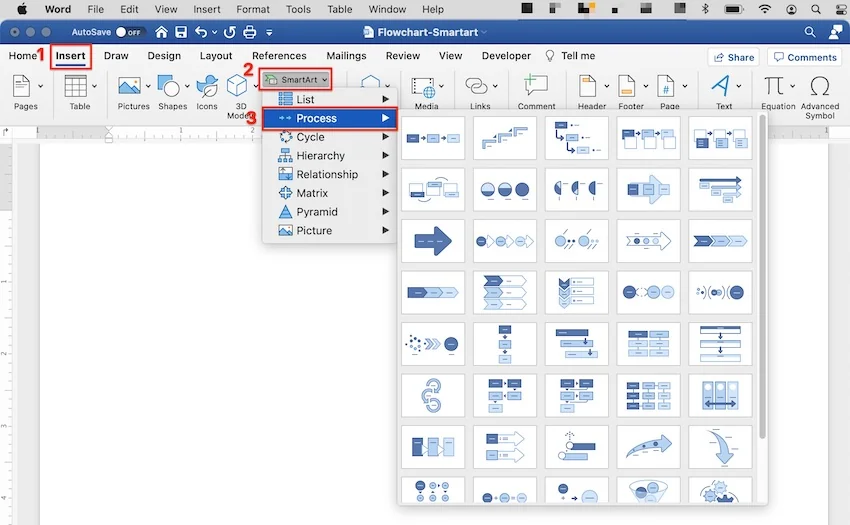
Choose the SmartArt that’s most suitable for the flowchart you wish to create.
Under the SmartArt Design tab, use the tools on the ribbon to format the various elements of the SmartArt.

Explore the special effects menu to see ways you can spice up your chart.
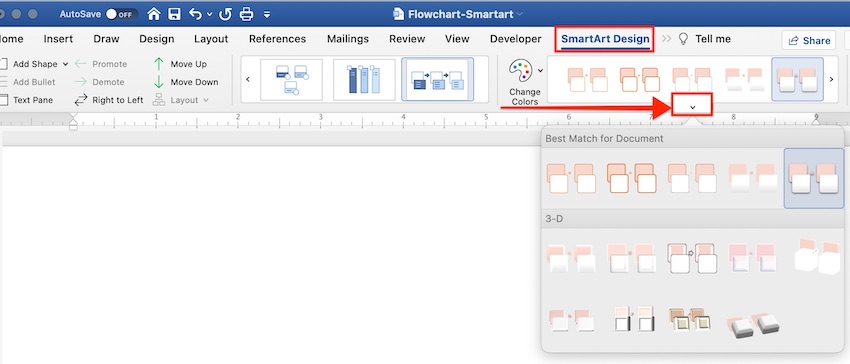
At any point, you can also change the style of your Microsoft SmartArt flowchart. First, select SmartArt. Under the SmartArt Design tab, open the styles menu. Click on a different style you wish to apply.
You’ll probably need to add steps to your process SmartArt. To do this, make sure you’re on the SmartArt Design tab. Click on the Add Shape drop-down menu and choose from one of two options:

You can add steps at any point in your workflow. But I suggest you add all the steps you think you’ll need before you add your text.
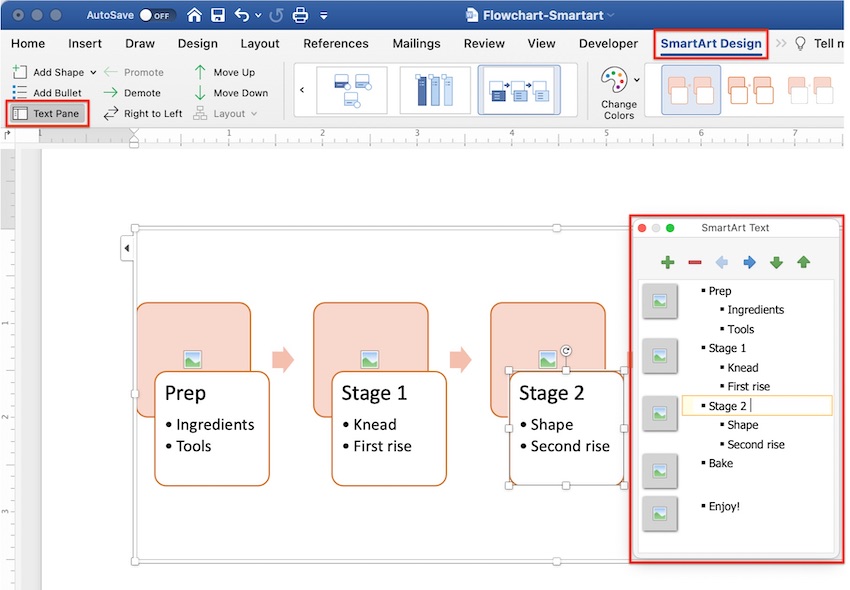
To add your text, click on a text box—it’ll have a placeholder that says “Text”—and type your own text. Under the SmartArt Design tab, you can also click on the Text Pane button to add and edit text through the SmartArt Text pane.
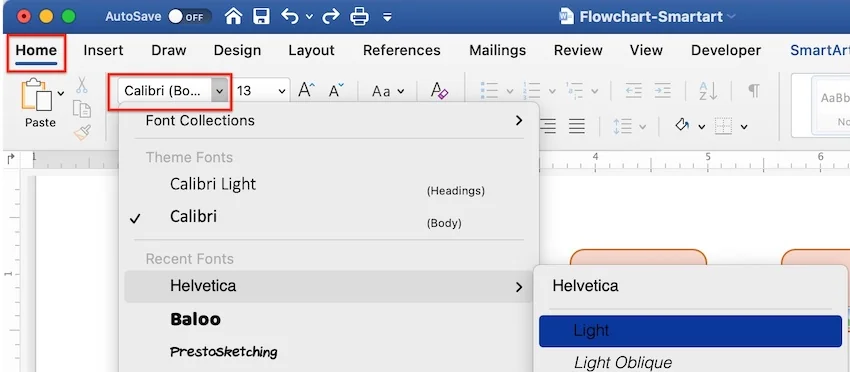
You can also format the text inside the SmartArt. First, select the text box, and then click on the Home tab. Use the formatting options to change the font, font size, and so on.
If the SmartArt flowchart style you created includes pictures, now’s the time to add your custom images.
Click on the image icon. This launches your document finder. Click on the image file you want to add, and then click Insert.
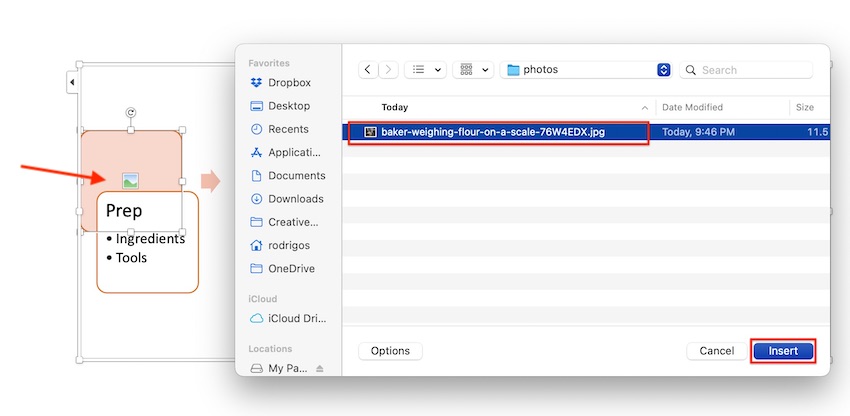
Make sure your image has the correct proportions for the image placeholder in the SmartArt. If the placeholder is square, edit your image to be a square before inserting it. Otherwise, it may get cropped awkwardly.
Repeat the steps above to complete your Microsoft SmartArt flowchart.

Now that know how to create a flowchart diagram in Word using two methods, you may be wondering which is the better way: Shapes or SmartArt?
Each has its advantages and disadvantages.
Use Flowchart Shapes to create a flowchart if:
Consider using SmartArt to make a flowchart if:
Microsoft Word gives you two convenient ways to make MS Word flowchart diagrams. To get the best results, keep these tips in mind:

Have a clear vision of what you want your flowchart to look like. Sketch it out with pen and paper, and know exactly what text and images you’re going to use.
Use a consistent style among the shapes and connectors in your flowchart. For example, use just one or two fonts for the text.
For the greatest legibility, make sure your chart fits all on one page. You may have to change the document’s orientation from portrait to landscape to accommodate a long or wide flowchart.

As mentioned above, shapes have specific meanings when used in flowcharts, but your readers may not know what those are. Make sure your flowchart makes sense even if this is the case. It’s also a good idea to include a legend or symbol key to let your readers know what the various shapes stand for.
In the English language, readers read from left to right and top to bottom. If your flowchart is more than one level long, continue the second level on the left side of the page.
(Of course, if your document is in a language that’s read from right to left, bottom to top, then you’d follow that direction for your flowchart as well.)

After creating a flow chart diagram in Word, walk through the flowchart with the people involved. They’ll know how long their jobs take. They’ll also be able to tell you how accurate it is.
If the flowchart is for a process that isn’t in place yet, try getting coworkers to simulate the process with you.
When making your Microsoft Word flowchart template, avoid overlapping connection arrows. When lines cross over each other, it’s difficult to tell where that line connects. The reader may also interpret the two lines as a point with two possible routes, which may not be what you intended.
If you’ve got to cross lines, add a crossover bump to show that one connector arrow is jumping over the other arrow.
Consider creating a flowchart symbol key when creating a flow chart in Word. Some people may not be familiar with what all the shapes and symbols mean. If you provide a key, it’ll help avoid confusion.

When making your Microsoft Word flowchart, do not use all caps. All caps take up space, which can make designing a neat-looking flowchart difficult. All caps are also harder to read than lowercase letters.
You can color code the steps in flowcharts in Word to identify resources. If you do add color-coded steps, make sure to add the colors to your key. It’s common to see colorful flowcharts for aesthetic purposes.
Another way to streamline your workflow is with a Word template.
Templates may include a Microsoft Word flowchart or other diagrams. Even if that’s not the case, starting with a Microsoft Word flowchart template is still an easy way to create a professionally designed document.

With a template for Word, all the major design decisions have already been made for you by a professional. All you’ve got to do is to customize it with your branding colors, images, and text.

One excellent source of Word templates is Envato Elements. In this creative marketplace, you’ll find templates for various kinds of documents such as this resume/CV template, which includes infographics.

An Elements subscription gives you access to much more than high-quality Word templates. For one low fixed price per month, you get unlimited downloads of the creative components you need to make your document look its best, such as fonts, photos, graphics, and icons.
And if you create other types of materials, like videos and websites, then you’ll also benefit from unlimited downloads of stock videos, music, sound effects, and presentation templates.
Now you know how to make an easy flowchart in Microsoft Word. For complete control, build your flowchart with shapes and lines. For a fast and artistic look, use SmartArt. Either way, a well-constructed flowchart will make your document more effective at showing a process, workflow, or data flow.
You can also use Word templates to streamline your workflow. For the best quality and value, get Word templates and other creative resources from Envato Elements. Your subscription brings to your fingertips millions of creative assets to help you communicate effectively.
Explore movie typography trends shaping 2026, from bold film fonts to cinematic branding, with inspiring examples and practical tips for creating impactful, screen-ready typography.

Explore the bold botanical design trend shaping 2026, from lush patterns and floral design to branding, interiors, and nature-inspired creative projects rooted in biophilic aesthetics.
Learn what font Disney uses, why it’s not downloadable, and discover Disney-style font alternatives to recreate that iconic, playful branding style in your own designs.

Explore PowerPoint templates with professionally designed layouts to create polished, modern, and visually cohesive presentations.