The best AI tools for extending images
AI image extension tools compared for professional creative work — evaluated on output quality, prompt control, workflow integration, and commercial licensing.
Envato: Get every type of asset for any type of project, and access to AI tools. Start now
Learn how to separate an image into editable layers with Envato Layers, then move, resize, transform and export individual elements.

You know the feeling: you’ve found an image that’s almost perfect. The subject works, the lighting is right, and the overall look fits the brief. There’s just one problem. An object is sitting exactly where your headline needs to go. Or the foreground element is too large. Maybe one detail needs changing, but regenerating or rebuilding the whole image feels like creative overkill.
That’s where Envato Layers comes in. It uses AI to break a flat image into editable layers, giving you control over individual elements without forcing you to start again. Move something, resize it, change its stacking order, remove it entirely, or use AI to transform a single layer while leaving the broader composition intact.
We’ll show you how to separate an image into layers with Envato Layers, rework the composition, and take those layers into the tools you already use. If you’re starting even earlier in the creative process, you can also create your starting point with Envato’s AI Image Generator.
Envato Layers is an AI-powered image editing feature that breaks a flat image into separate, editable layers. Instead of treating the entire image as one fixed canvas, you can work with individual elements independently, giving you more control over how the final composition looks.
You can start with an image from Envato’s stock catalog or upload your own. Once the image has been separated, you can make two broad types of changes.

First, you can rearrange the composition. Move an element somewhere else, resize it, place it above or below another layer, hide it, or remove it altogether. These edits change how the existing pieces of the image fit together.
Second, you can reimagine an individual element with AI. Rather than regenerating the whole image because one detail isn’t working, you can select that layer and transform it independently.
Think of the difference this way: rearranging changes where an element is, while reimagining changes what that element is.
And when you’re finished, you’re not locked into one workflow. You can save the layered composition in Envato, copy an individual layer into another tool, or export the composition as a layered PSD, SVG, or flat image.
Start by choosing the image you want to edit. You can select an image from Envato’s stock catalog or upload an image of your own.
The important thing here is that you don’t need to begin with a layered design file. Envato Layers is designed to start with a flat image and break its composition into editable pieces.
This changes how you can think about choosing stock imagery. Instead of searching endlessly for a photo where every object is in exactly the right position, you can start with an image that has the right overall visual direction and then adjust its composition.
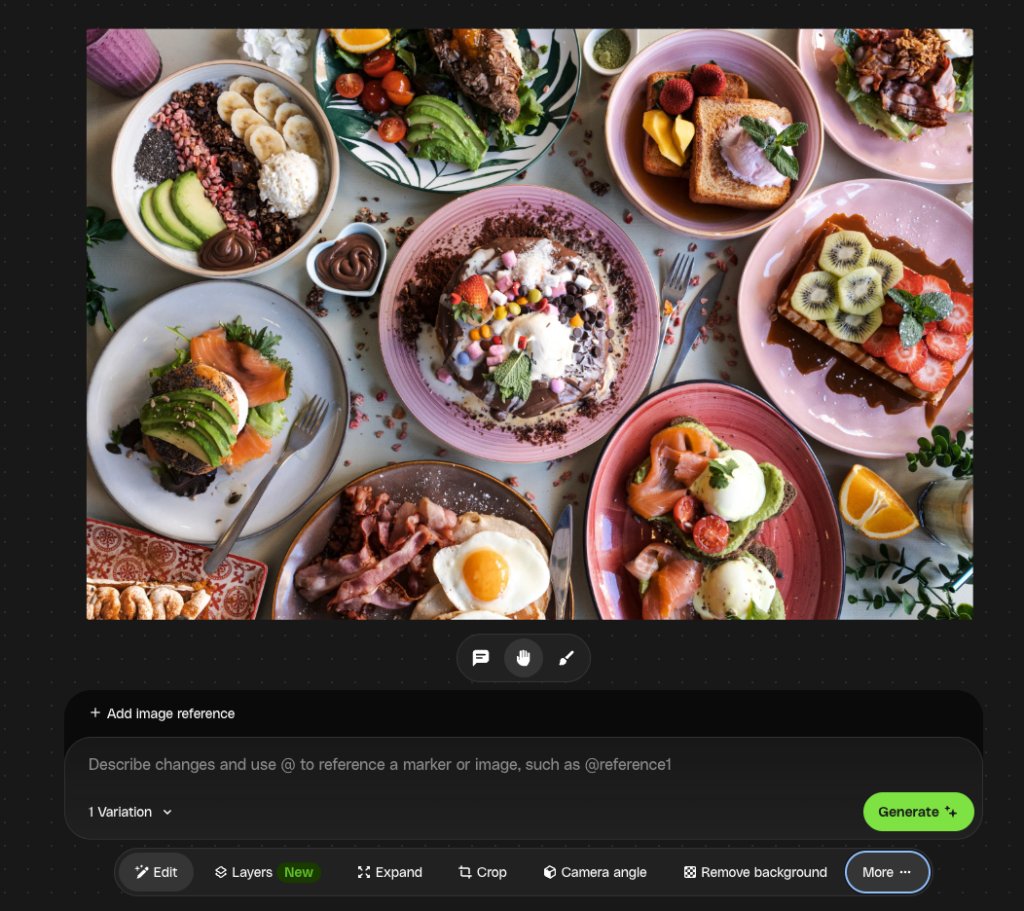
Imagine you’re designing a social ad, for example. You find a food image with exactly the mood you want, but a glass occupies the cleanest area for your headline. Previously, that positioning might have been a reason to keep searching. With Envato Layers, you can start with the image and see whether separating the composition gives you the control you need.
Images with multiple distinct visual elements can also make useful starting points when learning the feature, as there’s more scope to experiment with the resulting composition.
Open your chosen image in the AI image editor, then select Layers to begin separating it.
Envato Layers uses AI decomposition to analyze the flat image and break it into individual editable layers. This is what turns a finished image from something you can only edit as a whole into a composition you can pull apart and work with.
Once the process finishes, you’ll see the resulting layers in the layer view. Select one, and you can begin working with that element independently from the rest of the composition.
This distinction is important: Envato Layers isn’t recovering an image’s original design file or original layers. It takes a flat image and uses AI to create a new editable layer structure from its contents.
Select a layer and move it around the canvas to start changing the composition.
This is where the creative value of separating an image into layers becomes much clearer. You’re no longer limited by where every element happened to sit in the source image. Instead, you can start making deliberate layout decisions around your actual brief.
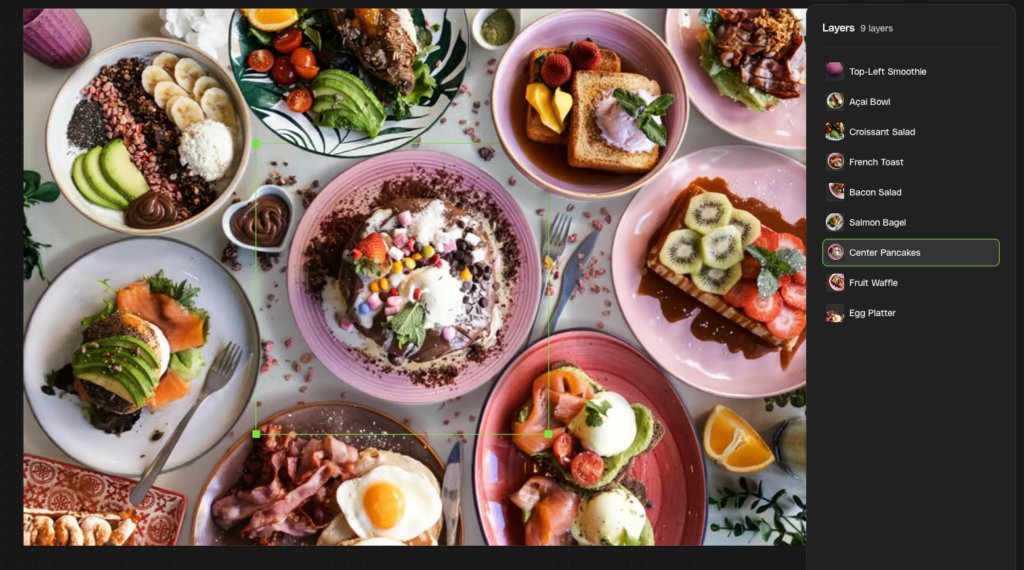
Say you’re adapting an image for an ad with a headline and a call to action. If an element occupies the cleanest area for your text, try moving it rather than choosing another image. You could shift the main subject to one side, move a smaller element towards the edge, or simply remove elements to create more negative space around the part of the design that needs to communicate.
The goal isn’t to move elements simply because you can. Ask what the composition needs to do, then use the layers to get it there.
Resize a selected layer when an element needs more or less visual weight. Scale can dramatically change hierarchy. A foreground element that felt balanced in the original image might dominate once you add typography or other design elements. Making it smaller can redirect attention towards your subject or create breathing room elsewhere in the layout.
You can also reorder layers to change which elements sit in front of or behind one another. This gives you another level of compositional control. Moving an element changes its position on the canvas; changing its layer order changes how it relates spatially to other parts of the image.
Used together, position, scale, and layer order let you rethink the hierarchy of an existing composition rather than accepting the original arrangement as fixed.
Experiment with individual elements by hiding, removing, or copying their layers.
Hiding a layer is useful when you’re not yet sure whether an element belongs in the final composition. Temporarily switch it off, assess the design without it, and bring it back if the image feels too empty. It’s a quick way to test a simpler composition without immediately committing to the change.
If you know an element no longer serves the brief, you can remove its layer. That can be particularly useful when adapting an existing image for a different format or purpose, and you need to simplify what’s competing for attention.
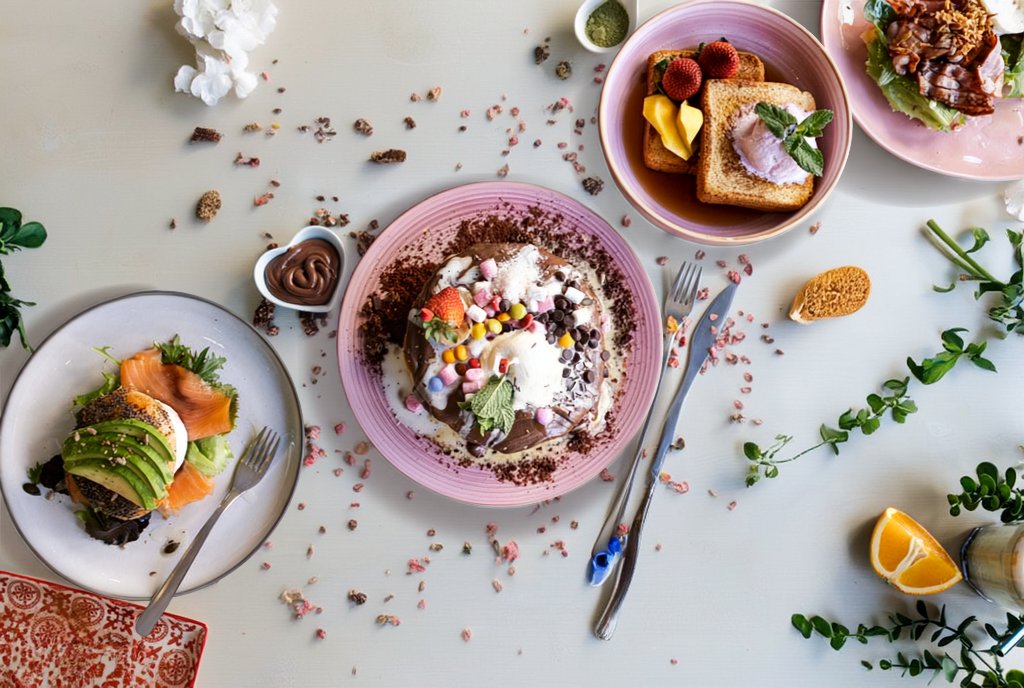
You can also copy an individual layer. The copied element becomes a static, transparent image that you can paste into another compatible destination. This gives you a quick way to take an isolated visual element beyond the current composition.
There’s an important distinction here: copying a layer doesn’t transfer the entire editable layered document. You’re copying that individual element as a static transparent image.
Select the layer you want to change when the problem isn’t its position, but the element itself.
This is where Envato Layers goes beyond rearranging a composition. You can use an AI prompt to transform an individual layer rather than asking AI to regenerate the entire image.
For example, perhaps the overall composition of an image works for your campaign, but a particular object doesn’t suit the concept. Instead of throwing away everything that does work, select that layer and prompt a transformation. You could swap an object, change a character, or tweak a specific visual detail while keeping the broader composition intact.
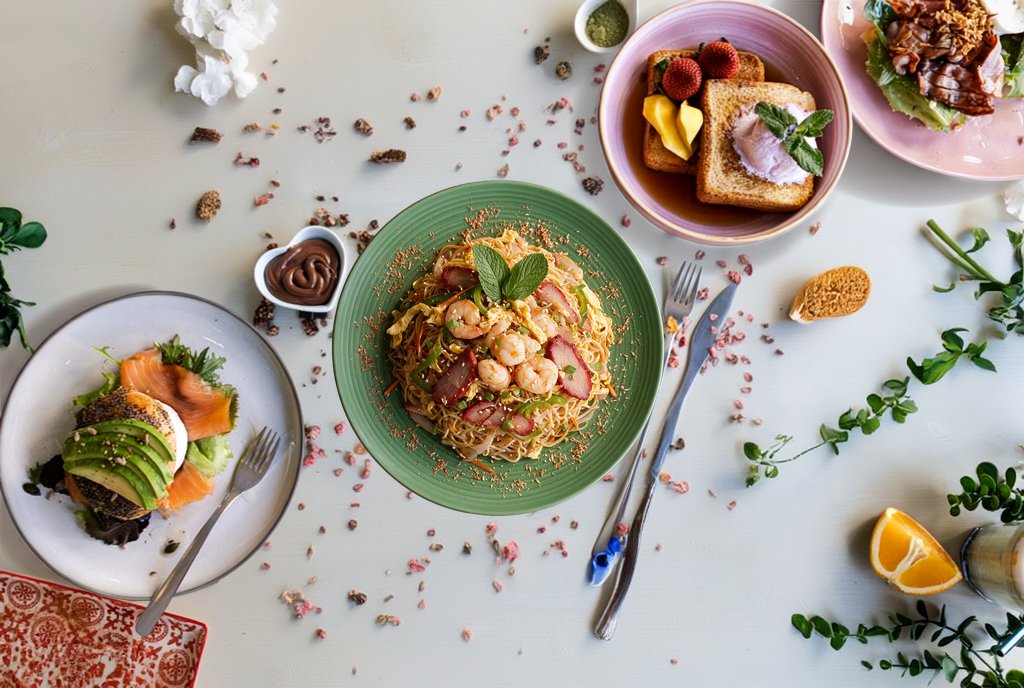
This creates a useful rule of thumb:
That separation can make experimentation much more intentional. Instead of treating every AI edit as a request for a completely new image, you can focus the transformation on the part that needs attention.
If you want to explore the prompting side of the workflow further, these AI art prompt ideas can help you think more deliberately about what you ask an image model to change.
Save your work when you want to preserve the editable layer structure and return to it later.
This matters because saving and downloading serve different purposes in the Layers workflow. Saving doesn’t simply capture a flat version of what’s currently on your canvas. It preserves the layered document so you can continue working with those layers when you come back.
You won’t need to run the AI decomposition again simply to continue editing those existing layers. Once you’ve created and saved the layered composition, ordinary actions such as repositioning and resizing remain part of that editing workflow.
That makes saving the right choice when your composition is still evolving. Perhaps you’ve created the first version of an ad but know the copy might change, or you want to return tomorrow and experiment with a different arrangement. Keep the layered version rather than prematurely flattening your options.
Export your work in the format that fits what you want to do next. The export menu separates your options into Flattened Image and Layered Files, making it easy to choose between a finished image and a composition you can continue editing.
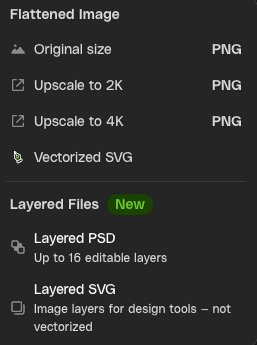
If you’re ready to use the image as-is, the flattened options include the original-size PNG as well as Upscale to 2K and Upscale to 4K PNG exports. You can also export a Vectorized SVG when you need a vectorized version of the flattened artwork.
If you want to keep working with the individual layers, choose one of the new layered file options:
That distinction is worth remembering. Vectorized SVG is a flattened-image export that converts the artwork to vectors, while Layered SVG is designed to preserve the separate image layers for continued design work.
| Export option | What you get | Best for |
|---|---|---|
| Original size | Flat PNG | Using the finished image at its current size |
| Upscale to 2K | Upscaled flat PNG | A larger finished image |
| Upscale to 4K | Upscaled flat PNG | Higher-resolution output |
| Vectorized SVG | Vectorized flat artwork | Workflows that need vector artwork |
| Layered PSD | PSD with up to 16 editable layers | Continuing to edit individual layers |
| Layered SVG | Image layers for design tools | Taking the layered composition into another design workflow |
This makes export part of the creative workflow rather than simply the final download button. You can use Envato Layers to pull apart and rework the composition, then choose whether to finish with a flat asset or keep the layers editable in the next tool you use.
Finding a great image shouldn’t mean accepting every part of its composition as fixed. With Envato Layers, you can start with an image you already like, break it into editable layers, and concentrate your effort on the parts that actually need changing.
Move an element when the layout isn’t working. Resize or reorder layers to change the hierarchy. Reimagine one element with AI when its content doesn’t fit the idea. Then save the layered document for another round, or export it into the tools you already use.
The result is less about editing for editing’s sake and more about having control over the creative decisions that matter. Your starting image can stay a starting point. Where you take it? Well, that’s up to you.
Yes. Envato Layers uses AI decomposition to break a flat image into separate editable layers. You can then work with individual elements by moving, resizing, reordering, hiding or removing them, as well as using AI to transform selected layers.
Yes. Envato Layers is designed to start with a flat image and create a new editable layer structure from it. It doesn’t recover the original source layers from a previous design file; instead, AI decomposes the static image into layers you can work with independently.
Yes. You can select an individual layer and transform it using AI without having to regenerate the whole composition. This is useful when the wider image works, but one object, character, or detail needs to change.
Yes. Envato Layers supports layered PSD export. You can start with a flat image, separate it into editable layers, adjust the composition, and then export the resulting layered work as a PSD for the next stage of your workflow.
Yes. You can export your layered composition as an SVG. The demonstrated Envato Layers workflow shows an exported SVG being opened in Figma with its layers retained, making SVG useful when you want to continue working with the composition in a compatible design tool.
No. That’s one of the main benefits of working with Layers. Once the image has been separated, you can select an individual layer and use AI to reimagine that element while keeping the broader composition in place. If the element itself is fine, you can simply move, resize, or reorder it instead.
AI image extension tools compared for professional creative work — evaluated on output quality, prompt control, workflow integration, and commercial licensing.
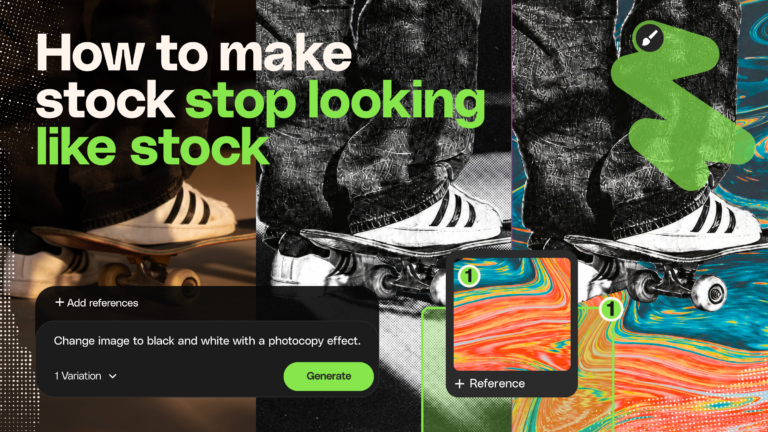
The best stock assets aren't the ones nobody recognizes. They're the ones you've riffed on — recolored, relit, reframed, and reshaped until they feel like they were made for your project.
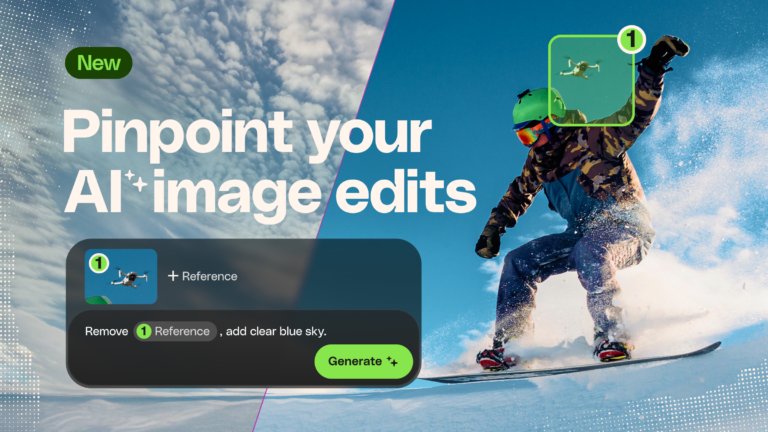
Learn how to edit an image with AI using Envato’s image annotation tool to select specific areas, make precise changes, and control where edits appear.

AI is reshaping photography at capture, edit and trust. Here's which segments are exposed, what provenance actually proves, and the skills that hold their value.