AI product photography: How to create product photos with Envato Shortcuts
Learn how to create AI product photography with Envato Shortcuts. Generate commercial-ready product scenes, backgrounds, and concepts in minutes.
Envato: Get every type of asset for any type of project, and access to AI tools. Start now
Nobody buys a blank canvas. Print on demand mockups place your design into a realistic product image before anything's printed — and get your listings right before a customer ever sees them.
Nobody buys a blank canvas. When a customer lands on a print on demand listing, they’re not picturing what your design might look like on a tote bag or a bedroom wall. They’re making a split-second decision based on what’s in front of them.
Print on demand mockups are what bridge that gap. A good mockup places your design into a realistic product image before a single item is printed — and if you’re selling anything online, that presentation is doing a lot of heavy lifting. It’s often the only thing standing between a scroll-past and a sale.
A print on demand mockup is a photographed or digitally rendered product image — a t-shirt on a flat surface, a mug on a desk, a poster above a sofa — with your design composited into a placeholder area. The result looks like a real product photo, but you never needed to print anything. They sit at the core of any print on demand workflow, replacing the need for physical samples or studio shoots at the listing stage.
There are three main types:
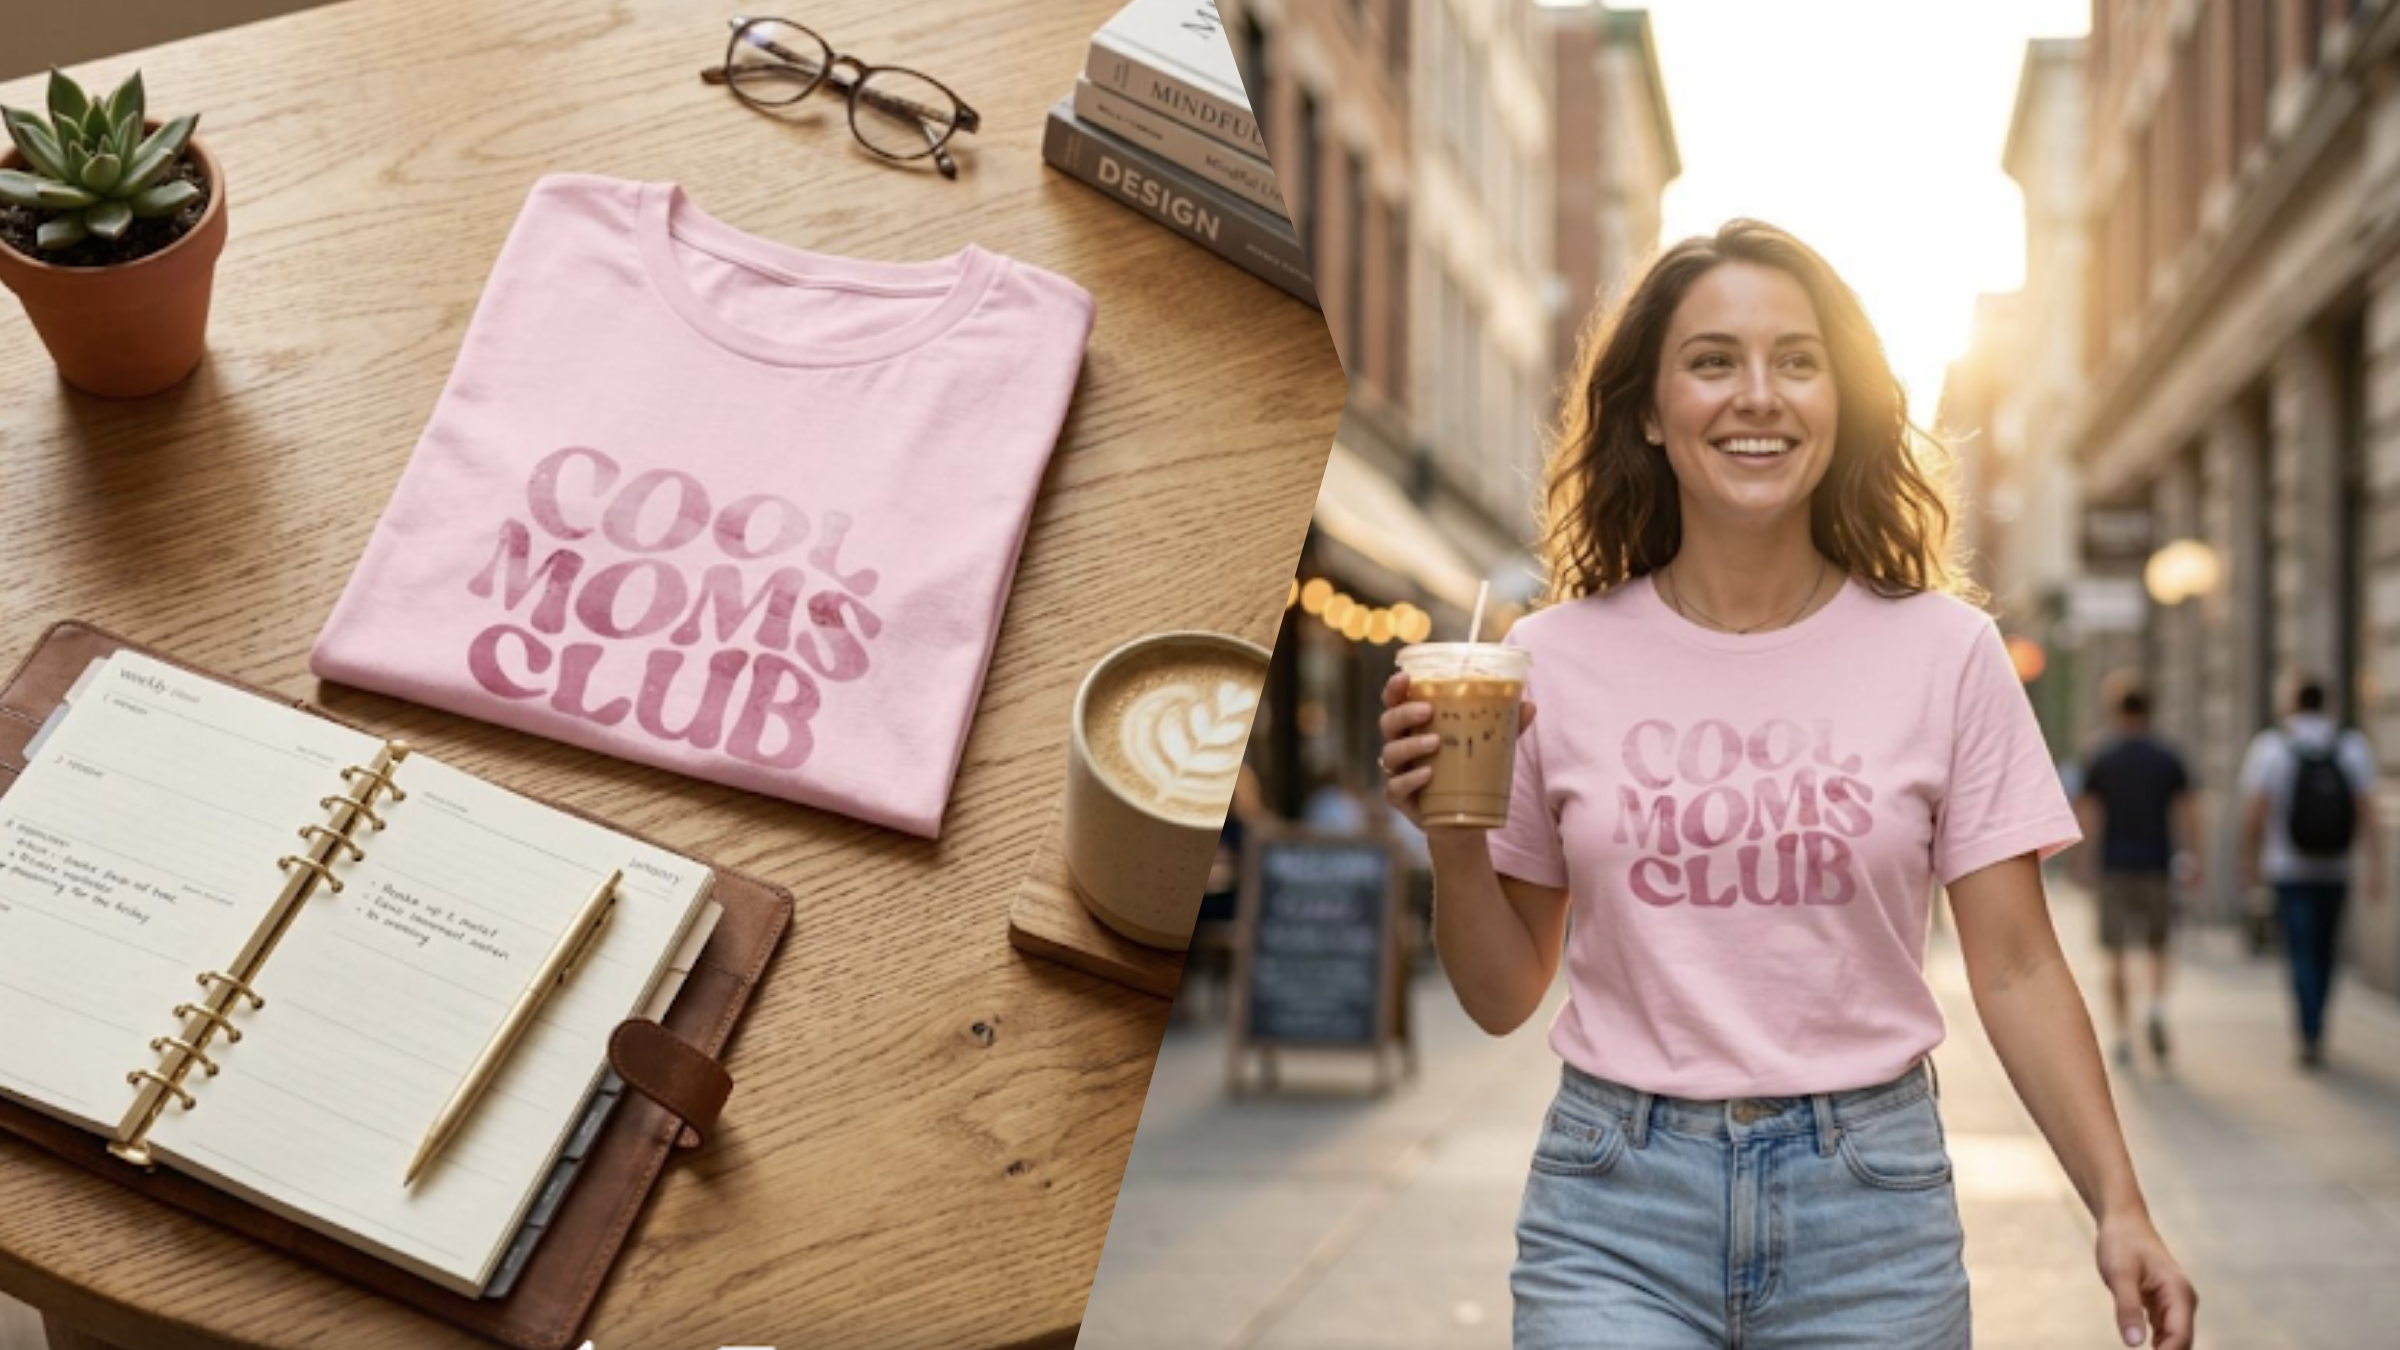
Flat lay mockups show the product from above against a clean or styled background. They’re good for showing design detail — nothing competes with the artwork itself.
Lifestyle mockups put the product into a real-looking scene: someone wearing the hoodie, a phone case beside a coffee on a desk. These tend to convert better because they help customers picture owning the thing, rather than evaluating it abstractly.
3D render mockups are digitally constructed, often showing multiple angles. They’re common for hard products — mugs, phone cases, framed prints — where setting up a photo shoot for every variant would be impractical.
For marketplace listings, a combination usually works best: a clean flat lay that shows the design clearly, plus a lifestyle shot that gives it context.

The obvious answer is that customers need to see what they’re buying. But there’s a less obvious reason too: mockups let you find problems before they reach a customer.
Before a product goes live, a decent mockup workflow will show you whether the design actually works on the product’s proportions, whether text is legible at scale, and whether the design disappears on darker fabric. You’ll spot these things in 30 seconds looking at a mockup. You’ll spot them much more slowly if you wait for a customer review.
It also means you can build out a full product catalog and all your listing images before you’ve printed a single item. In print on demand, that matters — you’re listing products and driving traffic before you’ve confirmed demand. A polished mockup is what makes that feel credible.
Whether you’re using a PSD template, a browser-based tool, or an AI generator, the core process is the same:
For PSD templates, the process involves Smart Objects (see the Photoshop section below). For browser-based tools and AI generators, it’s mostly upload-and-go.
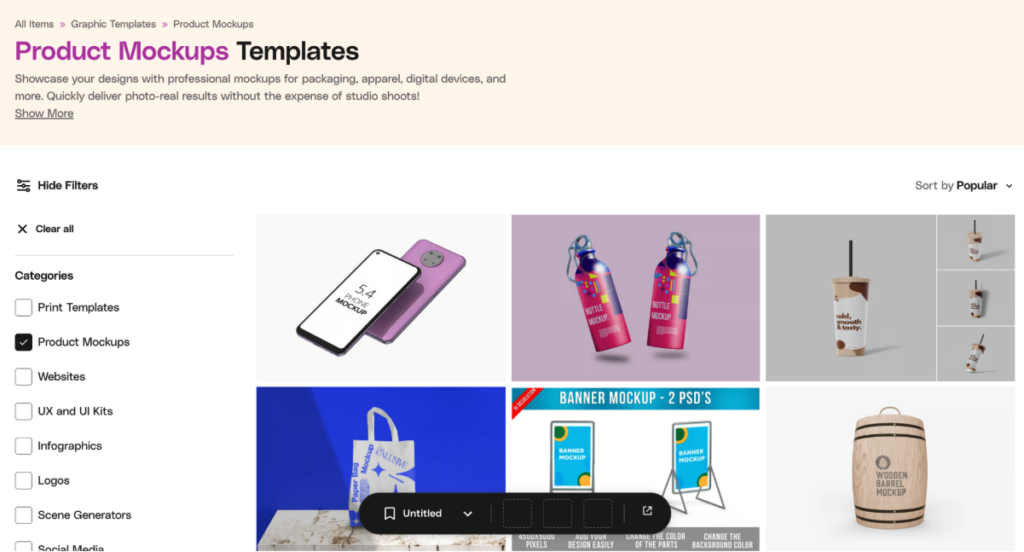
For sellers building out a full catalog, Envato is one of the most comprehensive sources for print on demand mockup files. The library includes Photoshop PSD templates with Smart Object placeholders for t-shirts, hoodies, posters, mugs, tote bags, and more — across flat lay, lifestyle, and 3D styles. Because the subscription covers unlimited downloads, it makes more practical sense than buying individual files when you need to cover multiple products and color variants.
Here’s a breakdown of the Envato mockup types most useful for common POD products:
T-shirt mockups: Look for flat lay and lifestyle options in both front and back views. Having a range of garment colors represented means you won’t need a separate template for each variant.
Poster mockups: Framed and unframed options, ideally with room context (above a sofa, on a gallery wall). Scale reference is essential — without furniture in frame, customers misjudge size and order wrong.
Mug mockups: 3D renders work well here. Look for options that show the handle position and wrap angle clearly, so you can check how the design reads when someone’s holding the mug.
Tote bag mockups: Flat lay and lifestyle both work. Lifestyle options showing the bag being carried tend to convert well because they anchor the size clearly.
Phone case mockups: 3D renders from multiple angles. Customers need to see how the design wraps around the edges and whether it’s obstructed by camera cutouts.
Hoodie mockups: Front-facing lifestyle shots perform strongly. If you’re selling on a colored garment, make sure the mockup uses the correct fabric color — a mismatch is a reliable source of negative reviews.
Most premium PSD mockup templates use a Smart Object layer — a special layer type that accepts external content and automatically applies the mockup’s perspective, lighting, and texture to whatever you place inside it.
The process:
Open the PSD. Find the Smart Object layer in the Layers panel — it’s usually labeled something like “Your Design Here” and has a small distinctive icon. Double-click it to open it as a separate linked document. Place your design, resize it to fill the area, then save and close. Your design updates automatically in the main canvas. Export via File > Export > Export As as a JPEG or PNG.
The step people most often miss: you edit the design inside the Smart Object document, not directly on the main canvas. If you try clicking the mockup itself, nothing happens.
Once you’ve done it a few times, it takes under two minutes per mockup.
If you’d rather skip Photoshop entirely, Envato Shortcuts offers a guided AI workflow approach that removes the prompt engineering from AI-generated mockups.
Shortcuts turn complex AI processes into step-by-step creative workflows. For mockups specifically, rather than manually writing prompts and hoping for a usable output, Shortcuts guide you through the decisions that matter — product type, lighting mood, background environment — and handle the AI orchestration behind the scenes. The result feels closer to creative direction than prompt engineering.
Alongside Shortcuts, Envato’s AI mockup generator is built directly into the Envato subscription and transforms flat design files into realistic product visuals. Upload your design, select a scene context, and it handles perspective, shadow matching, and lighting balance automatically.
Both tools are included in an Envato subscription alongside the full PSD library, so you can switch between traditional Smart Object templates and AI generation depending on how fast you need to move.
AI mockups work particularly well when you need a lot of variants quickly — different scenes, garment colors, or product types — without rebuilding a Photoshop file each time.
If you’re selling on Gelato, their Magic Mockups tool takes a different approach to AI mockup generation. Rather than working from templates, you describe the scene you want via a text prompt — or upload a reference image — and Magic Mockups generates a custom lifestyle setting with your design applied automatically. The AI is trained specifically for POD product photography, balancing lighting and perspective for results that read as real product shots rather than AI composites.
The practical advantage over generic mockup tools is the direct store integration: once you’re happy with a mockup, you can publish it straight to your Shopify or Etsy listing without leaving Gelato. The first 10 mockups are free, and the tool is included in Gelato+ for unlimited use after that.
It’s most useful when you want lifestyle imagery that’s genuinely custom — a specific setting, season, or mood — rather than choosing from existing template scenes.

Most POD platforms include mockup generation as part of the product setup flow. Gelato’s built-in Mockup Studio generates clean, styled product images directly from your uploaded design across their full catalog. Everything is sized and calibrated for the specific product, so it’s the fastest starting point if you want consistent mockups that match exactly what will be produced.
Placeit and Smartmockups let you generate mockups without Photoshop. Upload your design, pick a template, adjust placement, download. The libraries are smaller than dedicated subscriptions, but more than sufficient if you’re early-stage or don’t work in Photoshop regularly.
For sellers who want to stand out, commissioning lifestyle photography with physical samples is still the benchmark. You control everything — the model, the setting, the styling. The barrier is cost and the fact that you need samples in hand before you can shoot. Worth considering once you know which designs actually sell.
Match the mockup environment to the design’s mood. A design with warm, earthy tones looks more at home on a natural linen surface or in amber light than in a bright white studio. The whole image needs to feel coherent — not just the product.
Show the right product color. If you’re selling a design on a black t-shirt, use a black t-shirt mockup. Customers make color decisions from listing images, and a mismatch between the mockup and the actual product is a reliable source of negative reviews.
Don’t overscale the design. Filling every inch of print space because you can is a common mistake. Consider how the product would actually look being worn or used. A proportionate chest graphic usually reads more professional than edge-to-edge coverage.
Check dark and light variants. What reads clearly on white can disappear on navy. If you’re offering a design across multiple garment colors, create separate mockups — customers need to see exactly what they’re buying.
Include a detail shot for intricate work. If your design has fine typography or detailed illustration, a cropped close-up shows it far better than a full-product shot at listing thumbnail size.
Marketplace listings (Etsy, Amazon Handmade): Lead with a clean, well-lit hero shot — lifestyle or styled flat lay that shows the design clearly. Add close-up detail, color variant shots, and at least one scale reference for wall art. Five to seven images per listing is a solid standard.
Social media: Lifestyle mockups perform best here. Imagery that looks like it belongs in someone’s home or wardrobe gets saved and shared. On Pinterest, neutral-background flat lays work particularly well. On Instagram, showing the product in use tends to outperform purely product-focused shots.

Paid advertising: Simplicity wins. One product, one design, clean background, minimal visual noise. The message needs to land in under half a second as someone scrolls past.
Your own store: Consistency across all product imagery signals a real brand. If every product uses a similar mockup style — same general lighting direction, same background approach, similar orientation — your store reads as intentional. Mixed styles, even with good designs, makes everything feel unfinished.
Using the same two or three mockups across your entire catalog. Customers browsing multiple listings notice repetition quickly. Vary the environment and context even when the product is the same.
Ignoring scale reference for wall art. A 12×16 print and a 24×36 print look nearly identical in product images unless there’s furniture or a person in frame. Customers misjudge size, order wrong, and return products. One contextual shot solves this.
Not checking how mockups look on mobile. Most marketplace traffic comes from phones. What looks sharp and detailed on desktop can become illegible at thumbnail size. Check your images at reduced scale before publishing — if the design isn’t clearly readable in the thumbnail, the mockup isn’t working.
A mockup is a digitally rendered or photographed product image with your design composited in. It lets you show customers a realistic version of the final product without printing anything first.
For testing a design concept, yes. For live listings, free mockup libraries tend to have limited variety and lower production quality — which starts to show when customers are comparing you against sellers with polished imagery. A subscription to a dedicated library pays back quickly if you’re listing regularly.
Only if the product type is the same. Using a t-shirt mockup for a hoodie, or a poster mockup for a canvas print, creates a visual mismatch that erodes trust. Use product-specific templates wherever possible.
Yes, when the AI tool is designed specifically for product mockups. Envato’s AI mockup generator and Gelato’s Magic Mockups are both trained for POD product photography, producing results strong enough for marketplace listings and social media.
No. Browser-based tools like Placeit and Smartmockups work without any software installation. Envato also offers an AI mockup generator built into the subscription, and Shortcuts for guided AI workflows. Gelato’s Magic Mockups tool works entirely via text prompt with no design software needed. Photoshop gives you more control over the final result, but it’s not a requirement.
Five to seven is a good standard for marketplace listings. Lead with a hero shot, include at least one close-up detail image, show all garment or print color variants, and add a scale reference for wall art.
A flat lay shows the product from above against a plain or styled surface. A lifestyle mockup places the product in a real-world context — someone wearing it, a mug on a desk, a print above a sofa. Lifestyle mockups typically convert better because they help customers picture owning the product rather than just evaluating the design.
Learn how to create AI product photography with Envato Shortcuts. Generate commercial-ready product scenes, backgrounds, and concepts in minutes.

Learn how to improve email deliverability with better email design, sender authentication, list management, and inbox placement strategies that help more campaigns get seen.
Yes, you can edit Envato templates in Canva — here's exactly how to prepare, import, and customize templates in 2026.
Explore AI art prompts for better image generation, including AI art styles, materials, colors, events, and AI prompt tips for creating more controlled visuals.