You’ve seen the look. Skin like a wax figure. Lighting that comes from everywhere and nowhere. A background so uniformly sharp it feels like a green screen composited by someone who’s never stood outside. Every surface slightly too glossy, every color slightly too saturated, and the whole image sitting in a tonal range best described as “corporate uncanny valley.”
That’s the AI look. And if it’s the reason you have been hesitant to experiment with AI image generation, you’re not alone — and you’re not wrong to care. Creative professionals notice this stuff instantly because they’ve spent years learning why real images work. The good news is that the gap between “obviously AI” and “wait, that’s generated?” is almost entirely a prompting problem. The models can do it. They just need better instructions.
This guide breaks down why AI images default to looking fake, and the specific techniques that produce realistic AI images — output that could sit comfortably in a client deck without anyone reaching for the “is this real?” squint.
Why AI defaults to “plastic”
Understanding the problem makes it easier to fix. AI image generators are trained on massive datasets of images, and a disproportionate chunk of those images are retouched stock photography — the kind where skin has been smoothed to oblivion, lighting is studio-flat, and everything sits at the same focal distance. When you give the model a vague prompt, it reaches for the statistical average of its training data. And the statistical average of heavily retouched photography is, predictably, images that look heavily retouched.
Every detail you leave undefined in your prompt gets filled with the most “polished” version the model has learned. No lighting specified? You get flat, diffused light from every direction. No skin texture mentioned? You get airbrushed porcelain. No depth of field called out? Everything stays sharp from foreground to background. The result is technically clean but visually lifeless — and anyone with eyes to see spots it in half a second.
The fix isn’t complicated, but it does require a mindset shift. When you hire a photographer, you trust them to make the technical decisions — lens choice, lighting setup, depth of field. They bring that expertise to the shoot. An AI model doesn’t have that instinct. It has capability without taste. So when you’re prompting, you’re not the client giving a brief — you’re the photographer behind the camera, making every creative call yourself.
Talk like a photographer, not a prompt engineer
The single biggest shift you can make is to stop writing AI prompts and start writing shot descriptions. AI models understand camera language because their training data is tagged with it. When you specify a lens, a focal length, and a shooting style, the model pulls from a completely different part of its visual library — one that includes optical behavior, depth separation, and the natural way light falls off across a frame.
Compare these two approaches:
Vague prompt: “A woman standing in a field of flowers, realistic, high quality, 8K”
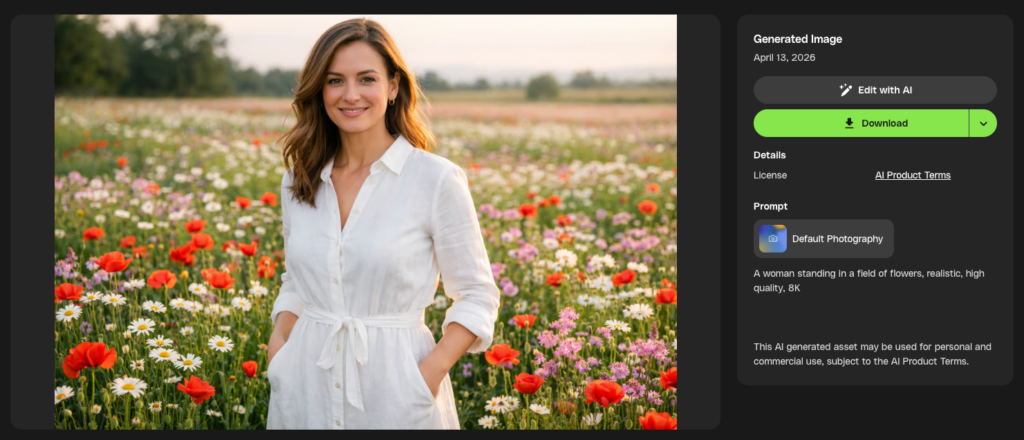
Result: Nice clean image, but very AI.
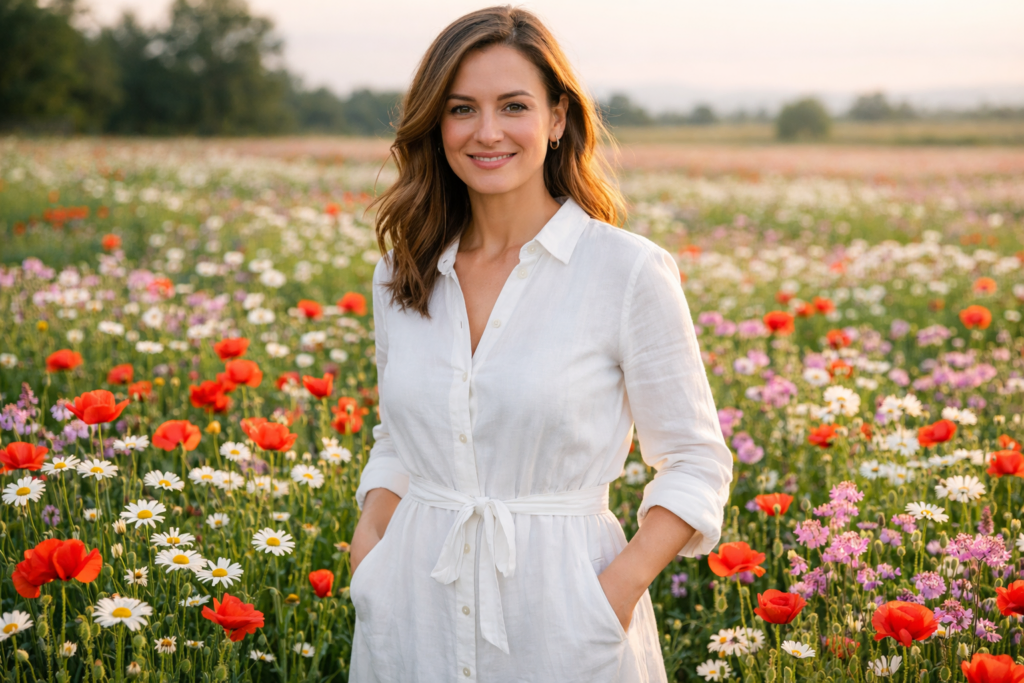
Photographer’s prompt: “Candid portrait of a woman standing in a wildflower field, shot on 85mm lens at f/1.8, golden hour side lighting from the right, soft bokeh in background, natural skin texture with visible pores, slight motion in hair, shot on Fujifilm X-T5”
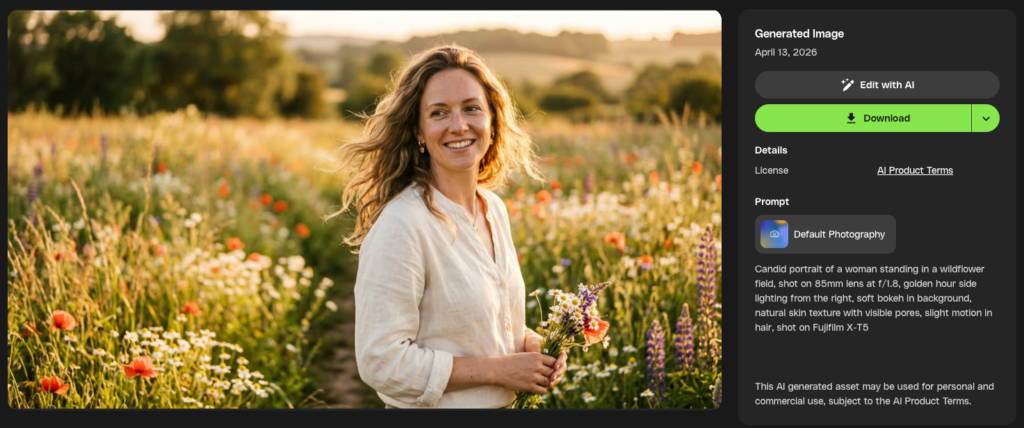
Result: Much better.
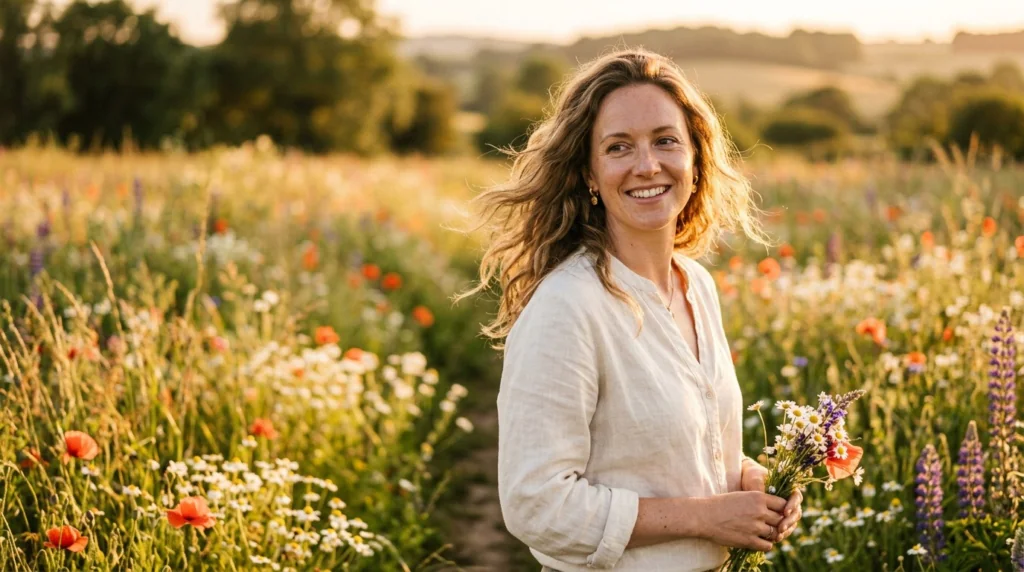
The first prompt tells the model almost nothing useful. “Realistic” and “high quality” are the AI equivalent of telling a designer to “make it pop” — the model has no idea what you actually mean. “8K” has zero impact on output resolution.
The second prompt gives the model a blueprint. An 85mm focal length tells it to compress the background and separate the subject. f/1.8 creates shallow depth of field. “Golden hour side lighting from the right” defines a specific light direction with warm color temperature. “Natural skin texture with visible pores” overrides the default smoothing. A camera model reference anchors the overall color science.
Each of these details steers the output away from the generic AI average and toward something that resembles an actual photograph. If you already know this stuff from real camera work, you’ve got a head start — you’re just translating what you already understand about photography into text.
Specify your light source (or watch everything go flat)
Flat lighting is arguably the single biggest giveaway preventing realistic AI images. Real photographs have light that comes from somewhere specific — a window, the sun, a reflector, a neon sign — and that directional quality creates shadows, contrast, and depth that the human eye reads as “real” without consciously thinking about it.
When your prompt doesn’t mention lighting, the model defaults to even, diffused illumination from all angles. No shadow side. No highlight rolloff. No depth. This is why so many AI portraits feel like passport photos taken in an over-lit government office.
Fix it by being explicit about light direction and quality. A few examples that produce dramatically different results:
“Soft window light from the left, casting gentle shadows across the face,” gives you Vermeer-style directional warmth. “Harsh overhead noon sun, deep shadows under eyes and chin” gives you gritty, contrasty realism. “Practical lighting from a laptop screen in a dark room, cool blue cast on face” gives you the late-night work session aesthetic that every creative knows intimately.
You can also specify how light interacts with surfaces. “Warm light catching dust particles in the air” or “wet pavement reflecting street lights” both push the model toward rendering light behavior that looks physically accurate rather than uniformly applied.
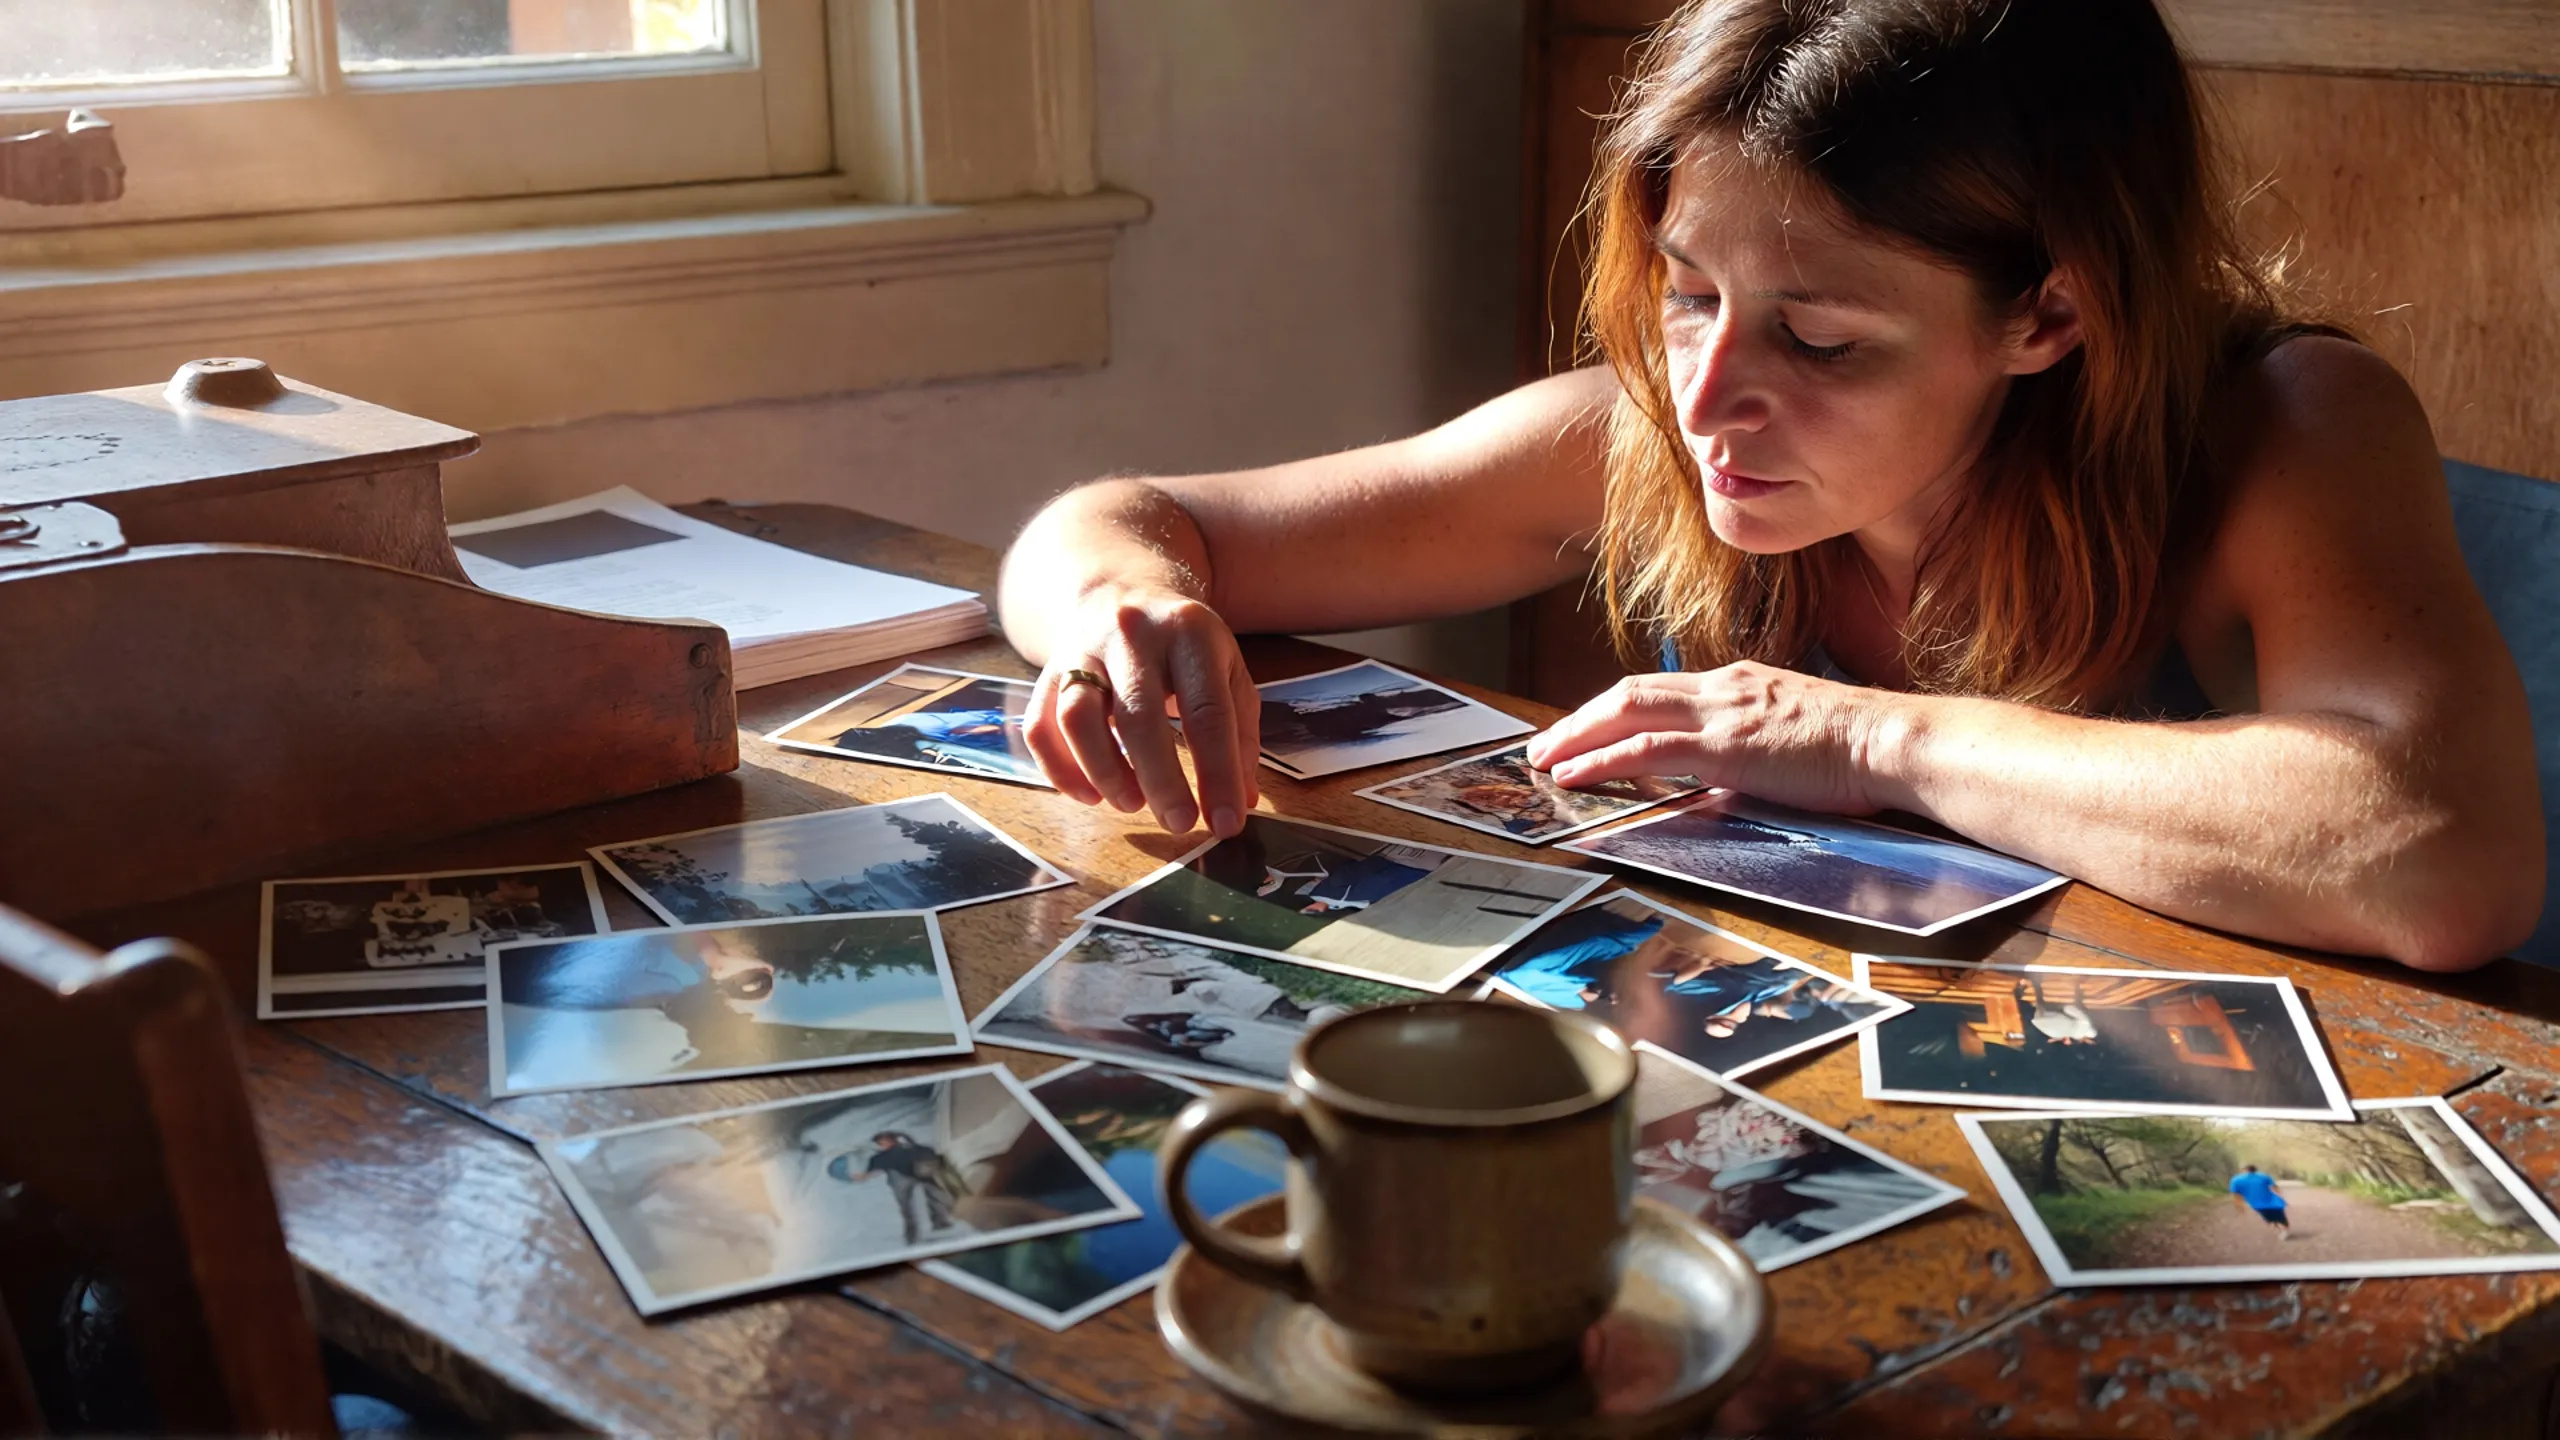
Add imperfection on purpose
Real life isn’t symmetrical, and it isn’t clean. Skin has pores, freckles, uneven texture. Clothing wrinkles and folds. Surfaces have scratches, wear marks, dust. Environments have visual clutter. The human brain is incredibly good at detecting the absence of these details, even when it can’t articulate why something looks “off.”
This is where most AI images fail hardest: they’re too perfect. Every element is rendered at the same level of polish, which creates a uniformity that reads as synthetic.
Build imperfection into your prompts deliberately. For portraits, specify “visible skin pores, natural blemishes, slight facial asymmetry” — these cues tell the model to pull from its more candid, less retouched training data. For objects and environments, add material specifics: “weathered leather with visible grain and creased seams” works far better than just “leather jacket.” For scenes, describe the mess: “cluttered desk with coffee ring stains, scattered sticky notes, and a half-eaten sandwich” reads as lived-in rather than staged.
Film grain is another powerful tool. Adding “subtle film grain, Kodak Portra 400 color palette” or “light photographic noise, shot in low light” pushes the output away from the hyper-clean digital look and toward something that feels captured rather than rendered. Envato’s AI image generator includes over 100 style presets — several of which apply photographic film characteristics automatically, so you don’t have to describe every technical detail yourself.
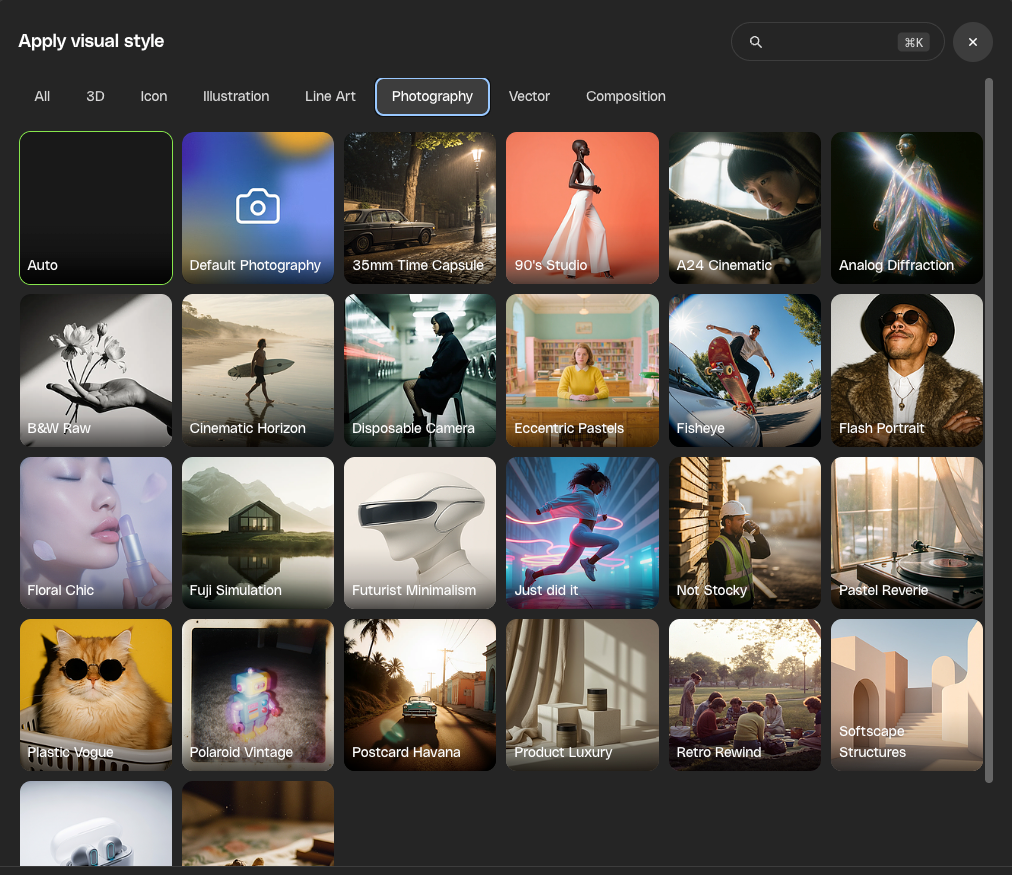
Use style presets as your starting point
If writing detailed prompts feels like a lot of overhead for your first attempt, style presets are your shortcut to better output. As mentioned above, Envato’s AI image generator offers curated presets spanning everything from cinematic photography to analog film looks to editorial realism. Pick a style that matches your intended output, and the preset handles the underlying technical parameters — film grain, color science, tonal range, rendering approach — while you focus on describing what you actually want in the frame.
This matters because the preset shifts the model’s baseline. Instead of defaulting to its generic “polished stock photo” average, it’s operating within a defined aesthetic framework from the start. A prompt like “Man reading a newspaper at a café table, morning light” produces a very different image when run through a 35mm film preset versus the default rendering mode.
Presets also make iteration faster. Generate a few versions, find one that’s close, and then refine your prompt to push it further. This is how AI photography prompts work best in practice — start broad, identify what’s working, and tighten from there.
Edit after you generate
Generating the image is step one. Editing it is where you can take something that’s 80% right and make it client-ready. If you’re subscribed to Envato, you can move directly from the AI image generator into Envato’s AI image editor without leaving the platform.
The practical applications here are specific. Got an image that’s almost right, but the background is too clean? Use the editor to add environmental detail. Skin looking a touch too smooth despite your prompting? The editor lets you refine specific areas without regenerating the whole image. Need to expand the frame for a different crop? Generative fill extends the canvas while maintaining consistency with the existing image.
Plenty of generations will be usable straight out of the prompt — especially once you’re applying the techniques in this guide. But when you want more control over a specific detail, or you’re working on something where every pixel matters, having an editing layer means you’re never stuck choosing between “close enough” and starting over from scratch.
For a detailed walkthrough of what the upgraded AI image generator and editor can do together, including reference-image workflows and version history, our feature breakdown covers the full toolset.
The prompting cheat sheet
If you take one thing from this guide, make it this: the more your prompt sounds like a photography brief, the more realistic your AI images will look. Here’s the short version of what to include in every photorealistic prompt.
Subject and context: Describe the scene like you’re briefing a photographer. Who or what is in the frame, where are they, what are they doing, and what’s the mood.
Camera language: Specify lens focal length (35mm for environmental, 50mm for natural perspective, 85mm for portraits), aperture (low f-numbers for shallow depth of field, higher for landscape sharpness), and optionally a camera body for color science reference.
Lighting direction and quality: Where is the light coming from, how soft or hard is it, and what color temperature is it. Side lighting and backlighting create the most depth.
Texture and imperfection: Skin pores, material wear, environmental clutter, asymmetry, film grain, photographic noise. Anything that breaks the “too-perfect” default.
What to leave out: Skip “8K,” “ultra-realistic,” “high quality,” “masterpiece,” and other vague quality modifiers. They don’t improve output. Specific details do.
It takes practice to get the balance right, and you won’t nail it on the first generation every time. But the gap between “obviously AI” and “did you shoot this?” is smaller than you think — it’s mostly about giving the model the specifics it needs to stop guessing and start rendering with intent. And unlike learning a new piece of software from scratch, you’re building on creative knowledge you already have. You already know what good light looks like. Now you’re just telling the model.
These techniques focus on photorealism, but strong prompting principles carry across Envato’s full AI suite. Our prompting guides break it down by tool if you want to keep building.Ready to try it? Open Envato’s AI image generator and test one of these techniques on your next project. Start with the camera language trick — it takes 10 seconds to add to any prompt, and the difference is immediate.
Realistic AI image FAQs
The models default to the average of their training data — mostly retouched stock photography. Without specific prompting, you get flat lighting, smooth skin, and uniform sharpness.
Yes. They shift the model’s baseline from generic rendering to a defined aesthetic — like film stock or cinematic grading — without longer prompts.
No. Vague quality modifiers don’t change the output. Specific details like lens type, light direction, and material texture do.
It runs multiple AI models and routes your prompt to the best one for the task — so you get specialized realism engines without choosing a model yourself.
Use camera language. Specifying a focal length, aperture, and directional light source overrides the model’s generic defaults.
Envato’s AI image editor lets you refine specific areas without regenerating the whole image. Generate first, edit second — same workflow as shooting and retouching.
85mm at f/1.8 for portraits with background separation. 35mm at f/8 for environmental compositions. Always include a light source direction.
Yes. Reference images and consistent style presets keep visual continuity across a series, and the AI image editor lets you refine elements without altering the full composition.
Header image created with Envato’s AI image generator.